How to Set Up a New Router: A Complete Step-by-Step Guide
Learn how to set up a new router with a clear, step-by-step process—from unboxing and wiring to securing Wi-Fi, updating firmware, and verifying your connection. This educational guide keeps your home network fast, secure, and reliable.

By following this guide, you will set up a new router from unboxing to configuring your wireless network and verifying connectivity. You’ll learn how to choose the right placement, connect devices, adjust security settings, and confirm your internet performance. This step-by-step approach minimizes downtime and helps you maintain a stable home network, with practical tips from WiFi Router Help.
Why a Proper Router Setup Matters
A solid router setup is the foundation of a healthy home network. When you configure placement, security, and firmware correctly, you reduce dead spots, improve speeds, and protect every connected device. According to WiFi Router Help, a careful first setup minimizes troubleshooting later and makes future updates smoother. A well-planned setup also simplifies device onboarding for family members and guests, ensuring a consistent experience across phones, tablets, smart TVs, and IoT gear. In short, a deliberate start saves time and headaches while delivering reliable coverage, fewer interruptions, and better overall performance.
Beyond speed, security is a critical driver of a good setup. Modern routers come with multiple layers of protection, but those layers are only effective if you enable strong passwords, encryption, and appropriate guest access. The model you choose should support current standards like WPA3, have a modern user interface, and offer straightforward firmware updates. By prioritizing security during setup, you reduce exposure to common home-network threats and give your devices a safer baseline from day one.
Preparing Your Equipment and Environment
Before you touch a cord, assemble what you’ll need and map out a practical layout for your network. A central, elevation-friendly location helps distribute Wi‑Fi more evenly and reduces interference from walls and appliances. Keep the router away from dense metal objects, large mirrors, microwaves, and direct heat sources. Have these essentials at hand to avoid mid-step trips: the router itself, an Ethernet cable, a computer or smartphone with browser access, and a power outlet near your setup area. If your home uses a separate modem, you’ll need that connection ready as well. By planning in advance, you’ll complete the setup faster and with fewer reconfigurations later. As you proceed, test connectivity from multiple rooms to identify any dead zones and adjust placement if needed.
A clean workspace also helps. Clear dust, unplug unnecessary devices, and keep a small note with your network name (SSID) and initial password for reference. If you’re setting up for guests, plan a separate guest network during this stage and ensure it is isolated from your primary devices. This approach reduces the risk of accidental exposure and keeps your main network more secure while still offering convenient guest access.
Connecting Your Router: Wired vs Wireless Setups
There are two common paths to bring your home online: a wired backbone using Ethernet and a wireless-first approach using the router’s built-in wireless network. A wired (LAN-to-WAN) connection often yields the most reliable performance for the primary household devices. Start by connecting the modem to the router’s WAN/Internet port with an Ethernet cable, then plug the router into a power source. If your router is part of a modem-router combo, you can proceed with the setup after powering it on. When you choose a wireless setup, you’ll still benefit from a wired backhaul for faster connections to the router itself, especially if you’re streaming 4K video or gaming locally. Consider a centralized placement to maximize coverage while minimizing interference from walls and furniture. As you test, move a few devices around to find the best balance of coverage and speed.
Keep in mind that some homes rely on a standalone modem while others use a gateway device. If you have a separate modem, you may need to power cycle both devices and verify that the modem signals an active connection before proceeding. This step helps ensure the router can obtain an IP address and begin broadcasting.
Accessing the Admin Interface and Running the Setup Wizard
Most routers offer a quick-start wizard accessible through a browser. Connect your computer or phone to the router via Ethernet or its default Wi‑Fi network, then open the router’s admin page using the gateway address (commonly 192.168.1.1 or 192.168.0.1, but your model may differ). If prompted, log in with the default credentials found in the manual. The setup wizard will guide you through WAN settings, such as your Internet type (DHCP, PPPoE, or static IP), and basic Wi‑Fi configuration. Create a unique network name (SSID) and a strong password, choosing WPA2 or WPA3 security. Make notes of the new credentials for future reference and enable automatic firmware updates if available. After the wizard completes, test both wired and wireless devices to confirm connectivity.
If you can’t access the admin page, verify you’re connected to the router’s network, try a different browser, and reboot the router. If access still fails, perform a factory reset using the reset button placed on the back of the device and re-run the wizard from scratch. This approach ensures you start from a known baseline and reduces configuration errors.
Securing Your Network: Passwords, Encryption, and Guest Access
Security should be a core focus of every setup. Use a strong, unique admin password for the router UI and disable remote management unless you truly need it. Enable WPA3 encryption for the Wi‑Fi network; if WPA3 isn’t available, WPA2‑AES is the next best option. Avoid using the default network name and leave the default login untouched only if you absolutely must, but changing the admin username where possible is a good practice. Disable WPS (the Wi‑Fi Protected Setup feature) as it can be exploited by attackers. Configure a robust guest network for visitors to keep your main devices protected, and consider network isolation so guest traffic can’t reach your primary devices. Regularly review connected devices and remove any that you don’t recognize.
Documentation and backup are helpful as you make changes. Save the current configuration to a file on a secure device or cloud storage (where allowed by your router). This makes it easier to restore your setup after a factory reset or a major update, minimizing downtime and frustration for other family members who rely on the network daily. Keep firmware up to date to close security gaps and improve performance. WiFi Router Help emphasizes proactive maintenance as the best defense against common threats.
After Setup: Testing, Updates, and Ongoing Maintenance
With your router configured, you’ll want to validate that every part of your network works as expected. Perform speed tests from multiple rooms and devices to ensure coverage aligns with your expectations. Compare wired performance to wireless performance to identify any discrepancies that may indicate placement issues or channel interference. If you notice slowdowns, try changing the wireless channel, enabling QoS for bandwidth-sensitive tasks, or enabling beamforming if your device supports it. Firmware updates are essential; check for new releases periodically and enable automatic updates when feasible to reduce the risk of security flaws.
Keep an organized record of your network details, including SSIDs, passwords, and IP ranges (use a private, secure document). Consider setting up a simple backup plan for the router’s configuration. If you upgrade devices or expand your home network with mesh extenders, re-check security settings and re-run basic tests to verify everything remains stable after changes. Your ongoing maintenance routine will help your network run smoothly for years to come.
Quick Recap and Next Steps
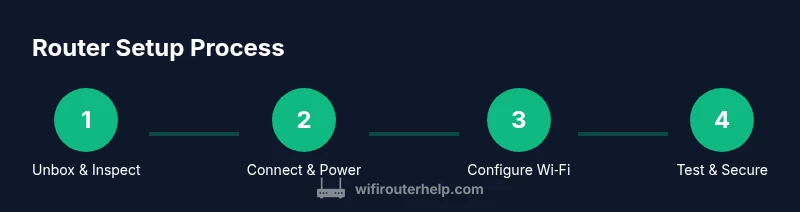
You’ve unboxed, connected, configured, and secured a new router, and you’ve laid out a plan for ongoing maintenance. The next steps are to monitor performance, keep firmware current, and document important settings for future reference. If you’re planning to expand coverage, consider adding a mesh system or a dedicated access point in high-usage areas. Regular reviews of connected devices and network security settings help protect your family’s digital life and keep your home network performing at its best.
Tools & Materials
- Router (new or reset to factory settings)(Ensure it supports current security standards (WPA3).)
- Ethernet cable(Cat5e or newer for reliable wired backhaul.)
- Modem (if separate from router)(Use only if your internet service requires it.)
- Computer or smartphone(For accessing the admin interface and running the setup wizard.)
- Power outlet(Near the setup area to minimize cable clutter.)
- ISP account details(Needed if your WAN type requires PPPoE or specific credentials.)
Steps
Estimated time: 40-60 minutes
- 1
Unbox and Inspect
Open the box, verify all components are present, and check for any shipping damage. If you see issues, contact the seller or manufacturer before proceeding. This ensures you won’t encounter missing parts during setup.
Tip: Keep packaging until setup is complete in case you need to reseat components. - 2
Place and Connect Hardware
Position the router in a central, elevated area away from large metal objects. Connect the modem (if separate) to the router’s WAN port with an Ethernet cable, and plug the router into power. Wait for the status lights to indicate a stable power and connection.
Tip: Avoid placing it behind furniture; keep a clear line of sight for better signal distribution. - 3
Access the Admin Interface
Connect your device to the router’s default network or wired LAN, then open the admin page using the gateway address (e.g., 192.168.1.1). Log in with the default credentials from the manual. Run the setup wizard to configure WAN, Wi‑Fi, and basic security.
Tip: If you can’t access the page, try a different web browser or clear your browser cache. - 4
Configure WAN and Wi‑Fi
Enter your Internet type (DHCP/PPPoE/static) and set a unique SSID and a strong password. Enable WPA3 if available, or WPA2‑AES as the fallback. Disable WPS to reduce risk and enable guest networking for visitors.
Tip: Use a long, unique password and separate admin credentials for the router UI. - 5
Update Firmware and Save a Backup
Check for firmware updates and install them. Back up the router configuration to a secure file on a computer or USB drive if supported. This makes restoration faster after future updates or resets.
Tip: Enable automatic updates if your device offers this option. - 6
Test Connectivity
Test wired and wireless connections across multiple devices. Run speed tests to confirm expected performance and adjust channel or QoS if needed. Ensure all essential devices can access the internet reliably.
Tip: Document baseline speeds for future comparisons. - 7
Secure and Document
Record your network names, passwords, and admin URL. Change any default admin usernames if the model allows. Review connected devices and remove any unknown items for ongoing security.
Tip: Store credentials in a secure password manager. - 8
Plan for Maintenance
Schedule periodic checks for firmware updates, review device connections, and consider expanding with mesh extenders if coverage gaps appear. Keep a small maintenance log for quick reference.
Tip: Set calendar reminders to reassess network performance every few months.
People Also Ask
Do I need the ISP login to set up the router?
Most setups do not require ISP login; you typically enter WAN details during setup. If your ISP requires PPPoE or specific credentials, have them ready during configuration.
Usually you don’t need ISP login unless your provider specifies PPPoE credentials during setup.
What if I can't access the router's admin page?
Make sure your device is connected to the router, try the gateway address in a different browser, and power cycle the router. If needed, perform a factory reset and rerun the setup wizard.
Ensure you're connected, then try the router's IP address; if needed, reset and start over.
How often should I update firmware?
Check for updates monthly or when the manufacturer releases a security patch. Enable automatic updates if available and review update notes for new features.
Check for updates regularly and enable auto updates when possible.
Should I enable a guest network?
Yes. A guest network isolates guest traffic from your main devices, improving security while maintaining access for visitors.
Yes—guest networks keep your main devices safer.
How do I back up router settings?
Use the router's backup feature to save the configuration as a file. This makes restoration quick after updates or resets.
Back up settings to a secure file so you can restore later.
What is the best placement for the router in a multi-story home?
Place centrally on a middle floor, elevated, away from thick walls or metal obstacles to maximize coverage across rooms.
Center and elevate the router for the most even coverage.
What to Remember
- Secure your router with a strong password and updated firmware.
- Test both wired and wireless connections across rooms.
- Document credentials and backup essential settings.