How to Connect a WiFi Extender to a Router: Step-by-Step
Learn how to connect a wifi extender to your router with clear, actionable steps. Covers WPS and manual setup, placement tips, and security best practices for stronger home WiFi in 2026.

Goal: connect a wifi extender to your router to broaden coverage. This quick guide covers WPS and manual setup, extender placement, and securing the extended network. According to WiFi Router Help, you’ll need your router’s SSID and password, the extender’s model, and a device to access the extender’s setup page. Ready? Start with the simplest method first.
Why extending wifi matters
A robust home network should blanket the living space with reliable signal in every room, from the basement to the attic. A wifi extender helps eliminate dead zones, improves streaming quality, and supports smart devices like lights, cameras, and voice assistants without worrying about buffering or dropped connections. WiFi isn’t just about speed; it’s about consistent coverage. When you extend thoughtfully, you reduce network complaints, enable more devices to stay online, and avoid the need for expensive rewiring. The result is a more comfortable, productive home environment where online homework, video calls, and gaming feel seamless. By understanding where your current signal fades, you can place the extender to maximize bandwidth and minimize interference from walls, appliances, and neighboring networks.
Understanding extender types and how they differ
There are several devices marketed as wifi extenders, and the best choice depends on your home layout and performance goals. Traditional range extenders replay existing WiFi signals, rebroadcasting them to reach farther areas. They’re simple to set up but can cut your bandwidth in half because they create a separate network. Access points, on the other hand, connect via ethernet to the router and provide a dedicated, often faster, network to extend. Some devices combine mesh capabilities, offering seamless roaming and single-network SSID across large spaces. When selecting, consider (a) whether you want a single seamless network, (b) the distance you need to cover, and (c) whether your existing router supports features like a dedicated backhaul or WPA3. If you have a modern router, a mesh-capable extender can offer the most intuitive experience, though it may come with a higher price tag. Understanding these options helps you pick a device that matches your home’s unique layout.
Before you start: gather info and plan
Preparation saves time and avoids mid-setup surprises. Start by collecting your router’s SSID and password, the extender’s model and firmware version, and a device to access setup screens. Write down the room-to-room map of your home to decide optimal extender placement. If you can, sketch a mini-floor plan and mark potential spots that strike a balance between signal strength and convenient power access. Check your router’s position relative to the areas you want to cover and note any thick walls, metal appliances, or large furniture that could obstruct signals. Finally, verify you have a stable power source, since many extenders require a continuous power supply to function reliably. This stage minimizes back-and-forth and makes the actual wiring fast and predictable.
Setup path A: WPS push-to-connect method
WPS offers a quick, one-button setup that can simplify the initial pairing. On your router, locate the WPS button (usually labeled WPS or with a circular icon) and press it for a few seconds. Within two minutes, press the WPS button on the extender. The two devices should exchange credentials and negotiate a secure link automatically. If the LED indicators blink steadily, your extender is connected. If not, move closer to the router and try again. WPS is convenient but not universally supported, so have a manual setup plan in case this method fails. For security, disable WPS after initial setup if your device supports it, to reduce exposure to potential weaknesses.
Setup path B: Manual setup via web UI
Manual setup gives you precise control and is compatible with virtually all devices. Connect your computer or phone to the extender’s temporary network (often named after the extender’s model). Open a web browser and enter the default IP address or URL provided in the extender’s manual (some use 192.168.0.254 or a hostname like http:// extender.local). Follow the on-screen steps to connect to your home WiFi network by selecting your router’s SSID and entering your router password. If the extender supports 5 GHz backhaul, enable it for faster backhaul connections where possible. After saving settings, the extender will reboot and apply changes. Remember to reconnect your device to the extended network and verify internet access.
Optimizing placement and network settings
Placement is the single most impactful factor in extender performance. Start near the router to configure and test, then gradually move the extender to a location where the signal is still strong but the distance to the router is sufficient to reach far rooms. A good rule of thumb is to position the extender halfway between the router and the area with weak signal, avoiding thick walls or metal appliances. In many homes, a bookshelf or high shelf at chest height offers the best compromise between coverage and stability. After initial setup, test key zones (living room, home office, bedrooms) and adjust placement as needed. If your extender and router support a dedicated backhaul channel (often 5 GHz), enable it to preserve more bandwidth for connected devices.
Extend securely: naming, encryption, and channel selection
Security matters as your extended network becomes a part of your home environment. Use WPA2-PSK or WPA3-SAE as the encryption method if available, with a strong password that isn’t used on other networks. Assign a distinct SSID for the extender? Some users prefer the same SSID to enable seamless roaming; if you choose this, ensure your router and extender support fast handoffs so devices can switch without reconnecting. If you split networks, lock down each with strong passwords and consider enabling guest networking for visitors. For channel selection, pick the least congested channel in your area, or rely on auto-channel selection if your devices support it. Regularly check for firmware updates on both router and extender to maintain security and performance.
Troubleshooting common issues and performance tips
Despite best practices, issues can arise. If you can’t access the extender’s setup page, verify the extender is powered on and reset it to factory defaults if needed, then try again. If devices report weak signal or slow speeds, experiment with repositioning the extender or enabling Ethernet backhaul if supported. Interference from microwaves, Bluetooth devices, or neighboring networks can degrade performance, so switch channels or move devices away from such sources. If you’re using a mesh-capable extender, ensure that the firmware is up to date and that the rover (nodes) are properly linked. In some cases, firmware updates on either the router or extender unlock improved roaming, stability, and compatibility. Remember to re-test after every change and keep notes of what works and what doesn’t.
Quick validation, testing, and long-term maintenance
Validation is about confirming real-world performance, not just numbers in a UI. Use a device in the farthest intended area and run a speed test or streaming check to verify that latency, jitter, and throughput meet your needs. Keep a simple log of speeds in different rooms and adjust placement as required. Over the long term, monitor firmware releases and apply updates when safe and convenient. Periodic re-testing after changes ensures your network remains robust as you add new devices or shift household usage. By maintaining a baseline and adjusting gently, you’ll keep coverage strong without creating bottlenecks.
Tools & Materials
- WiFi extender(Model and firmware version; check for 802.11ac/ax compatibility)
- Router(Access to SSID and password; ensure firmware is up to date)
- Smartphone/tablet/PC(Device to run setup and tests)
- Ethernet cable (optional)(If your extender supports wired backhaul or for initial hard connection during setup)
- Notepad and pen(To record network details and placement notes)
- Stable power outlet(Extenders need continuous power for stable operation)
Steps
Estimated time: 45-75 minutes
- 1
Gather and verify equipment
Collect the router, extender, setup device, and any necessary cables. Check that the extender’s firmware is up to date before you begin to avoid compatibility issues. If possible, unplug other devices temporarily to minimize interference during the initial setup.
Tip: Having all items ready speeds up the process and reduces mid-setup trips to the router room. - 2
Choose initial placement near the router
Place the extender about halfway between the router and the areas where you need coverage, avoiding thick walls or metal appliances that can block signals. Ensure the extender is powered on and within line of sight for the first setup, if possible.
Tip: A quick signal test with a phone can help you decide if you’re too close or too far from the router. - 3
Connect to the extender’s temporary network
On your setup device, connect to the extender’s default SSID (usually named after the extender model). This creates a direct link to the extender for configuration. If you can’t see the network, reset the extender and try again.
Tip: Take note of the exact network name (SSID) and password shown during this step. - 4
Open the extender’s setup page
In a web browser, enter the default IP address or the URL shown in the manual (e.g., something like http://extender.local or 192.168.x.x). Wait for the page to load, then begin the configuration wizard.
Tip: If the login prompts for credentials, check the manual for the default username/password; change them after setup. - 5
Select the router’s network and enter credentials
Choose your home WiFi network (SSID) from the list and input your router password. If the extender supports a separate 5 GHz backhaul, enable it for faster connections. Confirm the extender adopts the same security (WPA2/WPA3) as your router when available.
Tip: If you use a guest network or complex security, consider a dedicated backhaul or a single SSID approach for roaming. - 6
Apply settings and reboot
Save the configuration and let the extender reboot. This can take 60–120 seconds. After reboot, reconnect to the extended network if it changes or use the same SSID if you chose seamless roaming.
Tip: During reboot, avoid making further changes that could interrupt the setup process. - 7
Test coverage in target areas
Walk to rooms that previously had weak signal and run a quick speed test or stream a video to verify performance. If coverage is still weak, try moving the extender to a new location and re-test.
Tip: Document the strongest and weakest spots to guide future placement adjustments. - 8
Fine-tune channels and security
If your router offers channel optimization, adjust the backhaul channel to reduce interference. Verify encryption type and password strength, and consider enabling a guest network for visitors if needed.
Tip: Firmware updates often improve roaming, so check for updates after initial setup. - 9
Document and maintain
Record the final placement, network names, and passwords in a secure note. Schedule periodic checks for firmware updates and re-test coverage after major household changes.
Tip: Re-test anytime you add a new smart device or move furniture that could affect signal paths. - 10
Advanced option: wired backhaul
If available, connect the extender to the router via an Ethernet cable for a dedicated backhaul. This setup typically yields the best stability and throughput in large homes.
Tip: A wired backhaul minimizes interference and delivers consistent speeds across devices.
People Also Ask
What is the simplest method to connect an extender to a router?
The simplest method is often the WPS push-to-connect option if your router and extender both support it. Press the WPS button on the router, then on the extender within a couple of minutes, and wait for a solid connection indicator.
Use WPS on both devices if available; press and wait for the indicators to confirm a connection.
Can I use the same network name (SSID) for the extender as my router?
Yes, many setups use a single SSID so devices roam seamlessly. If you experience handoff issues, you can run the extender with a different SSID and manage the two networks separately.
Yes, you can use the same SSID for seamless roaming, or a separate one if roaming isn’t working well.
What should I do if the extender never appears in my device list?
Make sure the extender is powered, within range, and in setup mode. Reset to factory defaults and try the setup process again, or consult the extender’s manual for specific troubleshooting steps.
Check power and range, reset if needed, and retry the setup steps.
Is a wired backhaul better than wireless for extenders?
A wired backhaul (Ethernet) typically provides the most stable and fastest performance, especially in large homes. Use wireless backhaul if Ethernet is not feasible.
Yes—wired backhaul is usually best for stability, but wireless can work if needed.
How often should I update firmware on my router and extender?
Check for updates monthly or after major changes to your network. Firmware updates can improve security, performance, and compatibility with devices.
Check for updates monthly to keep security and performance current.
What safety tips should I follow when extending wifi?
Always use strong passwords, enable WPA2 or WPA3, and avoid disabling security features. Keep devices out of reach of liquid exposure and extreme heat.
Keep security enabled with strong passwords and update devices regularly.
Watch Video
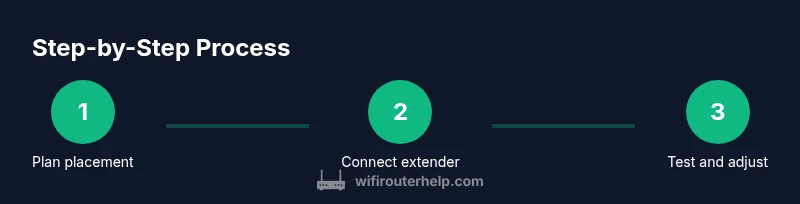
What to Remember
- Plan placement before wiring for best coverage.
- Choose setup method (WPS vs manual) based on device support.
- Match security settings across router and extender.
- Test in multiple rooms and adjust as needed.
- Keep firmware up to date for reliability.