Extender Router Guide: Setup, Placement, and Troubleshooting
Learn how to extend WiFi coverage with an extender router: setup steps, placement tips, troubleshooting, and best practices for reliable home networking.

An extender router expands your WiFi by repeating the signal from your main router, boosting coverage and reducing dead zones. It’s ideal for homes with multiple floors or thick walls, and it’s easier to install than a full mesh system. For best results, place it midway between the router and the areas that need coverage and use a strong 2.4 GHz/5 GHz band.
What is an extender router and when to use it
An extender router is a networking device that rebroadcasts your existing WiFi signal to reach areas that the primary router can’t confidently cover. It’s a practical solution for homes with thick walls, long hallways, or multi-story layouts where signals fade. Unlike a full mesh system, an extender is a single device that supplements your current network rather than creating an all-new network from multiple nodes. For many homeowners, an extender router provides a cost-effective upgrade path that yields visible gains in usable signal, fewer dead spots, and a more comfortable online experience for streaming, video calls, and gaming. According to WiFi Router Help, the key is to treat the extender as an amplifier, not a replacement, and to plan placement with real-world layouts in mind.
Extender vs mesh networking: what's the difference?
Mesh systems are designed as a unified network with multiple nodes coordinating seamlessly. An extender router, by contrast, connects to your existing router and rebroadcasts its signal, which can lead to backhaul limitations and sometimes a separate SSID unless configured to share one. Mesh networks are typically easier to scale for large homes and provide more uniform coverage, but they come at a higher price and require compatible hardware. For many users, an extender router offers a great balance between cost, simplicity, and performance, especially in homes that already have a decent main router but still experience dead zones in specific rooms. The WiFi Router Help team notes that careful placement and proper backhaul considerations can make extenders close in performance to mesh solutions in smaller homes.
How to choose the right extender router
Start with your current router’s capabilities and your coverage goals. Look for dual-band support (2.4 GHz and 5 GHz), at least one gigabit Ethernet port for a wired backhaul where possible, and straightforward setup via a mobile app or web interface. Consider whether the extender supports seamless roaming, which helps devices switch between the main router and extender without dropping connections. If you have high-demand devices or smart home gear, latency and backhaul performance become critical factors. WiFi Router Help suggests prioritizing devices that routinely demand reliable connections, like video conferencing gear and gaming consoles, when evaluating an extender.
Key features to compare
When evaluating extender routers, pay attention to: (a) Bands and speed ratings (AC vs. AX, and supported speeds), (b) Backhaul options (wireless backhaul or wired Ethernet backhaul), (c) Antenna configuration and coverage area, (d) Number and type of ports (RJ-45 for wired devices), (e) Easy setup and firmware updates, and (f) security features such as WPA3 and guest network options. A well-chosen extender should blend with your existing network, be easy to configure, and deliver predictable performance in the rooms where you need it most. The goal is to extend coverage without introducing significant bottlenecks or complexity.
Placement strategies for maximum coverage
Placement is the single most important factor in extender performance. Start midway between your router and the farthest room with acceptable signal: you want the extender to receive a good signal from the main router while still reaching far corners. Avoid obstacles like concrete walls, metal appliances, or large mirrors, and keep the device away from microwaves, cordless phones, and other electrical noise sources. Elevate the extender if possible and aim for a line-of-sight path to the main router. After placement, use your phone or laptop to test speed in multiple rooms and adjust as needed.
Basic setup workflow (no app specifics)
Power on the extender and connect a computer or phone to its temporary network. Open a web browser and enter the extender’s default IP address or setup URL from the manual. Follow the guided setup to connect the extender to your existing WiFi network, choose a unified SSID if you prefer seamless roaming, and set a strong password. Save settings and reboot if prompted. Once connected, re-scan from devices and confirm that you can access the internet from zones previously in dead spots.
Step-by-step configuration guide overview
Configuring an extender router typically involves connecting to the device, selecting your home WiFi on the extender, and applying the same security settings as your main router. If the extender supports a dedicated backhaul, enable it to improve performance on longer runs. After basic setup, verify the signal strength in the previously weak areas, and adjust the placement if needed. Finally, ensure firmware updates are installed to keep performance stable and secure.
Troubleshooting common issues
If you can’t connect to the extender’s network, check power and LEDs for error codes, reboot both devices, and ensure you’re linking to the correct network name. If speed is weak even when connected, verify that you’re using both bands effectively (2.4 GHz for range, 5 GHz for speed) and consider using a wired backhaul if the extender and router support it. Double-check for IP conflicts or double NAT scenarios, which can disrupt traffic routing and cause intermittent connectivity.
Security and performance tips
Keep firmware up to date and enable automatic updates if available. Use a unique admin password for the extender’s interface and disable any unnecessary services. Consider enabling a guest network to isolate IoT devices and protect your main network. If possible, run a dedicated backhaul on the extender to minimize interference and maximize throughput, especially in larger homes with challenging layouts.
Advanced topics: bridging, guest networks, and QoS
Bridging lets the extender act as a bridge rather than a separate router, reducing potential conflicts with your main network. A guest network keeps visitors off your main LAN, improving security. QoS (Quality of Service) settings let you prioritize critical apps like video calls and gaming, helping to maintain performance during peak periods. If your devices support it, enabling WPA3 security and disabling legacy protocols can improve both security and speed.
Real-world expectations and maintenance
In real homes, an extender router typically improves coverage in rooms that once suffered from weak signals, but results vary with building materials and layout. Expect some speed reduction on the extended network due to the nature of signal repetition; a wired backhaul setup can mitigate this. Regular maintenance—checking for firmware updates, re-evaluating placement after major furniture changes, and refreshing passwords—helps keep the network stable over time.
Common mistakes to avoid
Avoid placing the extender too far from the main router or behind large appliances. Don’t rely on a single old extender to fix all coverage gaps in a large home; consider a single well-placed extender plus a wired backhaul if possible. Finally, avoid using the extender as a main router replacement unless you’ve carefully tested compatibility and performance.
Tools & Materials
- Extender router(Ensure it supports dual-band and at least one Gigabit Ethernet port.)
- Smartphone or computer(Needed for initial setup and ongoing management.)
- Ethernet cable (optional)(Useful for a wired backhaul or first-time configuration.)
- Power outlet near extender(Keep it away from moisture and heat sources.)
- Existing router admin credentials(You’ll need to authorize the extender to join the network.)
- Manual or quick-start guide(Helpful if you run into device-specific quirks.)
Steps
Estimated time: 30-60 minutes
- 1
Identify coverage gaps
Walk through your home with a device to find spots where the signal is weak or drops entirely. Note the rooms and the distance from the main router. This helps you choose an effective placement later.
Tip: Use a simple room-by-room scorecard to track where you notice the most lag. - 2
Plan extender placement
Choose a location roughly halfway between the main router and the weak zone, ensuring it still receives a good signal from the router. Avoid placing behind thick walls or in cramped cabinets.
Tip: Aim for a position with a clear line of sight when possible. - 3
Power on and connect to the extender
Plug in the extender and connect your device to its temporary network. Open a browser and navigate to the setup page using the address in the manual. This initiates the guided setup.
Tip: If you’re stuck, reset the extender and try again. - 4
Link to your existing network
Choose your home network and enter the password to establish the connection. If you want seamless roaming, enable the option to use the same SSID and password as your main router.
Tip: Prefer a wired backhaul if supported by both devices. - 5
Configure security and SSID
Set a strong, unique password and select WPA3 when available. Decide whether to broadcast the same SSID or a different one for the extender network.
Tip: If you keep the same SSID, your devices may switch more easily between networks. - 6
Test signal and speed
Move around with a device and run speed tests in multiple rooms. Compare against the main router to verify improvements and identify any remaining dead zones.
Tip: Use both 2.4 GHz and 5 GHz tests to understand capabilities in different areas. - 7
Enable enhancements and features
Turn on QoS, guest networks, and any device prioritization options that fit your household. These features help manage traffic and improve user experience.
Tip: Limit unnecessary services that can slow the network. - 8
Update firmware
Check for and install the latest firmware from the manufacturer’s site or app. Reboot after updating to ensure changes take effect.
Tip: Enable automatic updates if available for ongoing security and performance improvements.
People Also Ask
What is the difference between an extender router and a mesh system?
An extender router rebroadcasts your existing signal to reach dead zones, which can introduce backhaul bottlenecks. A mesh system uses multiple coordinated nodes for more uniform coverage but at a higher cost and potential complexity. Both improve reach, but mesh systems excel in large, complex layouts, while extenders are a cost-effective upgrade for smaller homes.
Extenders boost coverage by repeating the signal; mesh systems use multiple coordinated nodes for seamless coverage. Both extend WiFi, but mesh setups are typically easier to scale and manage in bigger homes.
Can I use any extender with any router?
Most extenders work with standard WiFi routers, but check the extender’s compatibility with your router’s bands and security settings. For best results, use devices from reputable brands that support similar standards (e.g., WPA3, dual-band).
Yes, most extenders work with most routers, but verify compatibility with your router’s bands and security.
Do extenders create a separate network or extend the existing one?
Extenders can either create a separate network (different SSID) or be configured to share the same SSID as your main network. Using the same SSID often provides smoother handoffs, but may require more careful channel management.
You can have the same SSID on both, which helps devices move between areas without reconnecting.
Will an extender always improve speeds in distant rooms?
An extender can improve coverage, but speeds in extended areas may still be lower than near the main router due to signal repetition. A wired backhaul or higher-end dual-band backhaul can help minimize speed loss.
You’ll usually see better coverage, but the far zones may be a bit slower than the main area.
Should I enable WPS on the extender?
WPS is convenient but offers weaker security. If possible, configure the extender manually and disable WPS to improve security.
WPS is convenient but less secure—manual setup is safer.
How do I test coverage after setup?
Run speed tests in multiple rooms using a smartphone or laptop. Compare results to the main router and look for dead zones that still require attention.
Test in different rooms to confirm coverage and speed improvements.
Watch Video
What to Remember
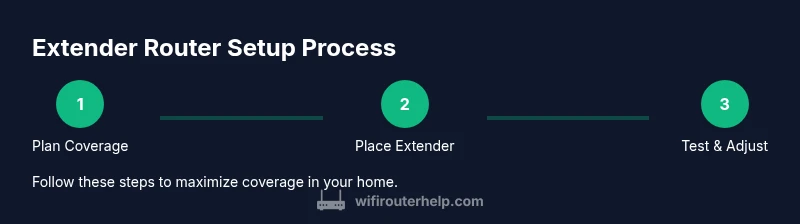
- Plan coverage first, not just more devices.
- Place extenders where they receive a strong signal from the main router.
- Test, then adjust placement for optimal performance.
- Keep firmware current for security and stability.