Google WiFi Router: Setup, Optimization & Troubleshooting
Learn how to set up and optimize a Google WiFi router, extend coverage, secure your network, and troubleshoot common issues with clear, step-by-step guidance from WiFi Router Help.

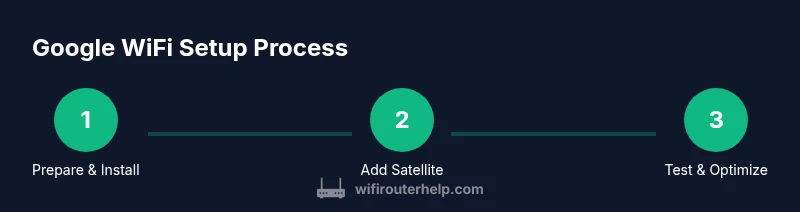
To set up and optimize a Google WiFi router, start with the Google Home app, add the primary unit to your modem, and place additional points for wide coverage. Then fine-tune settings, enable security features, create a guest network, and verify speed across rooms. Finally, monitor performance over a day.
Why Google WiFi Router and How It Works
According to WiFi Router Help, Google WiFi offers a simple path to reliable, mesh-based coverage without the complexity of traditional routers. The system uses multiple points that cooperate to blanket your home with wifi, reducing dead zones in far rooms or upstairs. The WiFi Router Help team notes that this approach is especially effective in multi-story homes or spaces with thick walls. Key benefits include easy setup through the Google Home app, automatic updates, and a single dashboard for monitoring connected devices. While it may not replace high-end enterprise gear in very large homes, it fits most mid-sized residences, apartments, and small offices. Understanding how the mesh topology distributes traffic helps you plan placement, choose the number of points, and avoid common pitfalls like clustering units in a single hallway. If you are transitioning from a single router to a mesh system, expect a gentle learning curve but noticeable gains in coverage and stability with proper placement.
Network Topology and Coverage Fundamentals
A Google WiFi setup creates a mesh network where a primary unit connects to your modem and additional points spread coverage through your home. This design minimizes dead zones and auto-adapts to changing device loads. When devices switch rooms or floors, the system reroutes traffic along the best path, usually without user intervention. Understanding NAT, IP addressing, and the concept of backhaul helps you diagnose why a room with a strong signal still feels slow. For most households, the built-in QoS and band steering features are sufficient for everyday streaming, gaming, and video calls. If you have a complex home or a guest network with many devices, you may want to map device placement and test coverage with in-app speed tests. A well-planned topology reduces interference and stabilizes your whole network.
Planning Your Layout for Best Coverage
Effective Google WiFi placement starts with a floor plan. Place the main unit near the center of your home, away from thick walls and large metal objects. Add satellite points at least a few rooms apart and elevated if possible, such as on a shelf or high bookcase. Avoid placing points in closets, basements, or behind large obstacles that block signals. In larger homes, two or three satellite units often deliver the best balance of speed and coverage. Use the Google Home app’s built-in diagnostics to visualize signal strength and adjust positions. Remember that proximity to power outlets matters; use shorter, neater cables to minimize clutter and accidental disconnects. With thoughtful placement, you’ll notice fewer buffering events and steadier performance across living spaces.
Step-by-Step Overview: What You’ll Do
This article walks through a practical, task-oriented process for configuring a Google WiFi system, expanding coverage as needed, and keeping the network secure. Expect to place the main unit near your modem, add satellite points, and customize the network using the Google Home app. You’ll also set up guest access, parental controls if desired, and routine maintenance checks. While the steps are straightforward, the key is deliberate planning, a few measurements, and regular testing. The goal is a consistent user experience: seamless streaming, fast downloads, and reliable video calls across devices and rooms.
Why Mesh Matters and How Points Interact
Mesh WiFi systems rely on the cooperation between the primary unit and satellites to distribute traffic efficiently. In practice, this means devices connect to the nearest point with the strongest signal, and the backhaul traffic travels between points to reach the internet. A properly configured mesh reduces the number of hops data must take and prevents congestion at a single router. This behavior is particularly noticeable in homes with multiple floors or thick walls. To maximize mesh effectiveness, avoid clustering devices in one area, keep points elevated away from large metal appliances, and ensure there’s a clear path between nodes. The result is broader, more stable coverage with fewer dead zones and less manual switching.
Security Best Practices for Google WiFi Router
Security should be baked into your setup from day one. Change the default credentials, enable automatic firmware updates, and use a strong, unique password for the primary Google account managing the network. Enable guest networks for visitors to keep your main network isolated, and review device access regularly. Disable features you don’t need, such as legacy protocols, if available. The WiFi Router Help analysis shows that automatic updates reduce exposure to known vulnerabilities and improve compatibility with new devices. Regularly auditing connected devices helps you spot unauthorized access quickly and take action.
Troubleshooting Common Issues
Even well-planned setups encounter quirks. If there is no internet after setup, check that the primary unit is connected to the modem, and ensure the modem is functioning and not in bridge mode unless intended. If speeds vary by room, consider adjusting satellite placement or adding an additional point. For devices not appearing in the app, refresh the app, reboot units, and verify the Google account used to manage the system. If a device repeatedly disconnects, run a short in-home diagnostic test via the app and note any interference sources such as cordless phones or microwave ovens. Regular reboots can resolve temporary routing hiccups, but persistent issues may require factory resets and reconfiguration.
Maintenance, Updates, and When to Upgrade
Keeping firmware current is essential for stability and security. Schedule monthly checks in the Google Home app or enable automatic updates to minimize manual maintenance. If your home expanded or your internet plan changed, you may benefit from adding satellite units to maintain coverage and bandwidth. When the performance gains level off, evaluate whether a single more capable mesh node or a higher-speed plan would deliver noticeable improvements. WiFi Router Help recommends documenting your network layout and performance data to guide future upgrades, preventing guesswork and wasted hardware investments.
Final Checks and Next Steps
After completing setup and initial testing, perform a quick two-minute speed check in each major area of your home. Confirm your guest network works as intended and that parental controls are in place if needed. Save a written note of your network’s SSID and password in a secure place, and keep a record of firmware versions for reference. If everything runs smoothly, you’re ready to enjoy a stable, scalable home network with minimal ongoing maintenance.
Tools & Materials
- Smartphone or tablet with Google Home app(Required for initial setup and ongoing management)
- Modem provided by your ISP(Must be active and connected to the internet)
- Google WiFi unit(s) or Nest WiFi points(One primary unit + satellites as needed)
- Power outlets near each unit(Ensure stable power for all nodes)
- Ethernet cable (optional for initial hard-wiring)(Could speed initial provisioning and backhaul)
- Pen and notebook or digital notes(Document network names, passwords, and IP settings)
Steps
Estimated time: 45-60 minutes
- 1
Prepare the app
Install the Google Home app, sign in with your Google account, and ensure Bluetooth/Wi‑Fi are enabled on your phone. This sets the foundation for provisioning the primary unit and later satellite points. Have your modem login handy in case you need to verify your WAN connection.
Tip: Keep your account secure and enable two-factor authentication if available. - 2
Power the primary unit
Unbox the main Google WiFi unit and connect it to your modem with an Ethernet cable if possible. Power on the unit and wait for the status light to indicate a stable connection. Open the Google Home app to begin setup and follow on-screen prompts.
Tip: Place the primary unit in a central, open location for optimal coverage. - 3
Add satellite points
Plug in each satellite point and add them through the Google Home app. The app will search for devices and guide you to place each satellite in a zone with good signal from the main unit. Complete pairing for each node before testing coverage.
Tip: Avoid placing satellites behind large obstacles or in closets. - 4
Create and name networks
In the app, create your network name (SSID) and set a strong, unique password. Consider enabling a guest network and configuring basic parental controls if desired. Double-check that devices can connect to both the main network and guest network.
Tip: Use different passwords for primary and guest networks. - 5
Tune placement and coverage
Test signal strength in key areas using the app’s diagnostic tool. If a room shows weak signal, reposition a satellite or add another node. Re-run the speed test after each adjustment to measure improvement.
Tip: Aim for a signal strength of at least -60 dB in busy areas. - 6
Configure security settings
Enable automatic firmware updates, create a strong admin password, and review connected devices. Set up a guest network with restricted access and consider disabling unnecessary features to reduce attack surface.
Tip: Regularly rotate your password and audit devices. - 7
Test performance and reliability
Perform multiple speed tests from different rooms, and verify video conferencing quality, gaming latency, and streaming stability. If issues arise, consult diagnostics in the app and adjust settings or hardware as needed.
Tip: Document testing results to reference during future changes. - 8
Document and maintain
Save your network details, firmware version, and a simple map of satellite locations. Schedule periodic checks for updates and coverage improvements as your home changes or new devices enter the network.
Tip: Keep a quick-reference card with SSID and password in a secure place.
People Also Ask
What is the minimum setup required to get online with Google WiFi?
You need a modem with active internet, a powered primary Google WiFi unit, and the Google Home app to begin. After provisioning, add satellite points to extend coverage and confirm your network is functioning in the app.
You need a modem, a powered primary unit, and the Google Home app to start; then you can add satellites to extend coverage.
How do I extend coverage to dead zones?
Place additional satellite points within range of the main unit and test coverage using the in-app speed tests. If needed, rearrange positions to balance signal strength.
Add more satellites and test coverage; move them if signals are weak.
Can I use Google WiFi in bridge mode?
Yes, you can enable bridge mode, but this disables mesh features and NAT. Use it only if you rely on a separate router for routing tasks.
Bridge mode turns it into a simple access point; mesh features are disabled.
How often should I update firmware?
Check for updates monthly and consider automatic updates to reduce exposure to vulnerabilities and improve device compatibility.
Update monthly or enable automatic updates for security and stability.
What should I do if a device won’t connect?
Verify the device is within a strong signal area, forget and reconnect to the network, and check for a compatible password. If problems persist, re-run the setup in the Google Home app.
Reconnect the device to the network and recheck the password; if needed, run setup again.
Are parental controls available on Google WiFi?
Yes, use the app to configure time-based access, filter categories, and pause internet for specific devices when needed.
Yes—set schedules and content filters in the app.
Watch Video
What to Remember
- Plan central placement for primary unit first.
- Use satellites to eliminate dead zones and balance load.
- Keep firmware up to date for security and compatibility.
- Regularly test coverage and adjust placement as needed.