How to Connect to a Netgear Router: A Complete Step-by-Step Guide
Learn how to connect to a Netgear router, login securely, and optimize your home network with practical, easy-to-follow steps. Includes troubleshooting, advanced features, and ongoing maintenance guidance from WiFi Router Help.

This guide shows you how to connect to a Netgear router, log in, and configure settings for reliable WiFi. You’ll verify your model, locate the gateway IP, access the admin panel, and optimize two bands, guest access, and security. Follow the steps below to start with a solid, secure home network and improve stability.
Verify your Netgear model and access method
Before you begin the process to connect to router netgear, identify your exact Netgear model and the recommended access method (web-based admin or Netgear’s mobile app). Look for a label on the bottom or back of the device to confirm the model number, and check the manual or Netgear support pages for the default gateway and login approach. If you’re unsure, start with the web portal using a browser on a computer connected to the router. The WiFi Router Help team notes that model-specific steps can differ, so confirming your exact device helps prevent mismatched instructions and login errors. Keep this reference handy as you proceed.
Gather prerequisites and prepare your network environment
To successfully connect to router netgear, ensure you have a compatible device (computer or smartphone) with a modern browser or Netgear’s mobile app. Have the router plugged in and powered on, and locate the admin password or the default login credentials if you haven’t changed them yet. If possible, keep an Ethernet cable handy; a wired connection can simplify login and setup, especially on first boot. Prepare a strong WiFi password, and note down the SSID for both 2.4 GHz and 5 GHz bands. Finally, ensure firmware is up to date or set a reminder to check for updates after you complete the initial configuration.
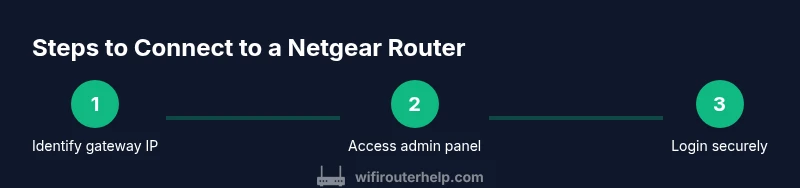
Locate the gateway IP and access the admin panel
The gateway IP is the address you enter into a browser to reach the Netgear admin page. Common defaults are 192.168.0.1 or 192.168.1.1, but some models use a different value. Connect a device to the router—wired or wirelessly—and open a browser. Type the gateway IP and press Enter. You should see the Netgear login screen. If you don’t, check the device’s network settings to confirm the correct gateway, or consult the Netgear support site. The key is to have a stable connection to reach the admin interface.
Access login credentials and first-time login steps
Enter the admin username and password. If you have never changed them, the default login is often admin with a password of admin or password, or it may be printed on the router label. If you’ve previously customized credentials, use those. After logging in, you may be prompted to set a new password or configure basic security. If two-factor authentication is available, enable it for added protection. If you can’t login, try resetting the router once following the official reset procedure, then reattempt login with the default credentials and update them immediately.
Configure wireless settings for best performance
Navigate to the wireless settings area to configure your networks. Separate 2.4 GHz and 5 GHz bands, giving each a unique, strong SSID. Consider using a non-overlapping channel (auto-select can work, but manual selection sometimes yields better results in crowded environments). Enable WPA3 where available for the best security and set a long, strong WiFi password. If your devices are older, you may need to retain WPA2 compatibility. Consider enabling mixed-mode settings only if you must support older devices.
Secure your network and change default credentials
Security starts with a strong admin password. Change the default credentials immediately after login and make sure they’re unique and long. Disable WPS unless you need it for a quick setup, as it can present a security risk. Keep firmware up to date by enabling automatic updates or checking manually on a regular basis. Enable firewall protections and review the router’s default port settings. The WiFi Router Help team emphasizes that regular maintenance reduces exposure to common threats and preserves overall network reliability.
Connect wired devices and set up guest network
A wired backbone improves reliability for desktops, gaming consoles, and smart home hubs. Plug critical devices directly into the router using Ethernet for consistent performance, then ensure the 2.4 GHz and 5 GHz networks are clearly distinguished. If guests need internet access, configure a guest network with its own password, separate from your primary network. This keeps your main network safer and makes guest management easier.
Troubleshooting common connection issues
If you cannot access the admin page, verify the gateway IP is correct in your device’s network settings, ensure you’re on the same network, and try a wired connection. Clear your browser cache or try a different browser. If login fails, confirm you’re using the latest credentials or perform a factory reset if necessary. If devices disconnect intermittently, check for channel congestion, firmware updates, and proximity to the router. Remember to reboot the router after major changes to apply settings.
Advanced features: QoS, parental controls, and port forwarding
Netgear routers offer Quality of Service (QoS) to prioritize traffic for streaming and gaming. Configure parental controls to filter content and schedule usage, and enable UPnP or port forwarding as needed for specific applications or games. When using advanced features, document changes so you can revert if things don’t work as expected. These features can significantly improve performance and safety when you connect to router netgear at home.
Validation and ongoing maintenance
After completing the setup, test from several devices to verify connectivity, speed, and stability. Run a basic speed test via a reliable service and check that both bands perform as expected. Periodically review connected devices and firmware versions, and maintain a simple backup of current settings. According to WiFi Router Help analysis, routine checks help maintain performance and prevent surprises after updates or changes. The aim is a reliable network that keeps devices connected without frequent manual interventions.
Quick checks after setup
Do a final sweep of your network: confirm devices connect to the correct SSIDs, test streaming on a TV, video calls on a laptop, and gaming latency on a console. Ensure the guest network is working and isolated from your main network. If you’ve configured a router restart schedule, verify it triggers correctly. Consistent verification reduces user frustration and confirms that connect to router netgear is working as intended.
Final reminder and a closing note
As you finish, record the netgear model, firmware version, and login details in a safe place. The WiFi Router Help team recommends keeping your router within reach of the strongest signal while maintaining clearance from electronics that could interfere with Wi‑Fi. With proper setup and periodic maintenance, your Netgear router will provide stable coverage and peace of mind through 2026 and beyond.
Tools & Materials
- A computer or smartphone(Device with a modern browser or Netgear app installed)
- Ethernet cable (CAT5e/CAT6)(Helpful for stable login during setup)
- Admin credentials(Have the current admin username/password or the router label with defaults)
- Notebook or digital record(To store network names, passwords, and settings)
Steps
Estimated time: 25-45 minutes
- 1
Identify the gateway address
Power on the router and determine the gateway IP from the label or your device’s network settings. This will be the address you type into a browser to access the admin panel. If you’re unsure, try 192.168.0.1 and 192.168.1.1 as common defaults, or check the Netgear support site for your model.
Tip: Having a wired connection can reduce the risk of connectivity issues during login. - 2
Open the admin page
From a connected device, open a web browser and enter the gateway IP. You should see the Netgear login screen. If not, verify the IP, ensure you’re on the correct network, or try a different browser.
Tip: Use an up-to-date browser and disable VPNs during setup to avoid routing issues. - 3
Log in with credentials
Enter the admin username and password. If this is your first setup, use the default credentials on the router label or in the manual. If you’ve changed them previously, use your updated credentials. After logging in, consider forcing a password change for security.
Tip: If you forget the credentials, a factory reset will restore defaults; remember to back up settings if possible. - 4
Configure wireless settings
Navigate to wireless settings. Set distinct SSIDs for 2.4 GHz and 5 GHz, select strong passwords, and choose appropriate channels. Enable WPA3 if available for best security. Consider disabling auto channel selection if you’re in a crowded environment and adjust to the least congested channel.
Tip: Document your SSIDs and passwords to avoid future login issues. - 5
Enhance security
Change the router admin password, enable firewall features, and apply firmware updates. Disable WPS if you don’t need it for guest devices. Review connected devices to ensure only trusted clients are listed.
Tip: Enable automatic firmware updates to keep defenses current. - 6
Set up guest network
Create a guest network with its own password and limited access. This keeps your main network more secure while still offering internet access to visitors and smart devices.
Tip: Label guest networks clearly to avoid accidentally using the wrong SSID. - 7
Connect wired devices
Plug desktops, printers, and hubs into Ethernet ports for reliability. Verify each device receives a stable IP and good throughput. If needed, reserve IPs for predictable device addressing.
Tip: Assign static IPs to critical devices to prevent IP conflicts. - 8
Test and verify
Run speed tests from multiple devices, streaming a video, and performing a video call to confirm performance across bands. Check both 2.4 GHz and 5 GHz networks for consistent coverage.
Tip: Nearby walls and appliances can degrade signals; adjust placement if tests show weak spots.
People Also Ask
What should I do if I can't access the Netgear admin page?
First verify the gateway IP and ensure you’re on the same network. Try a wired connection and clear browser cache. If needed, perform a factory reset and use default credentials to re-access, then change them immediately.
If the admin page isn’t loading, check the gateway IP, try a wired connection, and reset if necessary, then update credentials.
How do I find my Netgear router IP address?
Check the device label for the default gateway, or open the network settings on your connected device and look up the gateway value. If your router uses a different IP, consult the Netgear support site for model-specific instructions.
Look up the gateway in your device’s network settings or check the router label for the default IP.
Should I use 2.4 GHz or 5 GHz for devices?
Use 5 GHz for devices near the router that need higher speeds and less interference, and 2.4 GHz for longer range or through walls. Enable both bands if your router supports it and ensure devices connect to the appropriate SSID.
5 GHz gives faster speed nearby; 2.4 GHz covers longer distances and through walls.
Is WPS safe to enable?
WPS is convenient but can introduce security risks. Disable WPS unless you specifically need it, and rely on manually entered WPA/WPA2/WPA3 credentials for security.
WPS is convenient but less secure; disable it if possible.
How do I set up a guest network?
In the admin panel, enable a guest network with a separate password and limited access. This keeps your main network safer while still providing internet access for guests.
Enable a separate guest network with its own password.
How can I update Netgear firmware safely?
Check for firmware updates in the router’s admin interface or Netgear app. Install any available updates and reboot the router to apply changes. Regular updates improve security and performance.
Update firmware from the admin panel or Netgear app and reboot afterward.
Watch Video
What to Remember
- Verify your model and access method before changes
- Log in securely and update firmware
- Optimize wireless settings for 2.4 GHz and 5 GHz
- Secure your network with strong credentials and guest access
- Test connectivity and monitor firmware regularly