Nighthawk Mesh Setup and Optimization Guide
Comprehensive step-by-step guide to plan, install, and optimize a Nighthawk mesh network for reliable home Wi‑Fi coverage. Learn placement, security, firmware, and troubleshooting with practical tips.

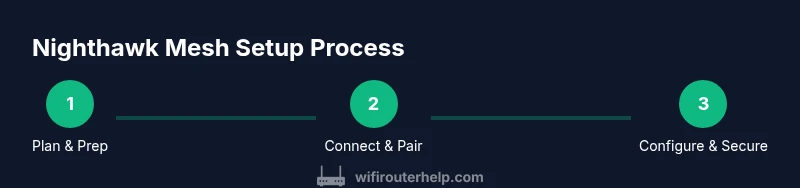
You will learn how to design, install, and optimize a Nighthawk mesh network for reliable home coverage. The guide covers node placement, basic configuration, security basics, and common troubleshooting steps. According to WiFi Router Help, start with proper modem compatibility, map your space for even node distribution, and follow a clear step-by-step setup to minimize dead zones.
What is Nighthawk Mesh and why it matters
The term "Nighthawk mesh" refers to Netgear's line of mesh Wi‑Fi systems designed to blanket homes with seamless coverage using multiple connected nodes. Unlike a single router, a mesh setup distributes the wireless load across several units, reducing dead zones and maintaining steady performance as you move around your home. For homeowners and tech enthusiasts, understanding the core idea behind nighthawk mesh helps in choosing the right number of nodes, and in planning placement that minimizes interference from walls, furniture, and appliances. In WiFi Router Help's analysis, a well-planned mesh network delivers more consistent speeds, better reliability, and simpler management than traditional single-router configurations. As you read, keep in mind the goal: stable, full‑home coverage with simple setup and clear control via the companion app.
Assessing your home for coverage needs
Before buying or placing nodes, you should estimate the space you need to cover. Start by measuring the square footage of your living space and noting high‑traffic areas where devices commonly connect. Consider multi‑story layouts, thick walls, metal appliances, and large open rooms that can obstruct signals. Nighthawk mesh works best when you spread nodes to form a single wireless umbrella, not a cluster in one corner. WiFi Router Help recommends mapping potential obstacle points and planning node locations to minimize walls and obstructions in line‑of‑sight paths between nodes.
Planning node placement for best coverage
Effective node placement balances proximity and coverage overlap. Place the primary router near your modem in a central, elevated location away from thick walls and large metal objects. Satellite nodes should be evenly spaced (not more than one or two rooms apart) and positioned to avoid barriers like closets, bookcases, and large appliances. A common rule is to position nodes at least 20–30 feet apart in open areas and slightly higher than floor level to improve line‑of‑sight. If you have a two‑story home, consider placing one node on each level to minimize stairwell dead zones.
Step-by-step: initial setup and pairing
Starting the setup involves connecting the main Nighthawk unit to your modem, powering everything, and using the companion app to add satellites. The app will guide you through pairing, updating firmware, and confirming that all nodes are communicating. During pairing, avoid placing satellites behind furniture or inside cabinets, which can dampen signals. The goal is a single, strong mesh that automatically routes traffic to the best node. After pairing, run a basic speed test in multiple rooms to verify uniform coverage.
Configuring the network: SSID, password, and security
Your mesh network should broadcast a distinct SSID for easy recognition, with a strong, unique password. Use WPA3 if available and enable guest networking to keep visitors on a separate network from your devices. In the Netgear app, you can also tailor device access rules, set up parental controls, and customize security features. Regularly review connected devices to spot unusual activity and consider enabling automatic firmware updates to stay protected against new threats.
Performance optimization: band steering, QoS, and guest access
Mesh systems commonly support tri‑band or dual‑band configurations and can aggressively steer devices to the best band. Enable QoS for latency‑sensitive activities like gaming or video calls, and assign higher priority to critical devices. A well‑tuned system reduces buffering and keeps video streams smooth. If you notice congestion, experiment with slightly re‑positioning satellites or adjusting band steering thresholds in the app. Remember that fewer, more reliable connections often outperform many weak links.
Security and privacy considerations for Nighthawk Mesh
Mesh networks introduce several layers of protection but require responsible configuration. Always change default admin credentials and enable two‑factor authentication if the app supports it. Use a strong, unique passphrase for both your primary network and guest networks. Regularly review firewall settings and disable features you don’t use. For households with multiple guests, segment traffic with a dedicated guest network and keep IoT devices on a separate VLAN when possible.
Maintenance, firmware updates, and long-term care
Firmware updates are essential for performance and security. Set devices to auto‑update if you can, and occasionally verify update notes for new features or fixes. Keep node firmware versions consistent across the network to prevent compatibility issues. Periodically reassess your node placement as your home layout changes (moving furniture, adding rooms, or expanding devices). This practice helps maintain even coverage and avoids silent dead zones.
Troubleshooting common issues and quick fixes
Common problems include dead zones, slow speeds, or devices dropping offline. Start by power cycling the entire system, then verify that the main node has a stable connection to the modem. Check node synchronization status in the app and ensure firmware is up to date. If a particular room remains weak, try re‑positioning a satellite or adding one more node. In cases of persistent issues, factory reset and re‑pair from scratch can resolve stubborn misconfigurations.
Tools & Materials
- Nighthawk mesh system kit (main router + satellites)(Ensure all units are included in the kit you purchase)
- Modem(Compatible with your ISP; connect to the primary router with Ethernet)
- Smartphone or computer(Used to install and manage the mesh via the official app)
- Ethernet cables(One for modem-to-router, additional cables if you want wired backhaul)
- Measuring tape or room layout map(Help plan node placement for even coverage)
- Quad‑A or USB power strip (optional)(Ensure clean power delivery and surge protection)
Steps
Estimated time: 30-60 minutes
- 1
Unbox and identify the nodes
Unbox all units and verify you have the main router and the satellite nodes. Identify each unit and label them if you plan multiple rooms. This ensures you follow a logical placement plan and don’t accidentally misplace a satellite.
Tip: Place the main router near the modem but not blocked by dense furniture; keep satellites in open areas for best signal spread. - 2
Connect the primary node to the modem
Power off the modem, connect the main router with an Ethernet cable, then power both devices back on. Wait for the link lights to indicate a successful connection. This is the foundation of your mesh network.
Tip: If you don’t see a stable link, reseat the Ethernet cable and try a different port on the modem or router. - 3
Launch the management app and start pairing
Open the mesh app and follow the on-screen prompts to pair satellites. The app will guide you through locating ideal locations and confirming signal strength.
Tip: Pair satellites one at a time and test connectivity after each addition to avoid coverage gaps. - 4
Set a unique SSID and strong password
Create a distinct network name and a strong password. Enable WPA3 if available and configure a guest network to segment visitors from your main network.
Tip: Use a passphrase of at least 16 characters combining letters, numbers, and symbols. - 5
Enable basic security features
Turn on firewall protections and automatic security updates. Review connected devices and disable unfamiliar entries.
Tip: Turn on two‑factor authentication in the app if supported for extra protection. - 6
Test performance and adjust placement
Run speed tests in key rooms (near bedrooms, home office, living room). If signals dip, reposition satellites or add another node.
Tip: Aim for a single dominant mesh with overlapping but not excessive coverage for best handoff.
People Also Ask
What is the main benefit of a Nighthawk mesh system over a single router?
A Nighthawk mesh system provides broader coverage and better reliability by distributing wireless traffic across multiple nodes. This reduces dead zones and maintains stronger speeds as you move through your home. It’s particularly advantageous for multi‑story homes or spaces with thick walls.
The main benefit is wider, more reliable coverage with fewer dead zones compared to a single router.
How many nodes do I need for a two-story house?
The exact number depends on square footage and layout, but starting with a primary node plus two satellites is common for mid‑sized two‑story homes. Add more nodes if you still see weak spots after initial placement and testing.
Typically start with three nodes; add more if you still have weak spots after testing.
Can I use existing modems with Nighthawk mesh?
Yes. The mesh system connects to your existing modem via Ethernet. Ensure the modem is compatible with your ISP and supports bridge mode if you plan to fully bypass its router features.
Yes, as long as the modem is compatible and you configure it to bridge mode if needed.
Should I enable guest networks on Nighthawk mesh?
Enabling a guest network keeps visitors on a separate network from your devices, improving security and simplifying access management.
Yes—guest networks help keep your devices separate and secure.
What should I do if a node won’t pair?
Restart the node and the app, ensure the node is within range of the main unit, and reattempt pairing. If issues persist, try a factory reset on the problematic node.
Restart, reattempt pairing, and reset if needed.
How often should I check for firmware updates?
Check monthly or enable automatic updates to ensure you have the latest security patches and performance improvements.
Check monthly or enable automatic updates.
What’s the difference between tri‑band and dual‑band mesh?
Tri‑band systems add an extra band to improve throughput and backhaul, which can help in busy homes. If your devices aren’t bandwidth‑hungry, a dual‑band system may suffice.
Tri‑band can offer better backhaul and speed in busy homes.
Watch Video
What to Remember
- Plan node placement for even coverage
- Secure network with strong passwords and guest access
- Regularly update firmware to maintain security and performance
- Test in multiple rooms to verify consistent speeds
- Use QoS and band steering to optimize critical devices