How to Get Starlink Router Out of Bypass Mode
A complete, step-by-step guide to safely exit Starlink bypass mode and restore standard router control. Learn prerequisites, exact actions, and post-switch checks to ensure a stable home network.

Exit Starlink bypass mode and restore standard router control, so your own network gear can manage NAT, firewall, and port forwarding. You’ll need a computer or mobile device with the Starlink app or web portal, a stable internet connection, and admin login credentials. Follow the step-by-step guide to switch from bypass mode back to router mode safely.
Understanding bypass mode on Starlink routers
Bypass mode is a power-user feature that lets you delegate routing duties to an external device. According to WiFi Router Help, when bypass mode is enabled, the Starlink gateway passes the public IP directly to your connected router, effectively removing some of Starlink’s own router services such as NAT and firewall protections. This setup can simplify advanced configurations (DNS overrides, port forwarding, or multi-router meshes) but it also increases complexity and potential exposure if misconfigured. The trade-off is worth it for tech enthusiasts who want full control, yet many homeowners prefer the built-in protections and simplified setup of Starlink’s default routing. If you’re trying to optimize coverage with a third-party router or need specialized firewall rules, understanding bypass mode helps you decide whether to stay in bypass mode or revert to router mode.
The WiFi Router Help team emphasizes that switching back to router mode should be done cautiously to prevent downtime and ensure you regain centralized control. Don’t skip steps or rush changes, as a small misconfiguration can disconnect devices or create double NAT scenarios that slow performance. This section sets the stage for a safe exit path that preserves your data security and network reliability.
What you’ll need before you start
Before exiting bypass mode, assemble essential tools and credentials. You’ll need a computer or smartphone with a browser or the Starlink app, plus your Starlink login credentials. If possible, export or back up the current settings in case you need to revert. A stable internet connection during changes minimizes the risk of mid-step drops. Optional but valuable items include an Ethernet cable for reliable wired access, a notebook to record new settings, and a plan for re-testing critical services (DNS, NAT, port forwarding, and Wi‑Fi coverage across all living spaces). Remember to keep cooldown time in mind after reboots to allow devices to re-establish connections.
Step-by-step overview (what happens in the process)
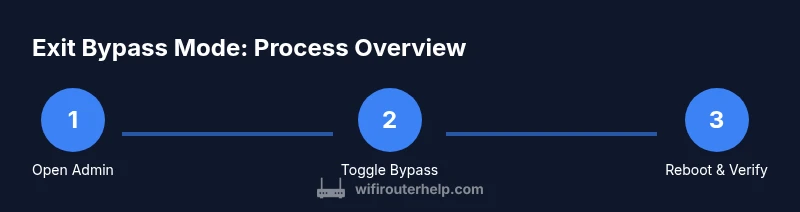
Exiting bypass mode is a structured process: prepare, implement router-mode configuration, and verify operation. This overview mirrors practical steps you’ll perform in the next section and helps prevent common missteps—like leaving the gateway half-configured or forgetting to reconnect clients after changes. The goal is to re-establish routing control on your primary device while keeping Starlink’s connectivity resilient. By following a clear sequence, you minimize downtime and ensure compatibility with existing network gear and smart home devices. The WiFi Router Help guidance here focuses on safe, reproducible actions rather than guesswork, with emphasis on verification after each major change.
Verifications and maintenance after exiting bypass mode
After bypass mode is disabled, confirm that your own router is handling routing duties and that devices obtain local IPs. Check firewall status, NAT functionality, and that DNS resolution works across wired and wireless clients. Test basic tasks such as streaming, video calls, and online gaming. If issues appear (double NAT, slow speeds, or dropped connections), revisit the router settings, check WAN IP assignment, and consider tweaks like MTU adjustments or UPnP configuration. Regular firmware updates for both Starlink hardware and your router help maintain stability. The goal is a dependable, secure home network with consistent coverage.
Authority references and further reading
For authoritative guidance on wireless routers, network security, and safe configuration practices, consult these sources:
- https://www.fcc.gov/consumers/guides/wireless-routers
- https://www.cisa.gov/publication/home-network-security
- https://www.nist.gov/topics/network-security
WiFi Router Help analysis shows that following established best practices reduces downtime and keeps your home network protected during changes.
Tools & Materials
- Laptop or smartphone with web browser(Use a wired connection if possible for stability during changes)
- Starlink app or web portal login credentials(You’ll need admin access to switch modes)
- Recent backup of current config (if exportable)(Having a backup helps you revert if needed)
- Ethernet cable (CAT6 recommended)(Useful for reliable wired access during changes)
- Notebook or notes app(Record new settings and outcomes for future reference)
Steps
Estimated time: 20-30 minutes
- 1
Open the Starlink admin interface
Connect a device to your Starlink network and launch the admin portal via the Starlink app or the web interface. Log in with your admin credentials and navigate to the Network or Bypass section to locate bypass-mode settings.
Tip: Ensure you are connected to the local Starlink network (not guest wifi) to avoid login issues. - 2
Check bypass status and back up current settings
Take screenshots or export the current bypass configuration if available. Document WAN settings, DNS you’re using, and any port-forward rules. This helps you revert if the switch doesn’t go as planned.
Tip: Having a clear snapshot makes rollback quick and safe. - 3
Switch to Router Mode (disable bypass)
In the bypass settings, toggle off bypass mode or select Router Mode. Apply changes and prepare for a reboot. This moves routing responsibilities back to your primary router.
Tip: Expect a reboot—don’t interrupt power during the process. - 4
Reboot both Starlink gateway and your primary router
Power cycle the Starlink gateway first, then your external router. Wait 2–4 minutes for each device to come fully online before testing connections.
Tip: A clean reboot reduces lingering configuration conflicts. - 5
Verify connectivity and services
Connect a client device to your home network and test internet access, DNS resolution, and any previously configured port-forward rules. Confirm VPNs, gaming, and smart-home devices operate correctly.
Tip: Record the new WAN IP and DNS settings after the changes.
People Also Ask
What is bypass mode on a Starlink router?
Bypass mode allows a separate router to handle routing duties by bypassing Starlink’s built-in NAT and firewall. This gives you more control but removes Starlink’s simplified security defaults. It’s typically used when you want to run your own router or a mesh system.
Bypass mode lets another router take over routing tasks, giving you more control but reducing Starlink’s built-in protections.
Can I disable bypass mode without losing internet connection?
Yes. You can disable bypass mode by switching back to Router Mode in the Starlink interface and rebooting devices. Your own router will then manage NAT and firewall. Some downtime may occur during the switch.
Yes, you can switch back to Router Mode with a short downtime during the reboot.
What if I can’t access the admin interface after the change?
Ensure you are connected to the local network, not a guest network. Use a wired connection if possible and retry the login. If you still can’t access, reboot the gateway and your device, then try again.
Make sure you’re on the right network and retry the login after a reboot.
Do I need to reset Starlink to factory settings after exiting bypass mode?
Usually not. A standard exit from bypass mode doesn’t require a factory reset. Only perform a factory reset if you encounter persistent misconfigurations that can’t be recovered by reverting changes.
A factory reset isn’t typically necessary unless you’re dealing with stubborn misconfigurations.
Will exiting bypass mode impact Starlink satellite connectivity?
Exiting bypass mode should not disrupt satellite connectivity; it may momentarily interrupt service during reboots. If you follow the steps, your satellite link should remain stable as your router regains control.
No long-term impact if you follow the steps; expect a brief restart period.
Watch Video
What to Remember
- Exit bypass mode to restore standard router control
- Verify NAT and firewall are active on your primary router
- Reboot devices in sequence to apply changes
- Test connectivity and essential services after switching