How to flush router: a practical, step-by-step guide
Learn to flush your router safely with a clear, step-by-step approach—from soft reboots to factory resets—and improve your home network performance, security, and reliability. Includes DNS considerations, device impacts, and troubleshooting tips.

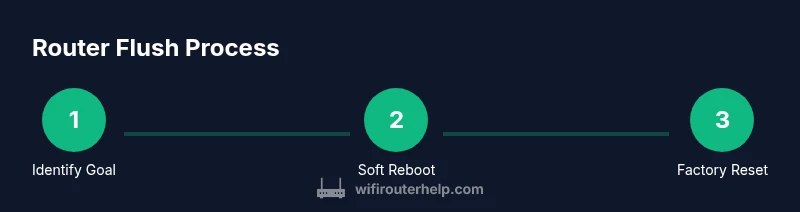
This guide explains how to flush your router safely, starting with a soft reboot and DNS cache refresh, then moving to more thorough options like a controlled reset if needed. You’ll learn what to back up, the exact steps, and how to verify improvements to keep your home network fast and reliable.
Why flushing a router matters
Flushing a router, in practical home-network terms, means refreshing the device's state to clear cached data, reset connections, and apply fresh configurations. In this guide on how to flush router, you'll learn how to safely reboot, clear DNS caches, and use a factory reset only when necessary. According to WiFi Router Help, a targeted flush plan reduces downtime and helps restore speed, reliability, and security. The WiFi Router Help team found that most slowdowns come from stale settings or firmware quirks, not hardware failure. By choosing the right method for your goal, you protect your devices and minimize the risk of losing important configurations.
Soft reset vs factory reset: choosing the right approach
Before you dive in, distinguish between soft resets (non-destructive, quick) and factory resets (restore factory defaults, erasing personal configuration). A soft reset clears ephemeral data and often fixes intermittent issues without changing your Wi‑Fi name or password. A factory reset should be a last resort when persistent problems remain after other steps. In many cases, a simple reboot or DNS flush resolves the issue. If you must reset, plan to reconfigure from backup and re-secure your network afterward. The choice depends on the root cause, downtime tolerance, and whether you can re-create your previous setup.
Step 1: define your flush goal and back up settings
Start by articulating the goal: do you want to clear DNS caches, refresh connections, or reset to factory defaults? Defining this helps you avoid unnecessary steps. Gather a backup of your current router configuration if supported by your device; this makes restoration easier after a reset. If you’re unsure, aim for a soft refresh first and reserve a factory reset for only when issues persist. Backups reduce the risk of losing custom names, passwords, and linked devices during the process.
Step 2: prepare your tools and access
Collect the items you’ll need before you start: a reset pin or paperclip to trigger a hard reset if needed, a powered outlet, a computer or mobile device to access the router admin page, and a browser with an updated session. If possible, connect a PC via Ethernet for stability. Ensure you know the router’s admin address (often 192.168.0.1 or 192.168.1.1) and have the admin credentials handy. Having these prepared minimizes downtime and confusion during the flush.
Step 3: perform a controlled soft reset (power cycle)
Power cycling is the gentlest flush option. Unplug the router from power, wait 60 seconds, then plug it back in. Allow the device to boot fully (usually 1–2 minutes). During this time, avoid pressing the reset button. A soft reset clears transient errors and can resolve many performance hiccups without altering Wi‑Fi settings. If your device supports a built-in reboot option in the admin UI, you can use that as an alternative to unplugging.
Step 4: log in to the router admin panel and inspect settings
After the router finishes rebooting, connect a device to the network and log in to the admin panel. Review basic settings like the Wi‑Fi name (SSID) and password, encryption (WPA2/WPA3), and the DHCP range. If your goal is a DNS flush, look for a DNS cache option in the advanced settings; not all routers expose this feature. If you spot obvious misconfigurations, correct them now to avoid repeating the issue after a full reset.
Step 5: flush DNS cache on the router (if supported) and test
Some routers offer a direct option to flush DNS caches or renew DHCP leases. If you see such an option, use it and then save/apply the changes. If there isn’t a DNS flush button, you can still renew the DHCP lease or reboot again to refresh cached values. After this step, test your browsing speed and DNS resolution by visiting a few websites and running a quick ping test to a known domain. This confirms whether the DNS data is refreshing as expected.
Step 6: flush DNS caches on client devices (optional but helpful)
Even with a router flush, individual devices keep DNS caches. On Windows, run ipconfig /flushdns in Command Prompt; on macOS, run sudo dscacheutil -flushcache and sudo killall -HUP mDNSResponder in Terminal; on iOS/Android devices, simply toggle Airplane mode off after a brief outage. Clearing client caches ensures you see the full benefit of the router flush. If you manage many devices, consider instructing users to restart those devices after the router step.
Step 7: factory reset if issues persist (last resort)
If soft resets and DNS refreshes don’t fix the problem, perform a factory reset. This erases all custom settings, including the SSID and passwords. Use a paperclip to press the recessed reset button for 10–15 seconds (or per manufacturer instructions) until the status lights flash. Before this, ensure you have a backup of configurations and know your ISP settings or login credentials for your modem if you use a separate modem. Do not unplug the router mid-reset and allow it to reboot fully after the press.
Step 8: reconfigure the router and restore backups
After a factory reset, reconfigure your router from scratch or restore a recent backup if you saved one. Set a new secure Wi‑Fi name and a strong password, enable essential security features (firewall, guest network isolation if available, and firmware auto-update), and re-import your saved configurations as appropriate. If you use a modem/router combo, ensure the correct bridge mode or IP passthrough settings are in place for your ISP. Reconnecting devices and applying QoS rules can help restore performance quickly.
Step 9: verify performance, security basics, and stability
With the flush complete, verify that the network meets your performance and security expectations. Run speed tests, check latency to common services, and confirm that devices can browse normally. Confirm that firmware is up to date and that the router’s password for admin access is strong. Finally, monitor for any unusual behavior over the next 24–72 hours and be prepared to revert steps if new issues appear.
Step-by-step recap: when to choose what
If you’re troubleshooting, start with a soft reset first. If that doesn’t help, try a DNS cache refresh or renewal of the DHCP lease. Only proceed to a factory reset if the issue persists after all non-destructive steps. This staged approach minimizes downtime and reduces the risk of data loss. Remember, your goal is a stable, fast, and secure home network.
Tools & Materials
- Reset pin or paperclip(Used to press recessed reset button for hard reset)
- Power outlet(Keep router powered during the procedure)
- Smartphone, tablet, or computer(Access the router admin page)
- Web browser(Navigate to router's admin interface (typically 192.168.x.1))
- Backup of settings (optional)(Export current configuration if supported)
- Ethernet cable (optional)(Direct connection to the router for stability during changes)
Steps
Estimated time: 60-90 minutes
- 1
Define flush goal
Clarify whether you want to clear DNS caches, refresh connections, or perform a full reset. A clear goal guides the scope of steps and avoids unnecessary actions.
Tip: Write down the objective before you begin to stay focused. - 2
Back up current configuration
If your router supports exporting settings, save a backup to a USB drive or cloud storage. This makes restoration simpler after a reset.
Tip: Include wireless name, password, and any custom DNS or QoS rules in the backup. - 3
Power cycle the router
Unplug the router from power, wait 60 seconds, then plug it back in. Let it boot completely before testing.
Tip: Avoid unplugging during the boot process to prevent partial resets. - 4
Log in to the admin panel
Connect a wired device if possible, open a browser, and enter the router's IP address. Verify admin credentials are current.
Tip: If you can’t reach the login page, check that you’re on the correct IP range and that the device is connected. - 5
Flush DNS cache via UI (if available)
Some routers provide a DNS flush option or lease renewal in advanced settings. Use it and save changes.
Tip: If a DNS option isn’t visible, proceed to the next steps; not all routers expose this feature. - 6
Flush DNS on client devices
Clear DNS caches on devices connected to the network to ensure you test fresh data after the router flush.
Tip: Use dedicated commands for Windows, macOS, iOS, and Android as appropriate. - 7
Factory reset if issues persist
Only perform a factory reset after non-destructive steps fail. This erases user settings, so prepare to reconfigure.
Tip: Note the default credentials and ISP login details you may need after reset. - 8
Reconfigure and restore backups
Reapply backup configurations or set up your network anew. Re-enable security features and firmware updates.
Tip: Change default passwords and enable automatic firmware updates where possible. - 9
Test and finalize
Run speed and latency tests, verify devices reconnect smoothly, and monitor for anomalies over the next 24–72 hours.
Tip: Document results to reference for future maintenance.
People Also Ask
What does it mean to flush a router?
Flushing a router means refreshing its state by clearing caches, rebooting, or resetting configurations to resolve performance or connectivity issues. It does not imply hardware damage and is a common maintenance task.
Flushing a router means refreshing its state—clearing caches and rebooting—to fix performance issues.
Can flushing fix all internet slowdowns?
Flushing can resolve many common issues caused by stale data or misconfigurations, but it may not fix problems caused by external service outages or hardware faults. Use it as part of a structured troubleshooting plan.
It fixes many common issues, but not all. If problems persist, check service status or contact your provider.
Will a factory reset erase my ISP settings?
A factory reset will erase all router settings, including custom DNS, passwords, and broadcast names. If you use a separate modem or ISP-specific configurations, note those details before resetting.
Yes, a factory reset wipes your settings. Save important details beforehand.
How long should I wait after reboot or reset?
Allow the router to fully reboot after each action—usually 1–2 minutes for a reboot and up to 5 minutes after a factory reset to re-establish connections.
Give it a couple minutes to boot and reconnect after resets.
Is it safe to flush my router while other devices are connected?
Yes. Soft resets and dns flushes are safe with devices connected. Avoid unplugging power during operations and perform a factory reset only when needed.
It's generally safe, but avoid unplugging during critical steps.
Watch Video
What to Remember
- Back up settings before resets to prevent loss.
- Prefer soft resets and DNS clears first; factory resets only if needed.
- Test connectivity and DNS after changes to confirm improvements.
- Keep firmware up to date for ongoing stability and security.