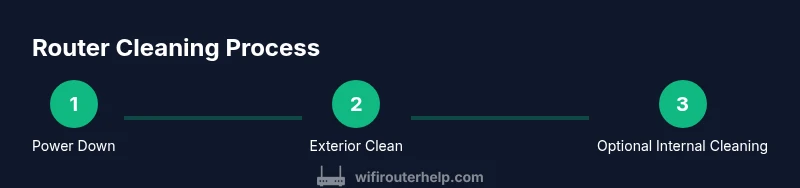
How to Clean a Router: A Practical Step-by-Step Guide
Learn how to clean your router safely to reduce dust buildup, prevent overheating, and extend its life with a practical, step-by-step maintenance routine you can perform at home.

By following this guide, you will learn how to clean a router safely, extend its life, and improve signal quality. You’ll clear dust from vents, wipe the exterior, and inspect ports without harming electronics. The process emphasizes power-down steps, gentle tools, and precautions to avoid liquid ingress or static damage. It’s a practical, maintenance-focused method for any home network.
Why Regular Router Cleaning Matters
Regular maintenance helps keep your home network reliable. According to WiFi Router Help, dust buildup and heat are major culprits behind slower speeds and intermittent drops. Cleaning the router isn't just about cosmetics; it reduces overheating, preserves ventilation, and can extend the device’s lifespan. A clean router also makes it easier to spot signs of wear, loose cables, or obstructed vents. By integrating a quick cleaning routine into your monthly tech care, you protect your investment and maintain consistent coverage throughout your home. This proactive approach aligns with best practices for maintaining a stable, high-performing network. The goal is to minimize heat buildup, which can degrade internal components over time and impact wireless performance across rooms.
Tools and Materials You’ll Need
Before you begin, assemble a small toolkit. Standard items:
- microfiber cloth (essential) — for wiping surfaces without scratching
- soft brush or camel-hair brush (essential) — to loosen dust from vents
- compressed air can (optional) — to dislodge stubborn dust (use upright and short bursts)
- isopropyl alcohol 70% (optional) — for light disinfecting on non-electrical surfaces
- cotton swabs (essential) — for tight crevices
- small screwdriver (PH0/PH1) (optional) — only if removing the back panel
- anti-static wrist strap (optional) — to minimize static risk
Notes: Avoid spraying liquids directly onto the router, never pour liquids into ports, and unplug the device completely before cleaning.
Safety First: What You Should and Should Not Do
Unplug and power down before you touch the router. Do not use water or household cleaners directly on the chassis. Damp cloths are best; never saturate. If your router is under warranty, opening the case may void coverage. Only proceed if you’re comfortable and the manufacturer guides allow it. Keep liquids away from ports and LEDs; avoid spraying near power ports. Ground yourself to avoid static discharge; work on a non-conductive surface. This safety-first approach protects you and your equipment while reducing the risk of damaging your network.
Exterior Cleaning: Dust, Grime, and Surfaces
Power off and unplug, then remove any attached cables carefully. Wipe the top, bottom, and sides with a dry microfiber cloth to remove surface dust. For stubborn grime, mist the cloth lightly with isopropyl alcohol or use a very light dampening, and wipe gently. Do not spray directly on vents or ports. Clean the vents with a soft brush and, if needed, a quick puff of compressed air to dislodge dust. Inspect LED indicators; keep them clean for visibility and avoid moisture near them. Pro tip: Always let the router return to room temperature before reconnecting power after cleaning.
Internal Cleaning: When and How to Open Your Router
Opening the case is optional and fraught with risk. If you decide to open, ensure you’re on the manufacturer’s terms. Remove screws on the back panel and gently lift the cover. Touch only the exterior frame and avoid touching circuit boards. Use compressed air to remove internal dust, keeping the can upright and performing short bursts. Do not shake or tilt the device while dusting. Place screws in a small container to prevent loss. If you are unsure about any step, skip it and rely on exterior cleaning as your maintenance approach.
Cleaning the Fans and Internal Components
If your router has a fan, keep the power off while cleaning. Use compressed air to blow dust away from blades, holding the can upright. Use a soft brush to reach around the fan housing. Wipe nearby surfaces with a lint-free cloth. Avoid contact with circuit boards or connectors. After cleaning, allow any moisture to evaporate fully before reassembly. If fan noise appears after cleaning, recheck mounting and ensure no loose screws contact the fan blades.
Reassembly and Testing
If you opened the case, reattach the back panel and tighten screws—do not overtighten. Reconnect cables and plug in the router. Wait a minute or two for the system to boot, then test your Wi‑Fi with a mobile device. Check the signal strength in multiple rooms and run a quick speed test. If the device feels unusually warm after restart, power down and recheck your steps. Ensure vents are unobstructed after reassembly to maintain airflow.
Troubleshooting Common Issues After Cleaning
If the router won’t power on, recheck power supply and outlets; ensure the power adapter is seated fully. If LEDs behave oddly, consult the manual; abnormal blinking can indicate errors or temperature protection. If performance is degraded, ensure air is circulating; reseat cables; confirm you didn’t dislodge a connector. If you still notice issues after a cleaning, consider scheduling routine cleanings and contacting support if hardware symptoms persist.
Maintenance Schedule and Long-Term Care
Create a simple calendar reminder to inspect your router monthly for dust. A quarterly cleaning focusing on vents and cables keeps your system refreshed. Place your router in an open, elevated location to improve airflow, away from heat sources and dense obstructions. Consider rotating positions if coverage varies by room and testing speeds after changes. This routine minimizes overheating and ensures more reliable performance over time.
Tools & Materials
- Microfiber cloth(Lint-free, dry or lightly damp as needed)
- Soft brush or camel-hair brush(For vent dusting)
- Compressed air can(Upright, short bursts)
- Isopropyl alcohol 70%(Dampen cloth lightly; avoid ports)
- Cotton swabs(For crevices near ports)
- Small screwdriver (PH0/PH1)(Only if removing back panel)
- Anti-static wrist strap(Optional safety measure)
Steps
Estimated time: 20-30 minutes
- 1
Power down and unplug
Ensure the router is powered off and all cables are disconnected. This protects you from shocks and prevents data loss while you work. Waiting a moment after unplugging helps discharge residual energy.
Tip: Take a photo of cable arrangement before removing to simplify reassembly. - 2
Prepare your workspace
Set up a clean, non-conductive surface with good lighting. Gather all tools within reach so you don’t interrupt the cleaning. Keeping screws in a labeled dish reduces loss risk.
Tip: Work on a static-free mat if possible. - 3
Dust exterior surfaces
Wipe the chassis, top, and sides with a dry microfiber cloth. If needed, very lightly dampen the cloth with isopropyl alcohol. Avoid moisture near LEDs and ports to prevent liquid ingress.
Tip: Use circular motions to lift dust without pressing into vents. - 4
Open the case (optional)
If you decide to open, locate the screws on the back panel and remove them carefully. Lift the cover only as far as needed to expose dusty areas, and avoid touching circuitry. Reassemble in reverse order after cleaning.
Tip: Check your warranty terms before opening; proceed only if comfortable. - 5
Blow out interior dust
Use compressed air to remove dust from interior surfaces. Keep the can upright and use short bursts; do not tilt or shake the device. Avoid touching any chips or connectors.
Tip: Hold the nozzle several inches away from components to prevent moisture spray. - 6
Clean the fans and housing
Direct a gentle puff of air at fan blades and housing to remove dust buildup. Do not touch spinning blades, and avoid applying solvent near electronics. Wipe nearby surfaces with a lint-free cloth after blasting dust.
Tip: If you can, hold the fan blades still while blowing dust loose. - 7
Reassemble and reconnect
Place the back panel, secure screws without overtightening, and reconnect cables. Allow the unit to sit for a minute before powering on. This ensures any residual moisture evaporates and components settle.
Tip: Power on and listen for normal fan startup and brief LED sequence. - 8
Test and monitor
Power on, verify that the router boots correctly, and run a quick speed test on a connected device. Check signal in multiple rooms and observe for unusual heat or noise. If issues arise, revisit cleaning steps or seek support.
Tip: Note any temperature or performance anomalies for future reference.
People Also Ask
Is it safe to open my router to clean the inside?
Opening carries risk and can void warranties. Only proceed if you’re confident and the manufacturer allows it. Exterior cleaning is usually sufficient for most users.
Opening a router can void warranties; proceed with caution, or focus on exterior cleaning.
Can I use water or alcohol to clean the router’s interior?
Liquids should not be used on internal electronics. Use compressed air and dry microfiber cloths, and only dampen surfaces lightly if needed away from ports.
Don’t use liquids inside the router; stick to dry cloths and compressed air.
How often should I clean my router?
Clean on a regular basis when you notice dust buildup near vents or when performance wanes. The frequency depends on your environment and usage.
Clean when you see dust or performance issues.
What are signs my router needs cleaning?
Visible dust around vents, overheating, muffled Wi-Fi, or frequent drops are signs that you should clean or inspect your router.
Look for dust, heat, or dropped connections as cues to clean.
Will cleaning void my warranty?
Opening the device or using non-standard tools may void some warranties. Check the manufacturer’s terms before proceeding.
Check your warranty terms before opening or modifying.
Should I use compressed air on electronics?
Yes, use compressed air in upright bursts from a distance to avoid moisture and damage. Don’t shake the can or use it on a hot device.
Air in short, upright bursts to blow out dust.
Watch Video
What to Remember
- Power down before any cleaning and unplug all cables.
- Use gentle tools and avoid liquids near ports.
- Exterior cleaning is low-risk; interior cleaning should be optional.
- Test connectivity after cleaning and monitor for issues.
- Establish a regular maintenance cadence to sustain performance.