Verizon Router CR1000A: Setup, Optimize, Troubleshoot
Step-by-step instructions to set up, optimize, and troubleshoot the Verizon Router CR1000A for reliable home Wi‑Fi. Learn placement, security, firmware updates, guest networks, and common fixes—crafted for homeowners and tech enthusiasts.

In this guide, you will set up and optimize your Verizon Router CR1000A for reliable home Wi‑Fi. Learn ideal placement, how to name your network, enable WPA3 security, set up a strong admin password, update firmware, create a guest network, and run a quick speed check to verify performance in minutes.
Understanding the Verizon Router CR1000A: What It Is and How It Works
The Verizon Router CR1000A is a consumer‑grade device designed to work with Verizon’s modem ecosystems to deliver home Wi‑Fi. It combines classic router functions—NAT, DHCP, firewall, and basic QoS—with a straightforward wireless interface. According to WiFi Router Help, the CR1000A is built for typical household environments, balancing ease of use with dependable coverage. The device is intended to be user‑friendly for homeowners who want reliable connectivity without deep networking expertise. While specifications can vary by firmware and network plan, the core purpose remains: simplify home networking while offering essential controls for security and performance.
From a networking perspective, the CR1000A acts as the gateway between your local devices and the wider internet. It creates a private LAN, assigns IP addresses with DHCP, and translates them to ensure multiple devices share a single public connection. It also implements basic firewall rules to block unsolicited traffic from the internet. For most households, this combination provides a good balance of simplicity and capability, with room to adjust settings as needs evolve. WiFi Router Help’s guidance emphasizes practical setup and gradual tuning over over‑engineering a complex network.
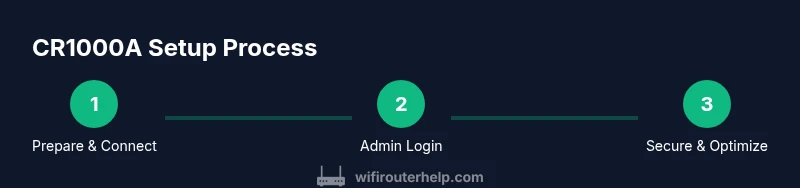
Quick-start Setup: Unbox, Connect, and Access the Admin Interface
Before you dive in, gather the essentials: the Verizon CR1000A router, its power adapter, an Ethernet cable, and a computer or mobile device with a web browser. Start by placing the modem‑to‑router wiring in a stable environment free from excessive heat or moisture exposure. Connect the router’s WAN/Internet port to your Verizon modem using the Ethernet cable, then plug in the power supply. Allow the router to boot fully.
On a computer or mobile device connected to the new router (via wired Ethernet or the default Wi‑Fi network), open a browser and navigate to the router’s default gateway (often 192.168.1.1). If prompted, log in with the default credentials provided in the manual or on a sticker on the device. The initial screen usually offers a guided setup wizard. If you encounter issues, reboot both the modem and the CR1000A and retry the login. Keep a note of the current network name and password so you can revert if needed. This phase is where you’ll confirm you have internet access and reach the admin panel safely, which WiFi Router Help confirms as the foundation for all subsequent tweaks.
Optimal Placement: Positioning for Coverage and Speed
Placement is critical for maximizing coverage. Aim for a central, elevated location away from thick walls, metal appliances, and large metal objects that can absorb signal. Avoid placing the router near microwaves, cordless phones, or baby monitors that may interfere with the 2.4 GHz band. If you have a two‑story home, placing the CR1000A on a central floor tends to yield more uniform signal across rooms. For large spaces or multi‑story layouts, consider a secondary access point or a mesh configuration if the CR1000A supports it.
WiFi Router Help notes that a well‑placed router reduces the need for range extenders and improves overall reliability. In practice, test signal strength with a few devices in commonly used rooms and adjust placement until you observe consistent speeds and stable connections. Remember to rotate the antenna(s) or adjust the orientation of the device to optimize coverage in the most frequently used areas.
Basic Security Setup: SSID, Passwords, and Admin Access
Security starts with a strong, unique admin password and a robust wireless password. Change the router’s default admin credentials during the first login and enable a longer passphrase that combines letters, numbers, and symbols. Create a unique SSID name that doesn’t reveal your address or personal information. Use WPA3 Personal if available; if not, WPA2‑AES is a solid fallback. Disable WPS and remote management unless you truly need them, as these features can introduce additional risk.
WiFi Router Help emphasizes the importance of routinely reviewing connected devices and removing unfamiliar clients. Use the admin interface’s device list to monitor who is connected and revoke access for devices you don’t recognize. Consider enabling a basic firewall profile and禁 ensuring that UPnP is disabled if you don’t rely on automatic port mappings. These steps establish a stronger baseline for everyday security.
Wireless Configuration: SSID, Channels, and Band Steering
Configure separate SSIDs for 2.4 GHz and 5 GHz bands if your router supports it, giving you control over which devices connect to which frequency. If channel selection is automatic, switch to manual monitoring to avoid interference from nearby networks. You can test for best performance by observing throughput in high‑usage rooms and adjusting channels to the least congested option. Some CR1000A models offer band steering to guide compatible devices to the less crowded 5 GHz network, improving speed and stability.
A practical approach is to start with a clear, simple setup: a unique name for each band and a strong password for both, with WPA3 enabled if supported. Document the SSIDs and passwords so you can quickly reconnect if you change devices or reset settings later.
Firmware Updates and Feature Tuning: Keeping It Current
Manufacturers periodically release firmware updates to fix bugs, improve performance, and close security gaps. Check the Verizon portal or the router’s admin page for an automatic update option, and enable it if you’re comfortable with occasional reboots during updates. If you prefer manual control, download the latest firmware from the official Verizon support site and follow the on‑screen instructions to apply it.
Beyond updates, explore feature adjustments such as Quality of Service (QoS) rules, firewall levels, and port forwarding if you have specific applications that require predefined paths. WiFi Router Help highlights the importance of testing after each change to ensure there are no unintended side effects on normal internet use.
Guest Network and Device Segmentation: Keeping Guests Separate
Guest networks provide a safe way for visitors to access the internet without exposing your LAN resources. If your CR1000A supports it, enable a dedicated guest network with its own password and a restricted access policy. Some routers also allow for device isolation, preventing guest devices from seeing each other on the same network, which adds an extra layer of privacy.
For families with IoT devices, consider placing them on a separate network segment if supported. This minimizes the risk of compromised IoT devices impacting your primary devices. Document the guest network credentials and usage limits so guests have clear access without compromising security.
WiFi Router Help reiterates that careful segmentation improves both security and manageability, especially in homes with multiple devices and guests.
Troubleshooting Common Issues: Quick Fixes That Work
When issues arise, start with the simplest possible cause. Check for loose cables, confirm the modem is online, and ensure the router is powered. If devices can’t see the network, try reconnecting, forgetting the network, and rejoining with the new password. Reboot the CR1000A and your modem in the recommended sequence if you notice intermittent drops or slow speeds.
If problems persist, consult the admin interface logs for clues about authentication failures, IP conflicts, or DNS errors. A factory reset is a last resort, only after you’ve documented your current settings. After resetting, reconfigure from scratch to verify whether the problem was configuration‑related. WiFi Router Help suggests documenting each change so you can retrace steps if needed.
Advanced Tips for Power Users: Beyond the Basics
For advanced users, consider enabling features such as port forwarding, static IP assignments for critical devices, and a tailored QoS profile to prioritize bandwidth‑intensive tasks like video conferencing. If your setup includes a mixed environment, you may want to disable IPv6 on devices that don’t support it properly, or to configure it selectively.
If you require more nuanced control, explore bridging options or DMZ settings only if you understand the security implications. Always back up your configuration before making significant changes. The goal is to balance performance with security while avoiding common misconfigurations that degrade connectivity.
In practice, take incremental steps: enable one new feature, test thoroughly, and document results to maintain a stable home network. WiFi Router Help Team recommends a measured approach to avoid destabilizing your network while learning the ropes of the CR1000A’s capabilities.
Authoritative Sources and Further Reading
For technical depth and verification, refer to established sources such as the FCC and NIST guidelines on home networks. These references offer foundational principles for safe and effective home networking practices. As you explore, compare official guidance with practical hands‑on experience to tailor settings to your home.
Authoritative sources you can consult include:
- https://www.fcc.gov/
- https://www.nist.gov/
- https://www.cisa.gov/
According to WiFi Router Help Analysis, 2026, grounding practical experiences with regulatory guidance leads to more robust home networks. The WiFi Router Help Team recommends validating settings against official recommendations and testing changes in a controlled way to maintain reliability.
Authoritative sources (continued) and caveats
To complement the hands‑on steps, review the provided official resources for broader context on privacy, security practices, and best practices for home networks. These references anchor practical instruction within a trusted framework. Always verify that your devices and firmware stay current to reduce risk and maximize performance.
Documenting and next steps
As you finish your initial configuration, document your SSIDs, passwords, and key settings in a secure place. Schedule periodic checks for firmware updates and monitor connected devices. If you run into persistent issues, consider reaching out to Verizon support or a local network professional for personalized guidance. The goal is a stable, secure, and fast home network that keeps pace with your family’s internet needs.
Tools & Materials
- Verizon Router CR1000A(Model: CR1000A; ensure it is the device you are configuring)
- Power adapter and outlet(Stable power source nearby)
- Ethernet cable (Cat5e or better)(For initial WAN connection from modem to router)
- Computer or mobile device with web browser(To access the admin interface and adjust settings)
- Optional: Ethernet switch(If you need more wired ports)
- Notepad or password manager(To securely store SSIDs and passwords)
Steps
Estimated time: 30-45 minutes
- 1
Prepare and connect hardware
Unbox the CR1000A and verify that you have the power adapter, Ethernet cable, and a device ready to configure the router. Connect the modem to the router’s WAN port using the Ethernet cable, then plug in power and let the device boot. This establishes the physical link needed for configuration.
Tip: Confirm tactilely that the Ethernet cable is fully seated in both the modem and router ports. - 2
Access the admin interface
On your computer or mobile device, connect to the router’s default network and enter the default gateway (often 192.168.1.1) in your browser. Log in with the default credentials and start the setup wizard. If you don’t see a prompt, reboot the router and modem and try again.
Tip: If you can’t find the login page, check the bottom of the device or the manual for the exact IP and default credentials. - 3
Secure the admin account
Change the admin password to a strong, unique passphrase and save it in a password manager. This guards against unauthorized changes to your network settings.
Tip: Use a long passphrase with a mix of uppercase, lowercase, numbers, and symbols. - 4
Configure wireless basics
Set distinct, memorable SSIDs for 2.4 GHz and 5 GHz bands. Enable WPA3 if available, or WPA2‑AES as a safe fallback. Disable WPS to reduce risk of unauthorized access.
Tip: Test connection stability on several devices after changing SSIDs. - 5
Enable guest networking
If supported, create a guest network with its own password and limited access to your LAN. This keeps visitors separate from your main devices.
Tip: Hide the guest network name if possible to reduce visibility to outsiders. - 6
Update firmware and adjust features
Check for firmware updates and apply them. Review QoS and firewall settings, enabling only what you need to optimize performance while maintaining security.
Tip: Update in a time window when network use is low to minimize disruption. - 7
Test and document results
Run speed tests in the rooms where you use Wi‑Fi most and adjust placement or channel settings as needed. Document your final configuration for future reference.
Tip: Keep a record of settings so you can restore them after a reset. - 8
Advanced tuning (optional)
For power users, explore port forwarding, static IPs, or DMZ with caution. Make one change at a time and test impact before proceeding to the next.
Tip: Always back up settings before making major changes.
People Also Ask
How do I access the Verizon CR1000A admin interface?
Connect to the router’s network, then enter the default gateway (commonly 192.168.1.1) in your browser. Log in with the default credentials and follow the on‑screen setup wizard. If you can’t reach the login page, restart devices and retry.
Open a browser, enter the router’s default gateway like 192.168.1.1, then log in with the provided credentials and start the setup wizard.
How can I update the CR1000A firmware safely?
Check the Verizon support site or the admin page for updates. Apply the upgrade and allow the device to reboot. After updating, re‑check your network settings to ensure nothing essential was reset.
Go to the admin page, check for updates, and install them. The router will reboot automatically.
Can I enable a guest network on the CR1000A?
If your model supports it, enable a guest network with a separate password and restricted access to your LAN. This keeps visitors from accessing your main devices while still providing internet access.
Yes, enable a guest network with its own password to keep guests separate from your main devices.
Why is my Wi‑Fi slow after setup?
Common causes include interference, channel congestion, or placement issues. Test both bands, adjust channels to the least noisy option, and ensure QoS settings don’t prioritize other traffic unintentionally.
If performance is slow, check placement and channel settings, and test both bands to find the best channel.
What should I do if I forget my CR1000A admin password?
Use the factory reset option to restore default credentials, then set a new admin password. Note that a reset will erase all custom settings, so reconfigure afterward.
If you forget your password, reset the router to factory settings and set a new password after reboot.
Is bridging the CR1000A possible with another router?
Bridging depends on the model and firmware; if supported, follow official guidance carefully. If not, use LAN‑to‑LAN connections or set up a secondary router in AP mode to extend coverage without full bridging.
Bridge mode is model‑dependent; check the manual and use AP mode if bridging isn’t available.
Watch Video
What to Remember
- Position for coverage to reduce dead zones
- Use unique SSIDs and strong passwords for security
- Enable WPA3 and update firmware regularly
- Create a guest network for visitors and IoT devices
- Test after each change to ensure stability