UniFi Dream Router 7: Setup, Optimization, and Troubleshooting
Comprehensive step-by-step guide to configure, optimize, and troubleshoot the UniFi Dream Router 7 for a fast, reliable home network. Learn provisioning, VLANs, guest networks, security settings, and firmware maintenance for stable performance.

You’ll learn how to set up, optimize, and troubleshoot the unifi dream router 7 for a fast, reliable home network. This step-by-step guide covers initial provisioning, VLANs, guest access, firewall settings, and firmware maintenance. Follow the instructions to maximize throughput, minimize interference, and keep your network secure and stable. This primer also helps you prepare for hands-on setup with confidence.
Why the unifi dream router 7 matters for home networks
According to WiFi Router Help, the unifi dream router 7 is designed to simplify home networking by combining routing, firewall, and wireless access in a single device. This all-in-one approach helps homeowners reduce equipment clutter while maintaining centralized control through the UniFi Network app. Whether you have a small apartment or a growing house with multiple smart devices, the DR7 can improve management, visibility, and reliability across your LAN. Throughout this guide, the emphasis is on practical steps, safe defaults, and scalable configurations you can adjust as your needs evolve. By focusing on real-world use cases, you’ll learn how to tailor features like guest networks, device-level access control, and automated backups to your household routine.
Core features of the UniFi Dream Router 7
The Dream Router 7 is presented as a compact, all-in-one networking appliance that combines a high-performance router, a built-in firewall, and a wireless access point. It runs UniFi OS with a built-in Network Controller, allowing you to manage network settings from a single dashboard. Expect centralized monitoring, simple device adoption, and intuitive guest portal management. For households with multiple smart devices, the DR7 supports essential security options such as threat management, firewall rules, and secure remote access, all designed to reduce complexity without sacrificing control. While specifications can evolve, the overarching value remains a cohesive, scalable solution that grows with your home network.
Planning your network layout for best results
Effective network planning starts with a central, elevated location for the Dream Router 7 to minimize dead zones and interference. Avoid placing the device inside cabinets or behind metal objects. Consider a simple floor plan where the main router sits near the broadband entry and distributes WiFi evenly toward living spaces. If you anticipate high traffic from streaming, gaming, or work-from-home tasks, map out a separate SSID for 2.4 GHz and 5 GHz and assign critical devices to the faster band. Lastly, decide whether you’ll use VLANs to separate IoT, guest, and primary devices—this decision guides security rules and traffic shaping later in the setup.
Getting started: a practical provisioning checklist
Before you start, assemble the required hardware and apps, create a UniFi account, and calibrate expectations for speed and range. Ensure your modem or gateway is powered and connected to a working internet source. Install the UniFi Network app on a mobile device, then prepare to adopt the DR7 through the app’s provisioning flow. Take a moment to confirm WAN settings provided by your ISP (DHCP or static address) and decide on initial network names and passwords. This foundation keeps later tweaks organized and reduces rework during the adoption process.
Security, VLANs, and guest access best practices
Security starts with strong credentials, enabled two-factor authentication, and a thoughtfully configured firewall. For most homes, leaving UPnP disabled reduces exposure to exploits. VLANs are a powerful tool for isolating devices like cameras, IoT gadgets, and guests from your main network without sacrificing performance. Start with a simple layout (MainLAN and GuestLAN) and progressively segment IoT devices if you encounter unusual traffic patterns. Don’t forget to enable WPA3 where available and to apply recommended security profiles from the UniFi OS to maintain baseline protection.
Maintenance and troubleshooting routines
Routine maintenance keeps the DR7 performing optimally. Regularly check for firmware updates via the UniFi Network app and back up current configurations before applying updates. If you experience slow speeds, verify channel usage, spectrum congestion, and potential interference from neighboring networks. Rebooting the device can resolve transient glitches, but always confirm that configuration changes persist after reboot. Finally, maintain a simple disaster-recovery plan: export settings and document your WAN details so you can restore configurations quickly if needed.
Real-world usage scenarios and optimization tips
In compact homes with a single floor, the DR7 can often deliver strong coverage from a central location. In multi-story homes, consider placement near the center of activity or using a mesh-backed approach with wired uplinks where possible. For households with heavy streaming, gaming, and video conferencing, tune QoS rules to prioritize latency-sensitive traffic. Regularly monitor client counts and adjust guest network limits to preserve overall performance. With disciplined optimization, the unifi dream router 7 can sustain high throughput while keeping devices secure and well organized.
Tools & Materials
- UniFi Dream Router 7(The central device with built-in power adapter)
- Ethernet cable (Cat6 or better)(1-2 meters or longer; use straight-through for WAN)
- Smartphone or tablet with UniFi Network app(iOS or Android; ensure app is up to date)
- Modem or gateway from ISP(Connects to WAN port of the DR7)
- Optional PoE switch(Adds extra LAN ports if you plan to expand wired devices)
- UPS or reliable power source(Minimizes downtime during power outages)
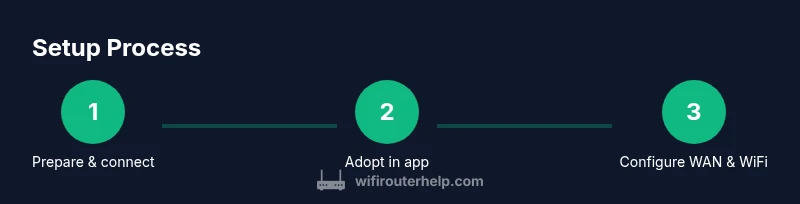
Steps
Estimated time: 40-60 minutes
- 1
Unbox and connect the DR7 to your modem
Unbox the Dream Router 7 and attach the WAN port to your modem with Ethernet. Plug in power and wait for the LED to indicate readiness. This establishes the path for all network traffic and ensures the device is discoverable by the app.
Tip: Have the modem powered on prior to DR7 hookup, and use a straight-through Ethernet cable for the initial link. - 2
Install the UniFi Network app and create an account
Download the UniFi Network app from your platform’s store. Create a new account or log in with an existing one to begin provisioning your DR7. The app will guide you through device discovery and adoption.
Tip: Use a strong password and enable two-factor authentication to protect your network control plane. - 3
Adopt the DR7 in the app
Within the app, locate the new device listed as pending adoption and approve it. Adoption grants the app control over the DR7’s configuration and future updates.
Tip: If the device doesn’t appear, ensure your phone is on the same LAN and try toggling airplane mode off/on to refresh network discovery. - 4
Configure WAN and Internet settings
Set WAN type to DHCP or Static as provided by your ISP. If your ISP requires VLANs, enter the VLAN ID in the WAN settings. Verify internet connectivity after applying changes.
Tip: If unsure about VLAN IDs, start with DHCP and add VLANs only when you have a confirmed requirement. - 5
Create WiFi networks and guest access
Create separate SSIDs for 2.4 GHz and 5 GHz bands. Add a dedicated Guest network and enable WPA3 where available for enhanced security. Assign devices to their appropriate networks for better performance.
Tip: Keep main network passwords unique and avoid sharing guest passwords with IoT devices to minimize attack surfaces. - 6
Enable security features and firewall rules
Enable the built-in firewall and configure basic rules to block unsolicited inbound traffic. Review and tailor firewall policies to your home layout. Consider turning off UPnP unless you need it for specific devices.
Tip: Test your rules with a trusted device to confirm legitimate connections aren’t unintentionally blocked. - 7
Update firmware and back up configuration
Check for firmware updates in the UniFi Network app and apply them. After updating, back up your current configuration to preserve settings for quick recovery.
Tip: Schedule regular firmware checks and keep a separate backup copy offline if possible.
People Also Ask
Is the UniFi Dream Router 7 suitable for small homes?
Yes. The DR7 combines routing, firewall, and access point features in one device, making it convenient for small households. It’s a strong all-in-one solution for most home setups.
Yes. The Dream Router 7 is a compact, all-in-one device great for small homes.
Can I use the DR7 with my existing mesh networks?
The DR7 can function as the primary router and gateway, and you can still use mesh extenders if needed. If you require full mesh with another system, you may disable the DR7’s built-in wireless to integrate with your setup.
You can use it as your main router and gateway, and still add mesh extenders if needed.
What speed should I expect on a gigabit plan?
Real-world speeds depend on your ISP, devices, and network layout. The DR7 supports high throughput, but actual speeds vary; run a speed test after setup to verify performance.
Expected speeds depend on your network; test after setup to verify.
Do I need VLANs for home networks?
VLANs are optional for most homes but useful to separate IoT, guests, and main devices. Start with a simple setup and add VLANs if needed.
VLANs are optional but helpful for separation; start simple.
How do I update firmware safely?
Update firmware from the UniFi Network app, preferably over a stable connection. Back up configuration before applying updates.
Update firmware from the app and back up your settings first.
What should I do if the DR7 won’t adopt?
If the DR7 won’t adopt, ensure it’s in setup mode, your phone is on the same network, and try restarting the device and app.
If adoption fails, restart the device and app and ensure setup mode.
Watch Video
What to Remember
- Plan network layout before setup and document WAN details.
- Separate main and guest networks for security and performance.
- Keep firmware updated and back up configurations regularly.
- Test performance after setup and adjust QoS as needed.