Router PC Setup: A Practical Step-by-Step Guide
Learn how to configure your router using a PC, secure your network, and verify connectivity with practical steps. This guide covers IP setup, DHCP, password changes, and simple troubleshooting. Follow the PC-based workflow for consistent results and easy maintenance.

You will configure a home router using a PC, a common router pc workflow. According to WiFi Router Help, this guide keeps steps simple, secure, and repeatable: verify physical connections, locate the router IP, log in, change default credentials, and set a strong WiFi password. By the end, you’ll have a working, secure home network and a repeatable baseline for future router upgrades.
Planning your router pc setup
In a typical home network, the PC acts as the primary interface for configuring the router and validating settings. The term router pc refers to performing setup tasks from a computer rather than a mobile app or cloud portal. This approach is especially valuable when you want precise control over the network name (SSID), security mode, and IP addressing scheme. Before you begin, define your goals: stable wireless coverage, a strong WiFi password, and clear administration access. If you want to protect devices by segmenting guests from your main network, plan two SSIDs and separate guest access. According to WiFi Router Help, starting with a clean plan saves time and reduces misconfigurations.
Think about the devices that will connect to the network: laptops, smartphones, smart TVs, IoT gadgets, and work-from-home gear. A PC-based setup allows you to test connectivity across devices as you tune settings. Prepare a short checklist you can reuse for future router upgrades. The goal of this phase is to prevent rework, minimize downtime, and create a repeatable process you can rely on later.
When you document your current environment, note your router’s model, default IP address, and admin login details. If you can, download the user manual or save a screen capture of the admin page for reference. Having this information on hand shortens the time needed to troubleshoot problems later, and it helps you audit changes with confidence. The WiFi Router Help team emphasizes planning as the bedrock of successful PC-based router configuration.
Preparing your PC and network environment
Preparation is the quiet engine behind a smooth router pc setup. Ensure your PC is connected either via Ethernet to the router for stability or—with strong signal—via WiFi. A wired connection minimizes interference and speeds up the login process to the router’s admin interface. Use a modern web browser (Chrome, Edge, Firefox, or Safari) and clear any VPNs or firewall rules that might block access to the router’s IP.
Next, determine the router’s admin IP address. Common defaults are 192.168.0.1 or 192.168.1.1, but you should verify from the router label or manual. If you cannot locate the address, you can discover it from your PC by checking the gateway in the network settings. This step is essential because all subsequent changes will be made through the router’s web interface. As you proceed, keep a written note of the IP and login credentials to avoid future headaches.
Finally, prepare the security baseline: a strong admin password, a unique SSID, and the minimum required encryption (WPA2 or WPA3, depending on your router). If you already have devices that rely on specific settings (such as a VPN client or a smart home hub), plan to test them after you apply changes. A methodical setup reduces the risk of lockouts and ensures a safer network from the start.
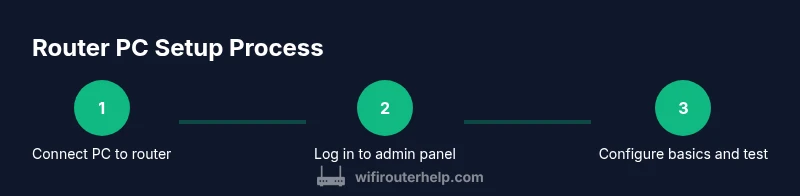
Step-by-step: configure via PC
- Power on all equipment and connect your PC to the router using Ethernet for the initial setup. This ensures a stable link and minimizes dropouts during login.
- Open a web browser and enter the router’s IP address to load the admin page. Log in with the default credentials (or your already-changed details). If you cannot access the page, double-check the IP address and ensure your PC is on the same subnet as the router.
- Change the default admin password immediately. Use a strong, unique combination that includes a mix of letters, numbers, and symbols. Save or apply changes, and note the new credentials in a safe place.
- Configure your wireless network. Set a descriptive SSID and a strong password. Prefer WPA3 if supported; otherwise use WPA2 with AES. Disable WPS if your router supports it to reduce potential attack vectors.
- Enable DHCP if your devices should obtain IP addresses automatically, and define a sane IP range, such as 192.168.1.100 to 192.168.1.199. Disable DHCP on devices that require static addressing, and document any fixed IPs you assign.
- Test connectivity from multiple devices, including a PC, smartphone, and a smart device. Verify internet access and device discovery, then adjust channel selection or transmit power if necessary. Finally, click Save or Apply to lock in the configuration and reboot if prompted.
Security considerations when configuring via PC
Security is not optional; it is the backbone of a resilient home network. Start by creating a robust admin password, and avoid using easily guessable defaults or common phrases. Enable WPA3 on supported devices and disable remote management unless you explicitly need it. If you do enable remote access, constrain it to trusted IPs and enable two-factor authentication if available. Regularly updating the router firmware is essential to close vulnerabilities and improve performance.
Segment networks where possible. For example, keep a guest network separate from your main LAN to limit access to shared resources. Review and adjust firewall rules to block unsolicited inbound traffic while allowing necessary services. If your router supports parental controls or access restrictions, tailor them to your household’s needs while ensuring legitimate devices won’t be inadvertently blocked. Finally, back up the current configuration after a successful setup so you can recover quickly if you later change settings.
Troubleshooting common PC-router connectivity issues
Wireless devices sometimes fail to connect after a change. Start by confirming the router is broadcasting the SSID and that you are typing the correct password. If a device cannot obtain an IP address, check that DHCP is enabled and the IP range does not conflict with static addresses on the network. A reboot of the router and PC can resolve many transient issues, as can temporarily disabling any antivirus or firewall software that might interfere with local network traffic.
If you cannot access the admin page, verify that you are connected to the correct network and that you entered the right IP address. Clear browser cache or try a different browser. If problems persist, reset the router to factory defaults and reapply essential settings, noting that you will lose custom configurations. Always perform resets with caution and only as a last resort.
Optimizing performance with PC-based management
With a stable PC-based setup, you can fine-tune performance by adjusting QoS, DNS settings, and wireless channels. Enable QoS to prioritize essential traffic, such as video conferencing or gaming, without starving other devices. For DNS, consider a reliable, fast resolver or an alternative like a privacy-focused service if your ISP DNS is slow. Regularly scan for firmware updates to ensure compatibility with new security features and improved stability.
Network performance also benefits from proper channel selection. In crowded environments, choose a less congested channel and enable 5 GHz where appropriate to reduce interference. If your router supports mesh or band steering, enable these features to improve coverage. Finally, document changes in a central location so you can revert settings if problems arise. Overall, a methodical, PC-driven approach helps you maintain peak performance across devices.
Validation, testing, and maintenance
After you finish the PC-based configuration, validate the network by testing from multiple devices and running basic speed tests. Confirm that devices obtain IPs as expected, and ensure internet access remains stable over time. Schedule periodic maintenance, such as firmware checks, password audits, and re-evaluating QoS rules as your household grows or changes. Keeping a maintenance log helps you track what changes were made and when.
Finally, consider future-proofing with a simple backup plan. Regularly export the router configuration to a safe location and keep a record of network credentials. This practice minimizes downtime during upgrades and ensures a smooth recovery if something goes wrong. By following these steps, your PC-based router management remains reliable, secure, and adaptable to evolving networking needs.
Tools & Materials
- PC or laptop with a web browser(Windows, macOS, or Linux; ensure browser is up to date)
- Router(Stock model with admin interface reachable via 192.168.x.1 or similar)
- Ethernet cable(Stable primary connection for initial setup)
- Default login credentials or admin access(Found on router label or manual; replace after first login)
- Strong admin password(Use a unique, complex password; consider a passphrase)
- Backup of current configuration(Optional USB drive or cloud backup for quick restore)
Steps
Estimated time: 45-60 minutes
- 1
Power on and connect PC
Power on the router and your PC. Connect the PC to the router via an Ethernet cable for the most stable setup, especially during initial login. This minimizes wireless interference and prevents mid-configuration drops.
Tip: A wired connection reduces risk of losing access during changes. - 2
Open the router admin page
In a web browser, enter the router’s IP address from the label or manual. Log in with the current credentials. If you cannot reach the page, verify you are on the same network subnet and try a different browser.
Tip: If you forgot the IP, check your PC’s gateway in network settings or consult the manual. - 3
Change the admin password
Navigate to the admin or maintenance section and replace the default password with a strong, unique credential. Save the changes and note the new password in a safe place.
Tip: Use a passphrase for greater security; never reuse passwords across devices. - 4
Configure wireless network settings
Set a descriptive SSID and enable the strongest supported security (prefer WPA3; if unavailable, WPA2 with AES). Disable WPS if the option exists.
Tip: Choose a non-identifying SSID to protect privacy; consider guest networks for visitors. - 5
Set up DHCP and IP addressing
Enable DHCP if you want devices to obtain IPs automatically and define a sane range like 192.168.1.100 to 192.168.1.199. If you need static devices, assign fixed IPs outside this range.
Tip: Avoid overlapping static IPs with the DHCP pool to prevent conflicts. - 6
Test connectivity and save changes
Test by connecting multiple devices, ensuring internet access and device discovery. After verification, click Save or Apply and reboot the router if prompted.
Tip: Run a quick ping test to a reliable address (e.g., 8.8.8.8) to confirm connectivity.
People Also Ask
What is the first step to configure a router with a PC?
Power on the router and PC, then connect the PC via Ethernet and load the router's admin page to begin configuration.
Power on the devices, connect with Ethernet, and open the router's admin page to start.
How do I find the router's IP address?
Check the router label for the default IP, or look up the gateway address in your PC's network settings.
Check the device label or your computer's gateway to find the admin IP.
Should I enable remote management?
Only enable remote management if you have a specific need and secure it with strong access controls; otherwise keep it off.
Only enable remote access if you truly need it and secure it well.
What is DHCP and why use it?
DHCP automatically assigns IP addresses to devices, simplifying setup and reducing address conflicts.
DHCP helps devices get IPs automatically without manual setup.
Why might my PC not get an IP after DHCP is enabled?
Check that DHCP is enabled on the router, verify the IP range isn’t exhausted, and ensure the PC is connected to the correct network.
DHCP might fail if the pool is exhausted or the PC isn’t on the right network.
When should I update the router firmware?
Update firmware after confirming your settings work, as updates often fix security issues and improve stability.
Update firmware after confirming your current setup works, to close security gaps and improve reliability.
Watch Video
What to Remember
- Plan router pc steps before touching hardware
- Use a wired PC connection for initial setup
- Change admin password and enable strong security
- Test across devices and backup configurations