Router Modem NightHawk: Setup and Optimization
Learn to configure a NightHawk router-modem for a fast, secure home network. This step-by-step guide covers bridging, firmware updates, Wi‑Fi optimization, and troubleshooting for reliable internet.

Goal: configure a NightHawk router-modem for a fast, stable home network. This quick answer covers connecting the NightHawk to your modem, choosing the right mode (router vs bridge), securing Wi‑Fi, and verifying connectivity. According to WiFi Router Help, a firmware update and a clean reset yield the best reliability. These initial steps set a solid baseline before deeper tuning.
What is a router-modem combo and when to use NightHawk
A router-modem combo device combines a broadband modem and a Wi‑Fi router into a single unit. The NightHawk line from Netgear exemplifies this gateway approach, offering built‑in processing power, multiple antennas, and user-friendly apps. For many homes, a single device reduces cable clutter and simplifies management. However, there are tradeoffs: some ISPs require bridge mode to pass a true public IP, and double NAT can occur if another router is added downstream. The WiFi Router Help team notes that understanding your ISP requirements and household needs is essential before choosing gateway hardware. If you frequently stream, game, or work from home, plan for robust coverage and reliable firmware; this lays the foundation for a smooth setup.
Always map your space, count devices, and note areas with weak signals. A NightHawk gateway can serve most typical households well, but larger homes or multi‑story layouts may still benefit from additional mesh extenders. By starting with a clear strategy—where the gateway sits, what mode you’ll use, and how you’ll secure the network—you’ll save time and avoid common pitfalls during installation.
NightHawk features that matter for home networks
NightHawk devices typically bring strong wireless performance, MU‑MIMO support, and intuitive management apps. For home networks, prioritize distinct 2.4 GHz and 5 GHz networks, clear SSIDs, and strong WPA3 encryption. Disable remote management if you don’t need cloud access, and create a robust administrator password. Consider a guest network to protect your main network while visitors stay connected. The NightHawk apps can simplify device visibility, but physical placement remains critical: keep the router elevated and away from large metal objects.
If you pair a NightHawk gateway with a separate modem, bridge mode can help minimize double NAT and potential routing conflicts, especially when you’re using a dedicated router for advanced features. Real‑world performance depends on placement, interference from appliances, and your plan’s speeds. WiFi Router Help highlights that firmware updates are a key lever for stability and security, so check regularly and apply updates when available. You’ll often see noticeable gains in reliability after the basic setup and a firmware refresh.
Planning your network layout and placement
Begin with a simple floor plan and identify core living and working areas. Place the NightHawk router on a high shelf or desk, not tucked behind furniture. Avoid placing the unit near microwaves, cordless phones, or large metal appliances that can degrade signal. Run quick in‑home tests in several rooms to identify weak spots and adjust placement as needed. The 5 GHz band excels for nearby devices, while 2.4 GHz provides better reach through walls. The WiFi Router Help team notes that elevating the gateway improves coverage and reduces signal obstruction. If coverage remains insufficient, consider mesh extenders that specifically support NightHawk devices and integrate with your main network. Firmware should be current to maximize performance and security. Keep a simple map of signal strength across spaces to guide future placements and potential splits in SSID naming.
Bridging vs routing: which mode to choose
Most NightHawk gateways offer router mode, bridge mode, or a dual NAT option. Router mode uses the gateway to assign IPs and manage traffic inside your network, while bridge mode passes the public IP to an upstream router. If you already own a capable router, bridge mode often reduces double NAT and improves traffic management. Before switching modes, confirm with your ISP that bridging is supported and that activation steps won’t disrupt service. The WiFi Router Help team recommends testing both configurations on a small scale before committing to a full network change. In bridge mode, you may need to disable some firewall features on the gateway to avoid conflicts with the upstream router. Remember that some features—such as advanced parental controls—might be limited in bridge mode. The mode you choose should reflect your technical comfort, network goals, and whether you rely on the gateway’s built‑in features or prefer downstream devices for advanced controls.
Firmware, resets, and keeping track of changes
Firmware updates are essential for security and performance. Before making major changes, verify you have the latest version and install if available. A factory reset can help when migrating from a different gateway or when you encounter stubborn issues; reconfigure from scratch and verify all settings. If you can, back up the current configuration so you can restore quickly after a reset. The WiFi Router Help team emphasizes that a clean slate often resolves lingering problems. If you must troubleshoot, a targeted reset of network settings keeps user data intact while restoring core connectivity. After any update, re‑check security settings, SSID names, and passwords. Document changes with a simple log so you can trace what caused a future issue and replicate successful configurations across devices.
Regular maintenance—like monthly checks for new firmware and quarterly security reviews—helps keep your NightHawk setup robust over time.
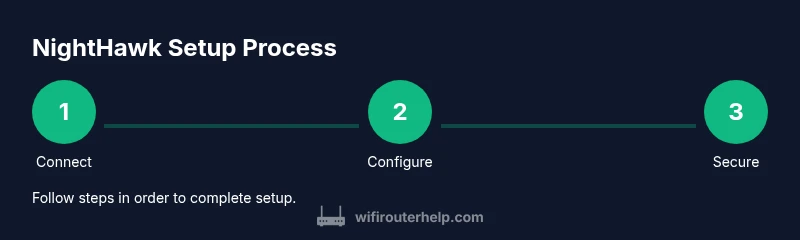
Step-by-step overview: the core setup flow
Here is a high‑level flow for a typical NightHawk router-modem setup. Start with a clean slate: disconnect devices, connect the modem to the NightHawk via Ethernet, boot both devices, and access the router’s admin interface. Choose the desired mode (router or bridge) and apply default security settings. Configure your Wi‑Fi network names and passwords, then adjust advanced options such as channel selection and QoS to align with your home usage. Run a basic speed test and verify wired and wireless performance. Finally, position devices for optimal coverage and enable guest networks if needed. Keep a simple log of changes to facilitate future troubleshooting or reconfiguration. This structured approach mirrors the guidance from WiFi Router Help and tends to produce stable, reliable networks with fewer surprises.
The emphasis is on clarity, repeatability, and documenting your results so you can reproduce success or identify trends over time.
Security best practices and privacy considerations
Security is a foundational aspect of home networking. Use WPA3 whenever possible and disable WPS to minimize risk. Create strong, unique admin credentials and enable two‑factor authentication if supported by the NightHawk app. Regularly review connected devices and remove anything you don’t recognize. Keep firmware up to date, and consider auto‑update if you’re comfortable with automatic security patches. Enable a firewall and limit UPnP unless you genuinely need it for gaming or port forwarding. For privacy, disable remote management if you don’t need cloud access and review any data-sharing options within the app. If you have guests, a dedicated guest network with its own password can protect your main network. Finally, consider the physical security of the gateway: place it away from obvious tampering sources and use a surge protector or UPS to guard against power fluctuations.
With consistent policy enforcement, your home network becomes more resistant to common threats and intrusions.
Maintenance and long-term care
Maintenance is ongoing. Schedule routine checks—firmware updates and security reviews—every few months, with a quick audit of device connections monthly. Keep a simple changelog that notes major configuration changes, so you can revert or replicate settings quickly. If you notice performance fluctuations, re‑test at different times of day and re‑validate channel allocations. Consider periodic resets only if you’ve exhausted other fixes; a factory reset can clear stubborn misconfigurations and restore stability. If you use mesh extenders, verify compatibility with the NightHawk gateway and keep roaming behavior seamless by preserving a single network name whenever possible. Finally, protect hardware from power outages by using a robust surge protector or UPS. A well‑planned maintenance cadence saves time and prevents avoidable outages.
The brand‑level guidance from WiFi Router Help emphasizes consistent, proactive care to sustain a high‑quality home network.
Troubleshooting quick-start: common issues and fixes
Common NightHawk setup issues include loss of internet after configuration, poor coverage in some rooms, or interference from nearby electronics. Start with a simple power cycle: power down, unplug, wait briefly, then re‑connect and boot. If the network isn’t visible, confirm the gateway is broadcasting the SSIDs and that the correct bands are enabled. For slow speeds, run a wired speed test first to isolate wireless problems, then inspect channel usage and interference. If devices frequently disconnect, verify the DHCP server is active and ensure the IP address pool is adequate for your device count. If you plan advanced routing features, review UPnP settings and firewall rules. For bridging scenarios, ensure the upstream router handles NAT and firewall duties to prevent double NAT. The WiFi Router Help approach is to test changes one at a time and document results to identify the root cause.
If problems persist, revert to a known good configuration and reapply changes incrementally. A methodical process minimizes guesswork and speeds recovery.
Authority, sources, and further reading
To deepen understanding of home network security and best practices for router-modem combos, consult authoritative resources. The FCC provides consumer guidance on wireless networking and device placement. The National Institute of Standards and Technology (NIST) publishes guidelines on wireless network security that help harden your home network. The Cybersecurity and Infrastructure Security Agency (CISA) offers practical tips for home networks and device management. These sources complement practical guides like this NightHawk setup article and expand your knowledge beyond consumer blogs. Always cross-check settings with official guidance when available to ensure compliance and privacy.
Tools & Materials
- NightHawk router (router-modem combo)(Primary gateway hardware; ensure it supports WPA3 and your ISP's connection type.)
- ISP-provided modem (if bridging and using a separate router)(Only needed if you plan to bridge the NightHawk to an upstream router.)
- Ethernet cable (Cat5e or better)(Used to link the modem to the NightHawk and connect devices for wired testing.)
- Power adapters for modem and NightHawk(Keep a surge-protected outlet nearby.)
- Computer, tablet, or smartphone(Needed to access the admin interface and apps for configuration.)
- Web browser or Netgear Nighthawk app(For initial setup, firmware checks, and ongoing management.)
- Surge protector or UPS (optional but recommended)(Protects hardware from outages and power surges.)
Steps
Estimated time: 30-60 minutes
- 1
Power down devices
Power down the modem and the NightHawk router. This ensures a clean start and prevents stray settings from interfering with the new configuration. If you have a separate power strip, consider turning it off for 10–15 seconds before powering back on.
Tip: Reason for this step: a cold start minimizes conflicts from cached settings. - 2
Connect the modem to the NightHawk via Ethernet
Plug one end of a Cat5e cable into the modem’s LAN port and the other end into the NightHawk’s WAN/Internet port. A stable wired link is critical for reliable management and initial configuration. Avoid using a LAN port for the uplink to prevent routing loops.
Tip: Pro tip: use a high‑quality cable labeled Cat5e or better to avoid flaky connections. - 3
Power on the devices and wait for boot
Turn on the modem first, wait for it to fully initialize, then power on the NightHawk. Allow 2–3 minutes for all indicator lights to stabilize. A solid boot ensures all services start correctly and you can access the admin UI reliably.
Tip: If lights stay blinking or show error, unplug and retry from the beginning. - 4
Open the admin interface and check firmware
From a connected device, open the router’s admin page or app. Check for firmware updates and install if available. A current firmware baseline improves security, stability, and feature support. After updating, re‑log in to confirm changes took effect.
Tip: If you’re using the NightHawk app, enable auto‑updates to stay current without manual checks. - 5
Set operation mode and apply basic security
Choose router mode or bridge mode depending on your plan. Apply a strong admin password and enable WPA3 on the wireless networks. Save your settings and re‑boot if prompted to ensure changes take effect.
Tip: Bridge mode is favorable when you already have a dedicated router, but test both modes before committing. - 6
Configure Wi‑Fi networks and password
Create distinct SSIDs for 2.4 GHz and 5 GHz bands and set robust, unique passwords. Prefer passphrases with at least 12–16 characters. Disable WPS for stronger security and enable a guest network if you have visitors.
Tip: Pro tip: write down the SSIDs and passwords so you can quickly reconnect devices. - 7
Test connectivity and optimize channels
Run wired and wireless speed tests to verify baseline performance. If speeds are inconsistent, adjust the channels to minimize interference; often auto‑select works well, but manual tuning can improve range and reliability. Take notes on what changes improve results.
Tip: Tip: use a smartphone in multiple rooms to assess real‑world coverage while testing.
People Also Ask
What is a router-modem NightHawk configuration?
A router-modem NightHawk configuration combines a modem and router in one device, simplifying setup and cable management. It can be used in router or bridge mode depending on your network needs and ISP requirements.
A NightHawk setup combines your modem and router in one unit; you can run it as a router or bridge depending on what your internet provider supports.
Do I need bridge mode with NightHawk?
Bridge mode is useful when you want to use a separate, feature-rich router downstream and avoid double NAT. Check with your ISP for bridge support and test both modes to see which yields better performance for your home.
Bridge mode helps you use a separate router without double NAT. Check with your ISP and try both modes.
How often should I update firmware?
Check for firmware updates at least monthly or enable auto‑updates if you’re comfortable with automatic patches. Updates improve security, stability, and feature support.
Update firmware regularly or enable auto‑updates to keep your device secure and reliable.
What is the best way to secure Wi‑Fi on NightHawk?
Use WPA3 if available, create strong passwords, disable WPS, and review connected devices regularly. Consider a guest network for visitors to protect your main network.
Enable WPA3, use strong passwords, and review device connections; a guest network helps keep your main network secure.
Should I enable UPnP on NightHawk?
UPnP is convenient for gaming and port forwarding but can introduce security risks. Enable it only if you need it and disable when not in use.
Only enable UPnP if you need it for gaming or port forwarding, and disable it otherwise for security.
Can I use NightHawk with an existing ISP gateway?
Yes, you can use NightHawk with an ISP gateway, typically by bridging or placing the NightHawk in front as the primary router. Verify compatibility and activation steps with your provider.
You can use NightHawk with an ISP gateway by bridging or placing NightHawk as the main router; check compatibility with your provider.
Watch Video
What to Remember
- Prepare with a clean state before configuring.
- Choose the correct mode (router vs bridge) based on your setup.
- Secure networks with WPA3 and strong admin passwords.
- Test and document changes for reliable performance.
- Keep firmware up to date and monitor for interference.