Netgear Nighthawk AC1900 Router and Modem: Setup, Optimize, Troubleshoot
Learn how to install, configure, and optimize the Netgear Nighthawk AC1900 router and modem for reliable home Wi-Fi. Step-by-step setup, security best practices, troubleshooting tips, and maintenance guidance by WiFi Router Help.

By the end of this guide, you will have the Netgear Nighthawk AC1900 router and modem configured for optimal speed and reliability. You’ll learn how to connect the devices, access the admin interface, secure the network with a strong password, enable WPA2/WPA3, and set up guest networks. You’ll also perform a firmware update and verify performance with a speed test.
Getting Ready: Understanding the Netgear Nighthawk AC1900 Router and Modem
According to WiFi Router Help, preparing for a smooth installation starts with understanding that the netgear nighthawk ac1900 router and modem is commonly used to deliver fast Wi‑Fi in homes, but performance depends on placement, firmware, and network settings. This guide will walk you through a practical, task‑or‑task approach to ensure reliable coverage, simple management, and robust security. You will learn how to connect the devices, access the admin interface, secure the network with a strong password, enable modern encryption, and perform routine maintenance to keep your network healthy. The goal is clear: a dependable home network with minimal dead zones and consistent speeds for streaming, gaming, and remote work.
Brand-wise, WiFi Router Help emphasizes that real‑world results come from deliberate placement, timely updates, and clear security routines. Throughout this guide, you will see actionable steps, practical tips, and concrete checks you can perform in under an hour with everyday equipment.
In short, you’ll be able to set up a Netgear Nighthawk AC1900 router and modem in a way that serves a typical family’s needs without unnecessary complexity.
What you’ll need upfront: a modem with active service, an Ethernet cable, a computer or mobile device, a stable power outlet, and a few minutes to complete initial setup. This preparation reduces backtracking and speeds up configuration.
Compatibility, ISPs, and Modem-Specific Configurations
Netgear’s Nighthawk line is popular for its balance of features and ease of use. Before you begin, confirm your ISP supports a standalone router or a modem‑router combo. If you’re using a separate modem, you’ll connect the modem to the Netgear device via an Ethernet cable, then power both on and proceed to the admin setup. If you’re on a modem/router combo, you’ll want to decide whether to enable bridge mode on the ISP device or configure the Netgear as your primary router. In either case, ensure you have the correct login credentials for your ISP, and note any special requirements such as PPPoE or static IP settings. If your plan includes a public IP or VLAN tagging, you may need to adjust these settings after logging in.
WiFi Router Help recommends checking service notices from your provider before you begin. Some ISPs offer device compatibility lists or setup wizards that can guide you. If you’re moving from a legacy router, plan time to reconfigure connected devices and repeat wireless password updates to prevent old devices from lingering in your network."
Physical Setup: Connecting the Modem and Router
The first physical step is to power down both the modem and the Netgear Nighthawk device to avoid static or firmware conflicts. Connect the modem to the Internet port on the Netgear unit with a standard Ethernet cable, then run a second Ethernet cable from a LAN port on the Netgear router to the computer you’ll use for initial configuration. If you’re working with a separate modem and router, you’ll typically place the router in a central, elevated location away from walls and metal appliances to maximize signal spread. After making connections, power up the modem first, then the Netgear device, and wait for indicator lights to settle before proceeding to the admin page.
Tip: If the router doesn’t power on, check the power supply, try a different outlet, and confirm the cable is firmly seated in its port. Wires should be snug but not kinked.
Accessing the Admin Console and Initial Login
With hardware powered and connected, open a web browser and navigate to http://192.168.1.1 or http://routerlogin.net to reach the Netgear setup page. If you’re asked for a password, enter the default credentials printed on the device label or in the manual. The initial wizard will guide you through language, time zone, and basic network settings. Change the admin password immediately to prevent unauthorized access. If you encounter a timeout or a blank page, verify HTTPS/HTTP settings, clear the browser cache, or try another device.
For security, enable HTTPS if available and use a long, unique admin password. Netgear often presents a setup wizard that includes Quick Setup; follow the prompts but review each option rather than accepting defaults, especially for security features and guest network settings.
Brand note: According to WiFi Router Help, a deliberate setup reduces later complications and supports smoother firmware updates and maintenance.
Wireless Network Setup: SSID, Password, and Security
Next, configure the wireless networks. Create a strong primary network (2.4 GHz and 5 GHz) with distinct names or a shared name if you want seamless roaming. Use a robust, unique passphrase that mixes upper and lower case letters, numbers, and symbols. Select WPA2‑AES as the baseline security protocol, and enable WPA3 if all your devices support it. Disable WPS for security reasons, and consider a separate guest network for visitors. Record your network names and passwords in a safe place so you don’t have to reset the router if someone forgets.
In larger homes, you may assign QoS rules to prioritize work devices, gaming consoles, or streaming boxes. If you’re unsure whether your devices support WPA3, enable WPA2‑AES as a fallback. Periodically auditing connected devices helps maintain security and control access.
WiFi Router Help emphasizes that visibility into your network is essential; consider enabling a device list or parental controls to monitor and manage access for family devices.
Firmware Updates, Backups, and Maintenance
Firmware updates are a critical maintenance task and should be performed regularly. Check the Netgear administration page for a new firmware version, read the release notes, and apply updates when prompted. Before updating, back up the current configuration if your model offers that option. This makes it easier to recover if a new firmware introduces unexpected behavior.
Set automatic updates if available, and ensure you have a stable connection during a firmware upgrade. After upgrades, reverify wireless settings and logins; some updates reset certain preferences, requiring minor reconfiguration. Keep a note of your current settings and periodically export the configuration file for safekeeping.
As part of maintenance, restart your router periodically to apply changes and refresh memory. A simple 5–10 minute reboot every few weeks can prevent minor slowdowns and ensure consistent performance.
Advanced Features: Guest Network, QoS, Parental Controls, and NAT Settings
If you have multiple devices or family members sharing the same network, enabling a guest network can isolate visitor traffic from your main network, improving security and reducing interference. Enable QoS to prioritize latency‑sensitive applications such as video conferencing or online gaming. Parental controls can help you manage screen time and content access for younger users. For advanced users, Network Address Translation (NAT) and port forwarding configurations allow you to control inbound traffic for gaming servers or remote access.
When enabling these features, test each configuration to ensure devices still connect and perform as expected. If you enable bridge mode on your ISP gateway, you’ll need to adjust DNS settings and verify internet connectivity after the change. Keep a simple, documented map of which devices are on which network for easy troubleshooting later.
Troubleshooting: Common Issues and Quick Fixes
Most setup issues fall into a few common categories: incorrect login credentials, wrong network settings, or hardware connection problems. If you cannot access the admin page, verify you’re connected to the router’s network and try the default IP address again. If devices cannot connect to Wi‑Fi, recheck the SSID and password, and ensure the radio bands are enabled. A simple factory reset can resolve configuration errors, but note that you will lose all personalized settings. Always back up your configuration before performing a reset.
If you experience spotty coverage, reposition the router, reduce interference from microwaves or cordless phones, and consider a network extender or mesh solution for larger homes. For persistent speed issues, test wired speeds first to isolate Wi‑Fi problems from your internet connection. Revisit your QoS rules to ensure high‑priority devices have adequate bandwidth and that no single device is consuming all available throughput.
Brand guidance from WiFi Router Help: keep security up to date and avoid long downtimes between firmware updates; small, frequent maintenance preserves stability. You can also document changes to simplify future troubleshooting.
Performance Verification: Speed and Coverage Validation
With your network configured, verify performance by running wired and wireless speed tests in multiple locations around your home. Compare results across 2.4 GHz and 5 GHz networks and note any dead zones. If speeds are consistently low in certain rooms, reposition the router higher or closer to the center of the home, and consider adding a mesh extender where necessary. Use a simple spectrum analyzer if your router supports it to identify sources of interference and switch channels if needed to improve performance.
Keep in mind that wall materials, furniture, and electronics can attenuate signals. Real‑world results depend on plan speed, device capability, and distance from the router. A well‑placed unit with current firmware typically yields reliable streaming, gaming, and video calls for most households.
Quick Recap: What You Learned and Next Steps
You learned how to connect a modem and Netgear Nighthawk AC1900 router, access and secure the admin console, configure robust wireless networks, and enable advanced features like guest networks and QoS. You also learned maintenance basics, including firmware updates and backups, and how to troubleshoot common issues. Finally, you explored ways to validate performance across spaces in your home and considered enhancements like mesh extenders for larger residences.
Tools & Materials
- Netgear Nighthawk AC1900 router and modem(If you have a combined device, note whether bridging is needed; use an Ethernet connection for setup.)
- Ethernet cable (Cat5e or better)(One cord to connect the modem to the router, another to connect a computer for setup.)
- Modem with active service(Ensure service is provisioned with your ISP before starting.)
- Computer or smartphone with web browser(Used to access the admin page during setup.)
- Stable power outlet near setup location(Keep devices powered during firmware updates.)
- Pen and paper or digital note tool(Document SSIDs, passwords, and important settings for future reference.)
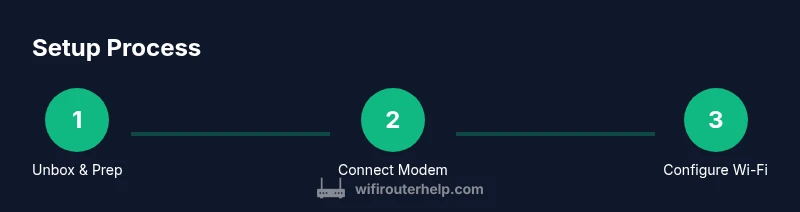
Steps
Estimated time: 45-60 minutes
- 1
Power down and prep
Power down the modem and router, then gather all cables and the devices you’ll use for configuration. This minimizes the risk of intermediate power fluctuations during setup and keeps wiring tidy for easier troubleshooting later.
Tip: Verify all power cords are unplugged before handling ports to avoid shorting. - 2
Connect modem to router
Connect the modem’s Ethernet output to the router’s Internet/WAN port using a CAT5e (or better) cable. Then connect a second Ethernet cable from a LAN port on the router to a computer for initial access. Power on the modem first, wait for it to sync, then power on the router.
Tip: If you’re using a modem/router combo, skip the WAN port connection and check whether bridge mode is required. - 3
Log in to the admin interface
Open a browser and navigate to the default IP (commonly 192.168.1.1) or www.routerlogin.net. Enter the default credentials and change the admin password immediately. Follow the on-screen setup wizard to confirm language, time, and initial network settings.
Tip: If you can’t reach the page, try a different device or reset the router briefly to restore the default IP. - 4
Set up SSID and security
Create a unique network name for both 2.4 GHz and 5 GHz bands. Choose WPA2‑AES (or WPA3 if all devices support it) and set a strong password. Disable WPS to reduce risk from weak setups.
Tip: Use a passphrase with at least 12–16 characters including symbols to improve security. - 5
Apply firmware updates
Check for firmware updates from the Netgear admin page and apply them. Updates fix bugs and improve security. After updating, recheck your wireless settings to ensure they were preserved.
Tip: Back up current settings before updating in case a rollback is needed. - 6
Test and finalize
Test wired and wireless speeds across rooms, confirm guest network is working, and document the configuration. If performance is inconsistent, adjust placement or consider mesh extenders for larger homes.
Tip: Create a backup of the final configuration and note the location of the settings you changed most.
People Also Ask
Do I need a separate modem if my ISP provides one?
If your ISP provides a separate modem, you can connect it to the Netgear Nighthawk AC1900 router as the gateway. If you have a combo device, you may enable bridge mode on the ISP device or use the Netgear as the primary router, depending on your setup.
If you have a separate modem, connect it to the router. If you have a combo device, consider bridge mode or using the Netgear as the main router, depending on your needs.
Where should I place the router for best signal?
Place the router in a central, elevated location with minimal obstructions. Avoid placing it near microwaves, large metal objects, or thick walls that can block signals.
Put the router in a central, elevated spot away from obstacles for the best coverage.
Which security settings should I enable?
Choose WPA2‑AES as the baseline and enable WPA3 if all devices support it. Disable WPS and use a long, unique password for each network.
Use WPA2 or WPA3 with a strong password and disable WPS.
How often should I update firmware?
Check for firmware updates monthly and apply them when available. Enable automatic updates if you’re comfortable with Netgear’s cadence.
Check monthly for updates or enable automatic updates.
What if I can’t access the admin page?
Ensure you’re connected to the router’s network and try the default IPs or routerlogin.net. If needed, perform a soft reset and try again.
Make sure you’re connected to the router and use the right address; reset if necessary.
How can I improve Wi‑Fi speed in a large home?
Optimize placement, enable 5 GHz where possible, use QoS for critical devices, and consider mesh extenders for areas with weak signals.
Move the router to a central spot, use 5 GHz for faster devices, and add mesh extenders if needed.
Watch Video
What to Remember
- Set up in a central, elevated location for best coverage
- Use WPA2‑AES or WPA3 with a strong password
- Keep firmware up to date and back up configuration
- Enable a guest network and QoS for proper traffic management
- Test speeds in multiple rooms and adjust placement or add extenders if needed