Router for Starlink: Setup, Tips, and Troubleshooting
Learn how to choose, install, and optimize a router for starlink to maximize speed, coverage, and security. A practical, step-by-step guide for home networks.

By the end, you’ll be able to run a dedicated router with Starlink to improve coverage, speed, and stability. This guide covers how to pick a router for starlink, connect it to your Starlink kit, configure security and QoS, and troubleshoot common issues. You’ll learn which features matter and how to test performance across devices.
Why a dedicated router improves Starlink performance
According to WiFi Router Help, using Starlink with a dedicated router can dramatically improve WiFi coverage, control, and reliability. The built-in Starlink router is serviceable, but as families add more devices for work, school, streaming, and gaming, a standalone router provides better features and management. The WiFi Router Help team found that many homes experience steadier speeds and lower latency when a capable router handles traffic while Starlink serves as the internet source. A router for starlink also enables advanced QoS, guest networks, parental controls, and easier network segmentation, which helps protect devices and keeps critical work devices prioritized. In practical terms, you’ll gain a more stable home network, more predictable performance as satellite links vary, and the ability to tailor coverage to your space. This section explains the benefits you can expect and what to look for when selecting a compatible router.
What features matter for Starlink routing
For Starlink, the router you choose should balance speed, coverage, and control. Key features to prioritize include dual-band Wi-Fi (2.4 GHz and 5 GHz) for compatibility with older devices while keeping fast 5 GHz for modern gear; a reliable WAN port and, if possible, a 2.5 Gbps Ethernet port for future-proofing; and robust QoS to prioritize work devices or gaming consoles. Security features matter too: WPA3, guest network isolation, automatic firmware updates, and a built-in firewall. You’ll also want easy administration through a clean mobile app or web UI, along with the ability to set up parental controls and device prioritization. When evaluating models, compare how many devices you can manage simultaneously and whether the router supports mesh networking if your home has dead zones. Overall, a solid router for starlink improves throughput and simplifies family networking.
Wired vs wireless: how to connect Starlink's hardware with your router
Connecting a third-party router to Starlink typically involves using the router as the primary gateway and letting Starlink act as an internet source. Some users place Starlink in bridge or passthrough mode if supported, so the third-party router handles NAT, firewall, and QoS. If bridge mode isn’t available, you can configure the Starlink router to pass the WAN signal to your own router by adjusting the network settings, keeping in mind potential double NAT implications. The goal is to give your own router control of DHCP, port forwarding, and guest networks while preserving reliable connectivity from the Starlink service. Always consult your device manuals and the WiFi Router Help guidelines before changing compatibility options, as the exact steps vary by model and firmware version.
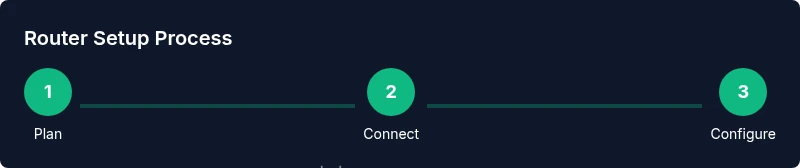
Step-by-step overview
This section provides a quick overview of the actions you’ll take to set up a router for starlink. It references the detailed steps in the dedicated Step-by-Step section below. First, verify compatibility and collect required materials; next, connect hardware, access the Starlink interface, and configure the router’s WAN/LAN settings; then fine-tune Wi-Fi and QoS; finally, test performance and security. If you want a hands-on walkthrough, proceed to Step 1 in the Step-by-Step guide. The goal is to complete a stable, secure network that prioritizes critical devices while offering strong coverage.
Optimize for gaming, streaming, and remote work
A router for starlink shines when you tailor traffic and prioritize devices. Use Quality of Service (QoS) rules to assign higher priority to videoconferencing, work laptops, and gaming consoles; set up separate guest networks to isolate IoT devices; enable two-band or tri-band networks when supported. For households with multiple floors or thick walls, consider a mesh system or a high-gain external antenna to expand coverage. Always run periodic speed tests across devices and times of day to verify you are meeting expectations. With the right settings, you’ll notice smoother video calls, faster downloads, and more reliable connections during peak hours, even when satellite links fluctuate.
Security and maintenance
Security should be part of every Starlink network plan. Change default admin credentials, enable WPA3 if possible, and keep firmware up to date. Regularly back up configuration, configure a strong Wi‑Fi password, and enable firewall features. Disable UPnP unless you need it, and review connected devices weekly. Consider enabling automated security alerts and keeping router logs accessible for troubleshooting. A well-maintained router for starlink minimizes risk and saves time when issues arise.
Positioning and cabling for best coverage with Starlink
Placement matters; aim for a central, elevated location away from thick walls and interference from microwaves or cordless phones. Avoid placing the router near large metal appliances or in corner cabinets that block signals. If you use wired backhaul, choose Cat6 or better Ethernet cables to reduce latency and interference. For larger homes, a mesh or satellite-supporting router can extend coverage to every room. Each room’s signal quality should be tested with a mobile app or a laptop to identify dead zones and adapt placement accordingly. A well-positioned router for starlink delivers the strongest, most consistent Wi-Fi across your home.
Troubleshooting common Starlink router setups
Common issues include intermittent connectivity, devices dropping off the network, or poor Wi-Fi range. Start with simple checks: ensure your firmware is up to date, reboot both the Starlink kit and your router, and verify cables are firmly seated. If you see double NAT issues, revisit bridge mode or DMZ settings; check that DHCP is only enabled on your primary router. For slow speeds, run speed tests at different times of day, confirm there is no ISP outage, and adjust QoS rules as needed. If problems persist, consult the manufacturer’s guidelines and WiFi Router Help’s troubleshooting resources for tailored advice.
AUTHORITY SOURCES
- https://www.fcc.gov
- https://www.tomsguide.com
- https://www.pcmag.com
Tools & Materials
- Main router (or mesh system)(Select a model that supports QoS, multiple SSIDs, and a WAN port)
- Gigabit Ethernet cable (Cat6 or better)(For reliable wired backhaul to your Starlink setup)
- Laptop or smartphone(For initial setup and ongoing management)
- Starlink kit (existing)(If you already own it, you can reuse it; optional during planning)
- Surge protector(Protect gear from power surges)
- Ethernet switch (optional)(Adds wired ports if you have many devices)
Steps
Estimated time: Total time: 25-45 minutes
- 1
Verify compatibility and plan layout
Confirm your chosen router supports bridge mode or IP passthrough if you intend to bypass Starlink’s NAT. Sketch your home layout, mark central locations, and note potential dead zones. This planning helps you place the router for best overall coverage.
Tip: Check product manuals for bridge/passthrough options before buying. - 2
Gather required materials
Collect all cables, adapters, and devices needed for setup. Having everything ready avoids mid-step interruptions. Ensure you have a Cat6 Ethernet cable and a powered outlet near the Starlink kit.
Tip: Label each cable at both ends to prevent misconnection. - 3
Power down and connect hardware
Power off Starlink kit and your new router before connecting. Connect the router’s WAN port to the Starlink unit using a Cat6 cable. If you’re using a switch, connect it next to the router for additional wired ports.
Tip: Handle components gently to avoid connector damage. - 4
Access the router’s admin interface
Power on devices and connect via ethernet or initial Wi‑Fi. Use a browser or app to access the router’s setup page. Login with a secure admin password that you will remember.
Tip: Use a wired PC or laptop for initial login to reduce wireless interference. - 5
Configure WAN/LAN settings
Set the router to obtain an IP address from Starlink or enable bridge mode if supported. Configure the LAN DHCP range and ensure there’s no conflicting NAT. Save settings before rebooting.
Tip: Document your settings in case you need to revert later. - 6
Set up Wi‑Fi and security
Create your primary and guest networks, enable WPA3, disable WPS if available, and set a strong Wi‑Fi password. Enable automatic firmware updates and a basic firewall.
Tip: Turn on a guest network to isolate IoT devices from sensitive equipment. - 7
Test connectivity and performance
Run speed tests from multiple devices and rooms. Check latency, upload, and download speeds, and verify stability across hours of usage. Adjust QoS rules if needed.
Tip: Test at different times of day to capture peak vs off-peak performance. - 8
Finalize and secure
Review all configurations, back up the current setup, and enable alerts for suspicious activity. Document the network map and where each device connects.
Tip: Schedule monthly checks for firmware and settings.
People Also Ask
Do I need a separate router for Starlink?
No, you can start with Starlink’s built-in router, but a dedicated router gives you more control, better coverage, and advanced features like QoS and guest networks. Many users layer a third-party router for improved performance and management.
You can use Starlink’s router first, but a separate router offers more control and features for better performance.
Can I use a mesh system with Starlink?
Yes, a mesh system can expand coverage beyond a single router’s reach, especially in larger homes. Ensure your mesh nodes are compatible with the Starlink gateway and that you configure them to work with the Starlink network.
Mesh systems can improve coverage, just ensure compatibility and proper setup with Starlink.
Should I enable bridge mode on Starlink?
Bridge mode (or IP passthrough) lets your own router handle NAT and firewall, giving you full control. Check your Starlink settings and device manuals for bridge options, as not all models support it.
Bridge mode can give your router full control, but availability depends on your hardware.
What is the best way to configure QoS with Starlink?
Prioritize critical activities like video calls and work devices. Create separate networks for guests and IoT, and set device-level priorities to ensure bandwidth goes where it’s needed most.
Set up QoS rules to prioritize important devices for smoother performance.
How do I test Starlink router performance?
Use multiple devices to run speed tests at different times of day. Compare results against expected Starlink speeds and check latency to ensure consistency.
Run tests on several devices, at various times, to gauge performance.
Is using a third-party router unsafe with Starlink?
Using a reputable third-party router is safe if you keep firmware current, use strong passwords, and enable security features like WPA3. Regular updates and proper configuration reduce risk.
A good router is safe when it’s kept up-to-date and properly configured.
Watch Video
What to Remember
- Choose a router with QoS and strong coverage.
- Enable QoS and secure networks to protect devices.
- Regularly update firmware and back up configurations.
- Test speeds across rooms and times of day to ensure consistent performance.