Netlink Router Guide: Setup, Optimize, Troubleshoot
Learn how to set up, optimize, and troubleshoot a Netlink router with step-by-step guidance, practical tips, and safety warnings for a stable home network.

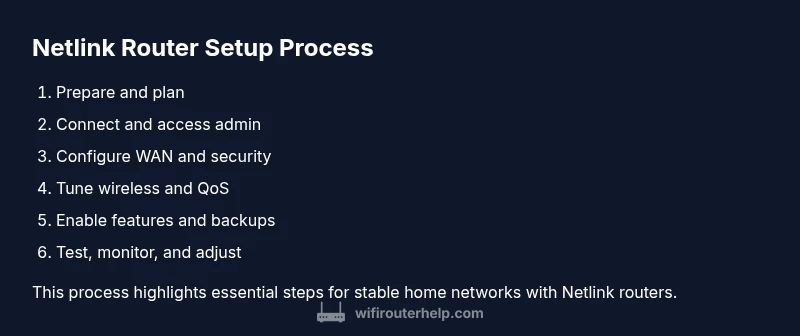
In this guide you will configure a Netlink router for a reliable home network, secure access, and efficient traffic management. You’ll learn to run the initial setup, enable key features, and verify performance. This quick answer highlights the core steps and tools you’ll need to complete a successful deployment and ongoing maintenance.
Understanding Netlink Router Fundamentals
A Netlink router is a class of devices or firmware configurations that leverage Netlink-based management interfaces to communicate between the Linux kernel and user-space utilities. This approach enables automation, scripting, and advanced network tuning without requiring complex GUI configurations. For many home networks, a Netlink router delivers robust stability, better scripting options, and transparent logging. According to WiFi Router Help, embracing Netlink-based management helps DIY enthusiasts and homeowners gain fine-grained control over NAT, firewall rules, and QoS policies while keeping the setup approachable for non-experts. Throughout this guide, you will encounter practical steps, terminology, and checks to ensure reliability as you grow your network from a single room to a whole home.
Planning Your Netlink Router Deployment
Before you power up, map your space and define your goals. Start with coverage: which rooms lose signal, what devices demand the most bandwidth (gaming PCs, streaming, smart home hubs), and whether you will have guests or work-from-home use. Draft an Internet Service Plan assessment: confirm your service tier, modem compatibility, and whether your plan supports dual-band operation or mesh extensions. A clear plan reduces trial-and-error time and helps you decide on features such as guest networks, parental controls, and QoS rules. WiFi Router Help emphasizes documenting your target SSIDs, password schemes, and device groups so future tweaks stay consistent rather than creating chaos. With this groundwork, you’ll know whether you need extra access points or a mesh setup later on.
Initial Setup: Connecting and Accessing the Admin Interface
Unbox the Netlink router and position it centrally to maximize coverage. Connect a computer directly to the router with an Ethernet cable for the first-time configuration, then power on the device. Find the router’s admin page using the default IP address shown on the device label or in the manual, and log in with the default credentials. During this stage, verify that the WAN/Internet status shows as connected and the LAN ports report active links. If you cannot reach the admin page, try a different browser or clear cache, and confirm that you are not connected through a VPN that might block local device discovery.
Securing Your Network: Passwords, WPA3, and Remote Management
Security is the foundation of a stable home network. Change the default admin password to a long, unique passphrase, and enable WPA3 encryption on the wireless network where available. Disable remote management unless you truly need it, and restrict remote access to trusted IPs if possible. Review the firewall rules and NAT settings to ensure they safeguard your devices without blocking essential services. Regularly auditing connected devices helps you spot unfamiliar hardware and remove it promptly. WiFi Router Help recommends enabling automatic firmware updates when available to protect against known vulnerabilities while keeping features current.
Optimize Wireless Performance: Channels, Bandwidth, and QoS
Wireless optimization starts with a clear split between 2.4 GHz and 5 GHz bands. Assign distinct SSIDs for each band and tune transmit power to reduce interference while preserving coverage. For busy networks, enable QoS (Quality of Service) to prioritize latency-sensitive traffic like gaming or video calls, and create device groups to ensure stable performance for critical work or entertainment. If interference is an issue, manually select channels with the least congestion or enable auto-channel selection if the router supports it. Consider enabling MU-MIN or beamforming features where supported, and check for driver and firmware compatibility with your devices to maintain consistent connectivity.
Advanced Features: Guest Networks, VPN, and Netlink Tools
Most Netlink routers offer guest networking to keep visitors off your main network while still providing Internet access. Configure a separate SSID, limit bandwidth, and enforce time-based access if needed. If you need secure remote access to your home network, set up a VPN server or a trusted VPN client on the router rather than exposing individual devices. Netlink-based management tools can simplify monitoring, logging, and automation through scripts or APIs. While exploring these features, balance convenience with security: disable unnecessary services, review port forwards, and keep an exit plan if a feature creates exposure.
Maintenance: Backups, Firmware Updates, and Recovery
Regular backups are essential when you tweak settings or push new configurations. Create a configuration backup on a local drive or cloud storage and note where the backup file is saved. Schedule firmware updates during off-peak hours to minimize disruption, and verify update integrity post-install. If something goes wrong after an update, use the recovery or reset procedures to revert to a known good state, then reapply preferred settings from your backup. WiFi Router Help advises maintaining a simple change-log so you can trace which tweaks caused performance changes or issues.
Troubleshooting Common Scenarios
Even well-planned setups encounter hiccups. If devices cannot connect to the network, verify cable integrity, reset the router, and confirm DHCP is enabled on the WAN port. If performance dips during peak hours, recheck signal strength and consider repositioning the router or adding a mesh node. For slow WAN speeds, test with a wired device to isolate the issue from wireless factors. When IPv6 or DNS problems appear, verify the assigned addressing scheme and DNS server entries. Keep a phone or notebook handy with the basic troubleshooting steps so you can quickly triage issues without starting over from scratch.
Tools & Materials
- Netlink router(The primary device to configure for your home network.)
- Ethernet cable (Cat5e or better)(For a reliable initial connection to the admin page.)
- Computer or smartphone with a web browser(Used to access the router’s web interface or app.)
- Power adapter and surge protector(Protects the device during setups and power events.)
- Latest firmware image or stable internet connection(Ensure you can update to the latest features and security patches.)
- Backup medium (USB drive or cloud storage)(Optional for storing configuration snapshots.)
Steps
Estimated time: 45-60 minutes
- 1
Prepare and verify prerequisites
Unbox the Netlink router, locate model-specific default credentials, and gather all required cables. Confirm you have a computer ready for configuration and a stable power source. Why: starting with the right prerequisites prevents mid-installation surprises and requires fewer reboots.
Tip: Take a photo of the label with default credentials for quick reference. - 2
Connect physically and access the admin page
Connect your computer to the router via Ethernet and power it on. Open the admin URL using the router’s default IP or the address printed on the bottom label. Log in with the default credentials and navigate to the WAN/internet section to verify connectivity.
Tip: If the page is unreachable, try a different browser or disable any VPN that might block local routing. - 3
Configure WAN and basic network
Set up your Internet connection type (DHCP, PPPoE, or static IP) according to your ISP. Verify internet access by loading a page from a wired device. Save changes before proceeding to security settings.
Tip: Keep a note of your ISP login details if you use PPPoE. - 4
Strengthen security and access controls
Change the admin password to a strong, unique passphrase. Enable WPA3 on wireless networks if available, and disable remote management unless needed. Review firewall settings and ensure UPnP is disabled unless you require it for compatibility.
Tip: Use a password manager to store your admin password securely. - 5
Tune wireless and QoS settings
Assign distinct SSIDs for 2.4 GHz and 5 GHz bands, set sensible channels, and enable QoS for latency-sensitive devices. Optimize transmit power and minimize interference by placing the router centrally away from metal shelves and microwaves.
Tip: Test speeds with a wired device first, then confirm improvements wirelessly. - 6
Enable features and create backups
Set up guest networks, VPN if desired, and any Netlink-specific management tools. Create a local backup of your configuration after finishing, and store it safely. Consider documenting the change log for future reference.
Tip: Store backups in multiple locations for redundancy.
People Also Ask
What is a Netlink router and how does it differ from typical routers?
A Netlink router emphasizes Netlink-based management interfaces to facilitate kernel-to-user space control and automation. It differs from basic consumer routers by offering scripting capabilities, finer control of firewall rules, and more detailed telemetry. This guide focuses on practical setup and maintenance using those tools.
A Netlink router is a router with Netlink-based management for more control and automation, which is great for power users and careful network management.
Can I use a Netlink router with my existing modem?
Yes. In most homes you can place the Netlink router behind your modem. If the modem supports bridge mode, enabling it can simplify setups and avoid double NAT. Ensure the Netlink device handles DHCP and NAT for your LAN.
Yes, you can use it behind your existing modem and consider bridge mode for simplicity.
How do I reset the Netlink router to factory settings?
Locate the reset button on the back, press and hold it for 10-15 seconds with a paperclip until the lights blink. Reconnect using the default credentials and reconfigure from scratch. Back up any important configs beforehand if possible.
Hold the reset button for 10-15 seconds, then reconnect with the default credentials and reconfigure.
How do I enable a guest network on a Netlink router?
Open the admin interface, navigate to Wireless or Guest Network settings, enable the feature, set a separate SSID and password, and apply any access restrictions you want (bandwidth limits or time windows).
Enable Guest Network in the admin panel, set a separate SSID and password, and apply restrictions if needed.
Why is my Netlink router not obtaining an IP address from the ISP?
Check the WAN/Internet settings to ensure the correct connection type (DHCP, PPPoE, or static). Verify cables are secure and the modem is functioning. Restart both devices and confirm the router is in bridge mode if required by the ISP.
Check WAN settings, cables, and modem status; restart devices and verify bridge mode if needed.
What should I do if the wireless signal is weak in some rooms?
Reposition the router to a central location, minimize obstructions, and adjust antenna directions if present. Consider adding a mesh node or a range extender for dead zones and ensure optimal channel selection.
Move the router to a central spot, reduce obstructions, and consider a mesh node for dead zones.
Watch Video
What to Remember
- Learn the Netlink router fundamentals and why this approach matters.
- Plan coverage, device needs, and security before configuring.
- Secure the admin interface and wireless networks first.
- Tune channels and QoS to maximize performance.
- Keep backups and firmware up to date for reliability.