Netgear WiFi Extender AC1200: Setup, Placement, and Troubleshooting
A step-by-step guide to installing and optimizing the Netgear wifi extender ac1200 for better home coverage, including placement tips, configuration, and troubleshooting strategies.

Learn how to set up and optimize your netgear wifi extender ac1200 in a few simple steps, including placement, pairing, and basic security settings. The WiFi Router Help team has tested common configurations and found that a strong baseline ensures reliable coverage. According to WiFi Router Help, you’ll need access to the main router, a smartphone or computer, and a current Wi-Fi password.
What is the Netgear wifi extender ac1200?
A Netgear wifi extender AC1200 is a dual-band device designed to extend the coverage of your existing Wi-Fi network. The 'AC1200' label refers to the combined theoretical bandwidth across both 2.4 GHz and 5 GHz bands. In practical use, the extender helps eliminate dead zones by receiving a strong signal from your router and rebroadcasting it to areas of your home that struggle to reach the main network. For homeowners, this means you can place the device halfway between your router and the areas with weak signals, allowing devices like smartphones, laptops, and smart TVs to lock onto a more reliable network. The exact performance you experience depends on factors such as wall materials, interference from neighboring networks, and the capabilities of your router. The Netgear line of extenders is widely supported and commonly offers simple setup processes, guest network options, and management through a mobile app or web interface. Keep in mind that AC1200 is a class designation, not a guarantee of speed in every room; real-world speeds will vary. According to WiFi Router Help, the most consistent gains come from proper placement and a straightforward configuration.
How dual-band extenders improve home networks
AC1200 extenders use two wireless bands to balance speed and range. The 2.4 GHz band travels farther but is slower, while the 5 GHz band offers higher speeds over shorter distances. In a typical home, a Netgear extender in this class can help multiply the usable signal in rooms that previously had weak coverage, enabling streaming, video calls, and gaming with fewer dropouts. Real-world results depend on distance from the router, walls, and interference from neighboring networks. For best results, keep the extender within one to two rooms of the weak spot and avoid placing it behind large metal appliances. This approach aligns with best practices discussed by the WiFi Router Help team for consistent performance across devices.
Planning your extender placement for best coverage
Choice of placement can make or break the performance of a netgear wifi extender ac1200. Start by mapping your home’s layout and identifying the zones that experience the most signal degradation. Place the extender at a halfway point between the router and the target area, ideally with a clear line of sight and minimal obstructions. Elevation matters too: a high shelf or wall-mount can improve signal propagation and reduce floor-to-floor attenuation. After you position the device, test connectivity with multiple devices in different rooms to confirm coverage. WiFi Router Help analysis shows that the distance to the main router and the presence of thick walls are the dominant factors in real-world speeds, not just the extender’s nominal rating.
What you need to get started
Before you begin, gather the essentials: a Netgear wifi extender ac1200 device, your main wireless router, and a smartphone or computer with Wi-Fi access. Ensure you know your router’s SSID and password, and have admin access if you want to customize settings like guest networks or security options. Power outlets near the extender location and a stable internet connection from the router are crucial. If you prefer, you can use a wired Ethernet backhaul from the router to the extender for potentially more stable performance, but wireless setup works well for most homes. Finally, keep the extender’s user manual handy or bookmark the Netgear support page for model-specific steps.
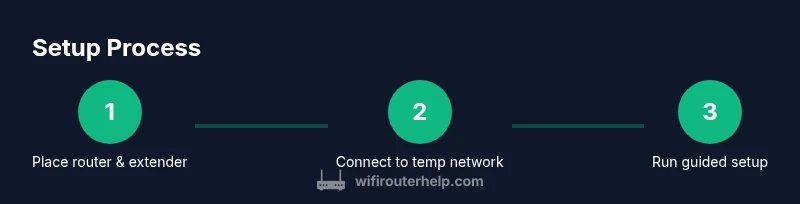
A quick overview of the setup flow
While the exact steps are in the step-by-step section, here’s the high-level flow you’ll follow: power on the extender, connect to its temporary network, access the guided setup, choose your existing router’s SSID, enter the Wi‑Fi password, and confirm the connection. During this process you can customize the extender’s name (SSID) and set a password for the guest network if supported. Keep an eye on LED indicators; a solid light typically indicates a stable connection, while blinking patterns signal activity or an issue that may require relocation or reboot. This overview mirrors best practices outlined by WiFi Router Help for clean, repeatable results.
Security and network management for your extender
Security should never be an afterthought when expanding your home network. Enable WPA2 or WPA3 encryption on the main network, and ensure the extender uses the same security settings when relaying signals. Create a distinct, strong password for any guest network, and consider disabling features you don’t need, such as WPS, which can be a vulnerability point. Regularly update firmware on both the router and extender to patch known issues. If your extender supports an admin interface, keep it protected with a strong login and avoid exposing it to the public internet. These practices help maintain network integrity as you broaden coverage.
Troubleshooting common issues during extender setup
If you can’t connect to the extender’s setup page or the LED indicators don’t show a healthy status, try a few common fixes: relocate the extender closer to the router, restart both devices, or reset the extender to factory defaults and start over. Make sure you’re connecting to the correct temporary network (not your main Wi-Fi), and verify you entered the right SSID and password for your router during the setup. If problems persist, consult the Netgear support site and the WiFi Router Help recommendations for verifying compatibility with your router and confirming you’re using a compatible mode (AP client vs. range extender).
Performance tuning: getting the most from AC1200
After setup, you can tune performance with simple steps: keep devices within line of sight of the extender, avoid metal obstacles, and consider using the 5 GHz band for nearby devices and reserve the 2.4 GHz for longer-range coverage. If your router supports band steering, ensure it’s enabled so devices switch to the best available band automatically. Regularly run speed tests in different rooms to measure gains and adjust the extender’s placement if needed. WiFi Router Help analysis shows that real-world improvements rely heavily on placement, backhaul quality, and interference management more than the extender’s nominal rating.
What to expect after setup and final recommendations
With a properly placed and configured netgear wifi extender ac1200, you should see stronger signals in previously weak rooms and more reliable connectivity for streaming and online gaming. Avoid overloading a single access point; spread devices across the network to reduce contention. As the WiFi Router Help team recommends, pair the extender with a modern router, keep firmware up to date, and reassess coverage periodically as your home’s layout or device mix changes. By following these guidelines, you’ll maintain robust performance and reduce ongoing troubleshooting.
Tools & Materials
- Netgear wifi extender ac1200(Ensure it is the AC1200 class extender and ready for setup)
- Main wireless router(Active internet connection)
- Smartphone or computer(Wi-Fi enabled for setup)
- Power outlet near extender(Stable power source)
- Optional Ethernet cable(For wired backhaul or initial configuration)
- User manual or support page(Model-specific steps and firmware notes)
Steps
Estimated time: 20-30 minutes
- 1
Position devices
Place the router and extender so the extender sits roughly halfway to the target area with a clear line of sight and minimal obstructions. This maximizes signal transfer and coverage.
Tip: Aim for a central location in your home, away from thick walls and large metal appliances. - 2
Plug in and power up
Plug the extender into a power outlet and wait for it to boot up. A stable LED pattern typically indicates the device is ready for setup.
Tip: If the lights are not steady, give it 60 seconds and try a reset. - 3
Connect to temporary network
From your phone or computer, connect to the extender’s temporary network listed in the quick start guide. This creates a direct link to begin configuration.
Tip: Avoid using your main home Wi-Fi during this step to prevent confusion. - 4
Open the setup page
Launch a browser and follow the guided setup to select your existing router’s SSID and enter the Wi-Fi password. This links the extender to your network.
Tip: If prompted, allow the extender to access your device’s location for easier detection of networks. - 5
Configure naming and security
Name the extender’s network (optional) and enable WPA2/WPA3 encryption. Consider enabling a guest network if supported and set a strong password.
Tip: Keep the same security protocol as your main router for consistency. - 6
Test and adjust
Test signal strength in several rooms and adjust the extender’s placement if needed. Use a few devices to ensure stable performance across the home.
Tip: If coverage is still weak, try a higher shelf or slightly move the extender closer to the router.
People Also Ask
What is the Netgear wifi extender ac1200 capable of?
An AC1200 extender rebroadcasts your existing Wi‑Fi signal to broaden coverage. It supports dual-band operation to serve more devices and reduce dead zones, but real-world performance depends on placement and router compatibility.
An AC1200 extender rebroadcasts your existing Wi-Fi to widen coverage. Real-world results vary with placement and your router, but it’s a cost-effective way to fill in gaps.
Do I need to use the Netgear app for setup?
Using the Netgear app or the web setup page is common, but you can often start the process from a browser by following the guided setup. The app can simplify updates and feature control.
You can usually set up via a browser, and the Netgear app can simplify ongoing management and updates.
Can I use a wired Ethernet backhaul with AC1200 extenders?
Yes, you can connect the extender with an Ethernet cable to the router for a potentially more stable connection, though many users are happy with wireless setup.
A wired backhaul is optional but can improve stability if you have a convenient Ethernet run.
How do I reset the extender to factory settings?
Hold the reset button on the extender for about 10 seconds until the LEDs flash. Then run the setup again from scratch. This clears custom settings.
Press and hold the reset button for about 10 seconds, then restart the setup from the beginning.
Will an AC1200 extender work with any router?
Most AC1200 extenders work with standard routers, but performance improves when your router supports modern security and feature sets. If problems occur, check compatibility notes from the manufacturer.
Most routers work, but compatibility and firmware matter for best results.
How can I improve performance if I have thick walls?
Thick walls can attenuate signals; try placing the extender higher, away from large metal objects, and use the 5 GHz band near the extender for compatible devices to avoid interference.
Raise the extender and minimize metal obstructions; use the 5 GHz band where possible.
Watch Video
What to Remember
- Position devices for optimal coverage
- Use the guided setup for reliable results
- Test in multiple rooms and adjust placement
- Secure the network with strong credentials