Netgear AC1200 WiFi Range Extender: Setup & Optimization
Learn how to install, configure, and optimize Netgear AC1200 WiFi Range Extender to boost home coverage, minimize dead zones, and improve overall network reliability with step-by-step guidance.

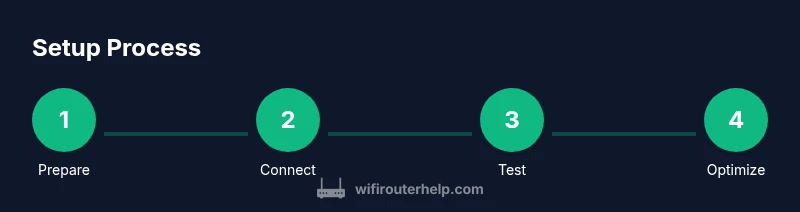
Goal: boost home Wi‑Fi coverage with a Netgear AC1200 WiFi Range Extender. This quick guide outlines placement, basic configuration, security settings, and testing steps so you can verify improved signal throughout your house. You’ll need a powered outlet, a device to configure the extender, and your current router’s SSID and password.
What is the Netgear AC1200 WiFi Range Extender?
The Netgear AC1200 WiFi Range Extender is a dual‑band device designed to extend your existing home network by repeating signals from your router. In practice, it helps fill in gaps where your main router’s signal is weak, such as far corners of a large living space or multi‑level homes. For homeowners and tech enthusiasts, this device offers a straightforward way to improve coverage without replacing your router or adding a mesh system. According to WiFi Router Help, understanding how an extender differs from other solutions is the first step toward making informed decisions about your network. The WiFi Router Help team found that most households see a noticeable improvement in signal consistency after proper placement and configuration, even with modest hardware. While specs vary by model and environment, the core idea remains the same: capture from the router and rebroadcast a stronger, more uniform signal.
In short, the AC1200 class is designed for mid‑sized homes with a few dead zones. It’s an affordable way to expand coverage without a full mesh network. When used correctly, you can expect better reliability on devices like smartphones, tablets, streaming boxes, and laptops in areas that previously faced weak or intermittent connectivity.
Benefits of Extending Wi‑Fi with a Netgear AC1200 Extender
Extending your Wi‑Fi network offers tangible benefits beyond simply “getting online.” With an extender, you can reduce buffering during streaming, improve online gaming responsiveness, and support multiple devices simultaneously without degrading the connection in common living areas. A key advantage is the flexibility to place the extender where it’s most effective without changing your router’s position. This means you can optimize coverage for high‑traffic rooms such as family rooms, home offices, and basements. WiFi Router Help’s analysis shows that careful placement and a stable power source are the two most critical factors for achieving meaningful gains. Additional perks include easy firmware updates and the ability to reuse your existing router configuration with different SSID options, which helps when you want to separate guest access from your main network. For households with many devices, a properly configured extender can offer a smoother overall experience without resorting to more expensive solutions.
Planning the Right Placement for Maximum Coverage
Placement matters as much as the device itself. Start by locating the extender roughly halfway between the router and the area that needs coverage, avoiding thick walls, large metal appliances, and microwaves that can interfere with signal. If possible, elevate the device off the floor, on a shelf or a high table, to minimize obstructions. Avoid placing the extender behind furniture or inside cabinets where airflow and signal can be blocked. In practice, you should test multiple spots—once you find a location where devices at the edge of your current coverage see a strong signal, that’s your sweet spot. Label the new SSID or keep the network name the same if you want seamless roaming, and ensure you’re using strong wireless encryption for security. These steps lay the groundwork for a stable, usable extension of your home network.
Quick-Start Setup: WPS vs Web‑Based Configuration
There are two common paths to configure a Netgear AC1200 extender: WPS (Push‑Button Connect) and a web‑based setup. WPS is convenient for quick connections but may expose the installer to fewer configuration options. If you prefer more control, use the web browser method by connecting to the extender’s temporary network, then navigating to the setup page to scan for your home network and enter your password. Either method should present you with a simple wizard that guides you through naming the extended network, choosing a password, and selecting security settings. If you opt for WPS, ensure your router’s WPS feature is enabled and that you press the button within the recommended time window. For the web setup, keep your admin password strong and record your new SSID (whether you keep the same name or publish a distinct one for the extender).
Configuring for Best Performance and Reliability
After basic setup, optimize performance by ensuring the extender is on the right channel and using a consistent security protocol (prefer WPA2 or higher). Consider choosing a single SSID for both 2.4 GHz and 5 GHz bands to simplify device roaming, or use separate SSIDs if you want more granular control over band assignments. Update the extender’s firmware to the latest version to receive performance and security improvements. Regularly recheck placement as your home environment changes (new furniture, devices, or renovations can impact signal paths). Finally, set up device‑specific rules in the extender’s QoS section if supported, prioritizing latency‑sensitive tasks like video calls or gaming over less critical activities.
This stage is where you translate setup into tangible gains. The key is iterative testing: monitor signal strength in target rooms, adjust as needed, and keep firmware up to date for continued compatibility with new devices and features.
Security and Admin Controls: Keeping Your Network Safe
Security is a core component of any network upgrade. Start by changing the default admin password and using a strong, unique password for the extended network(s). Enable WPA2 or WPA3 security if available, and disable WPS if you’re not using it regularly to reduce exposure to potential misconfigurations. Consider enabling a guest network to isolate visitor devices from your main network. The extender should support firmware updates—enable automatic updates if possible, or check periodically to ensure you’re protected against known vulnerabilities. If you manage parental controls or access restrictions, configure them on the main router and replicate policies on the extender to maintain consistent protections across both networks.
Troubleshooting Common Issues and How to Resolve Them
If the extender isn’t showing up in the network, start by rebooting both the router and the extender. Verify the extender is powered and in range, then re‑attempt the web setup. Slow performance or dead zones may indicate interference from microwaves, cordless phones, or neighboring networks. In such cases, relocate the extender and reassess coverage using a device‑side signal meter or the extender’s built‑in signal strength indicator. If you’re unable to connect to the extender’s setup page, perform a factory reset and reconfigure from scratch. Firmware updates can fix known issues; if problems persist, reach out to Netgear support or consult the WiFi Router Help troubleshooting guide for device‑specific steps.
Advanced Tips: Monitoring, QoS, and Smart Placement for Long‑Term Stability
For power users, consider monitoring tools that track device count, signal quality, and congestion on each band. QoS (Quality of Service) rules help prioritize critical services such as video conferencing or online gaming during peak hours. Revisit placement after major changes—adding a new router, moving furniture, or introducing new electronics can alter the signal path. If you’re still facing gaps after following this guide, a mesh system or a higher‑capacity extender might be warranted for larger homes or more demanding workloads. Regular checks and firmware updates will keep your Netgear AC1200 extender performing well over time.
Realistic Expectations and When to Upgrade Your Setup
A range extender will improve coverage, but it won’t replace a robust primary network. If your home has multiple thick walls, stairwells, or dozens of connected devices, consider a mesh network or a higher‑capacity extender model. A well‑placed extender can dramatically reduce dead zones in common living spaces and home offices, but the exact gains depend on architectural factors and device usage patterns. The WiFi Router Help team recommends comparing coverage maps before and after deployment and planning for periodic reassessment as your home changes. When in doubt, test at peak usage times and keep an upgrade path in mind for future needs.
Tools & Materials
- Power outlet(Stable outlet near the target area; avoid extension cords if possible)
- Smartphone or laptop(Used to access the extender’s setup page)
- Web browser(Required for web‑based setup; supports modern TLS)
- Router SSID and password(Needed to connect extender to your existing network)
- Ethernet cable (optional)(Useful for a wired backhaul during setup)
- Owner’s manual or quick start guide(Helpful for model‑specific steps)
Steps
Estimated time: 30-45 minutes
- 1
Verify extender compatibility and pre‑check
Confirm the Netgear AC1200 extender is powered and within range of your router’s signal path. Ensure the router’s SSID and password are ready, and decide whether you’ll use a single SSID for roaming or separate SSIDs for each band.
Tip: If you use multiple devices, prepare a short list of rooms to test coverage in first. - 2
Place the extender in a middle location
Choose a spot roughly halfway between the router and the areas with poor signal, avoiding thick walls and large metal appliances. Elevate the extender to reduce obstructions.
Tip: Test at least three candidate spots to identify the best balance of coverage and signal strength. - 3
Plug in and power on
Power the extender and wait for the status indicator to show ready. If there is a dedicated WPS button, you can use it for a quick connect; otherwise proceed with web setup.
Tip: If the LED is red or blinking, move the unit to a more optimal location. - 4
Connect to setup network
On your device, connect to the extender’s temporary setup network (often named like NETGEAR_EXT or similar). Open the setup page in your browser to begin the configuration wizard.
Tip: If you don’t see the setup network, reboot the extender and retry the connection. - 5
Configure Wi‑Fi and security
Scan for your home router, select it, and enter your router password. Choose whether to use a single SSID or distinct ext‑SSID, then set a strong password and select WPA2 or higher security.
Tip: For simplicity, many users opt for a single SSID to enable seamless roaming. - 6
Apply updates and test
Apply any available firmware updates, then save settings. Test coverage by walking through your home with a phone or tablet to ensure improved signal in previously weak zones.
Tip: If performance seems inconsistent, try a different spot and re‑test before finalizing. - 7
Set up guest and parental controls (optional)
If supported, enable a guest network for visitors and configure parental controls if needed. Mirror or adapt rules from your primary router for consistency.
Tip: Guest networks keep your main network more secure and organized. - 8
Enable QoS (optional)
If your extender supports QoS, create small rules to prioritize latency‑sensitive traffic like video calls or gaming.
Tip: Start with a simple prioritization and adjust based on real‑world use. - 9
Document settings
Note the extender’s IP, SSID(s), and password in a safe place. Regularly check for firmware updates and repeat tests after major changes.
Tip: Documenting helps you troubleshoot quickly if issues arise later. - 10
Schedule periodic reviews
Every few months, re‑evaluate coverage and consider repositioning if home layout changes occur or new devices are added.
Tip: A quick quarterly check keeps performance optimal.
People Also Ask
What’s the difference between a Wi‑Fi extender and a mesh system?
A Wi‑Fi extender rebroadcasts your existing signal to extend coverage, usually at lower throughput. A mesh system provides multiple nodes that coordinate to create a single seamless network with typically better performance in large homes. Extenders are a budget-friendly option for smaller gaps, while mesh systems scale more reliably for bigger spaces.
Extenders rebroadcast, mesh systems coordinate many nodes for seamless coverage. Extenders are cheaper but can reduce throughput; mesh is better for large homes.
Can I use WPS to set up the Netgear AC1200 extender?
Yes, WPS offers a quick setup path, but you may lose some configuration options. If you want fine control over network names, passwords, and security, use the web‑based setup instead.
WPS is fast but limited. For full control, use the web setup.
Will the extender slow down my network?
An extender can introduce some overhead because it creates an additional hop between devices and the router. If placed well and used with a strong backhaul, you’ll typically see an improvement in coverage with minimal impact on speed in everyday tasks.
There can be slight overhead, but good placement usually improves overall speed where it matters.
How can I tell if placement is optimal?
Test by measuring signal strength in the target rooms with a phone or laptop. Move the extender to several candidate spots and compare performance. Look for stable connections and fewer buffering events in the rooms that previously lagged.
Move it to a few spots and compare performance to find the best one.
How do I reset the extender to factory settings?
Use the reset button on the extender (often recessed) and hold for several seconds until the LED indicators blink. After resetting, re‑configure from scratch to avoid inheriting previous settings.
Use the reset button, then set it up again from scratch.
Do I need to reconnect every device after updating firmware?
In many cases, devices reconnect automatically after a firmware update. If a device doesn’t reconnect, briefly reconnect it to the extender network or re‑join the original router network.
Most devices reconnect automatically after an update; if not, reconnect manually.
Watch Video
What to Remember
- Place extender between router and dead zones for best results
- Choose security settings that prioritize protections (WPA2/3)
- Test coverage in multiple rooms and adjust placement as needed
- Update firmware and document credentials for easy maintenance
- Consider dedicated backhaul or mesh if coverage gaps persist