Modem Router Guide for CenturyLink: Setup, Compatibility, and Tips
Learn how to choose, configure, and optimize a modem router for CenturyLink. This guide covers compatibility checks, bridge vs router mode, security, and troubleshooting to maximize home network speed and reliability.

By the end of this guide, you’ll know how to pick and set up a modem router for CenturyLink that balances performance and reliability. You’ll verify compatibility, optimize your network, and configure bridge or router mode as needed. This step-by-step approach helps prevent drops, buffering, and IP conflicts while keeping security strong.
Why CenturyLink compatibility matters
Compatibility matters because CenturyLink services vary by region and by whether you have a DSL or fiber connection. According to WiFi Router Help, using a modem router that matches your service type ensures you don’t waste time with unsupported features or failed authentication. A properly matched device reduces dropout risk, improves stability, and makes troubleshooting simpler when you need to adjust settings.
In practice, you’ll want a device that can handle your plan’s speeds without overloading the hardware, supports current Wi-Fi standards, and provides straightforward bridging or routing options. This upfront alignment saves time during the setup and helps you avoid expensive or incompatible gear.
Understanding modem vs gateway and what 'modem router' means
A modem is the device that translates your Internet signal from the provider into a usable network. A gateway combines a modem and a router in one box, typically provided by CenturyLink. A 'modem router' is a standalone modem paired with a separate router. For many homeowners, using a third‑party modem-router pair gives more control over features, performance, and security, especially if you opt to place CenturyLink’s gateway in bridge mode.
What features to look for in a CenturyLink-friendly device
When selecting a modem-router, prioritize compatibility, future‑proofing, and security. Look for:
- DOCSIS or DSL support aligned with your service type
- Dual-band or tri-band Wi‑Fi with strong a/b/g/n/ac/ax support if possible
- Modern security features (WPA3, guest networks, automatic updates)
- Bridge/Router mode flexibility and simple admin interface
- Clear documentation for installation and troubleshooting
A device with these features reduces setup friction and provides room to grow as your home network adds smart devices.
How CenturyLink authentication and service type affect setup
CenturyLink may require authentication through PPPoE credentials or a simple DHCP/IP setup, depending on whether you have DSL or fiber. Before you buy or configure a device, check your account or CenturyLink support page to determine the required method. If you do not have PPPoE credentials, you might still connect in a straightforward DHCP mode, but some plans demand a login.
Bridge mode vs router mode: Pros, cons, and when to choose
Bridge mode disables the CenturyLink gateway’s routing capabilities, turning it into a simple modem. This often yields fewer double NAT issues and cleaner network management when you bring your own router. Router mode, by contrast, keeps the gateway's own features active; you’ll manage the network from a single interface but may encounter double NAT. Choose based on your goal: simplicity vs control.
Practical setup workflow overview
A practical workflow includes confirming your service type, gathering credentials if needed, and choosing a deployment plan. If you’re bridging, you’ll place the gateway in bridge mode and connect your own router to the WAN port. If you’re not bridging, configure the gateway as a pass-through device and manage settings from your router. Finally, test stability, adjust channels, and secure the network.
Troubleshooting common issues and performance tips
If you experience dropouts or slow speeds, verify cable quality and ensure firmware is up to date. Restart both devices in a specific sequence: modem/gateway first, then router. Check for interference from microwaves or neighbors’ networks, update SSIDs, and enable a guest network to isolate IoT devices. Use the router’s QoS settings to prioritize critical devices.
Security and privacy best practices for your CenturyLink network
Change the default admin password, enable WPA3 if available, and disable WPS. Regularly update firmware, review connected devices, and enable firewall features. Consider enabling a separate guest network for visitors and enabling network segmentation for smart home devices to minimize risk.
Authoritative sources
For official guidance on network security and ISP interactions, consult recognized sources such as the FCC, CISA, and NIST. These resources provide context on best practices for home networks and incident response, helping you design a safe and compliant CenturyLink setup.
Tools & Materials
- Compatible modem-router device(Confirm service type (DSL or fiber) and supported protocols; ensure firmware is current.)
- Ethernet cable (Cat5e or better)(Used for WAN connection and initial setup.)
- PC or mobile device with internet access(Needed to access admin interfaces and configure settings.)
- Power outlet with surge protection(Recommended for protecting equipment.)
- PPPoE credentials (if required by service)(Ask CenturyLink support or retrieve from your account if needed.)
- Documentation or model-specific manual(Helpful for step-specific instructions.)
- Cable splitter or dedicated line (for testing)(Only if you need to diagnose line quality.)
Steps
Estimated time: 75-90 minutes
- 1
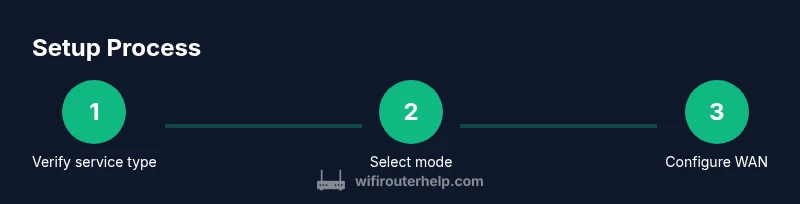
Verify service type and compatibility
Confirm whether your CenturyLink service is DSL or fiber and verify that your chosen modem-router supports that service. Check CenturyLink support pages or your account for compatibility lists before purchasing.
Tip: Cross-check device firmware compatibility with CenturyLink's latest requirements. - 2
Gather authentication credentials
If your plan uses PPPoE, locate the username and password from CenturyLink or your account portal. If DHCP is used, you may not need credentials, but confirm this with your service guide.
Tip: Having credentials ready saves a lot of time during setup. - 3
Decide deployment mode (bridge vs router)
If you own a separate router and want maximum control, bridge mode on the ISP gateway is preferred. If you want simplicity, keep the gateway's routing enabled and manage via the gateway interface.
Tip: Bridge mode often reduces double NAT issues and improves WAN stability. - 4
Connect hardware
Power off all devices. Connect the modem-router to your ISP line via the appropriate port, then connect your computer to the router using an Ethernet cable. Power on the gateway first, then the router.
Tip: Use a direct wired connection during initial setup for reliability. - 5
Configure WAN settings on your device
Access the admin page of your modem-router. Set WAN type to DHCP or PPPoE depending on your service type. Enter credentials if required. Disable extra features that can cause conflicts if you’re bridging.
Tip: Save changes and reboot after each major config change. - 6
Set up Wi‑Fi and security
Create a strong SSID and passphrase. Enable WPA3 if available, set up a guest network, and turn on automatic firmware updates where possible.
Tip: Use a separate guest network for IoT devices to limit exposure. - 7
Test connectivity and optimize
Run speed tests close to the router and at Wi‑Fi extents. Adjust channel selection, enable QoS for critical devices, and verify the stability of both wired and wireless connections.
Tip: Note peak usage times and modify performance settings accordingly. - 8
Document settings and enable remote management
Write down your network credentials, IP ranges, and any custom DNS you use. If you trust remote management, enable it with caution and strong authentication.
Tip: Keep a secure copy of credentials separate from the device.
People Also Ask
Is my CenturyLink service compatible with a third-party modem router?
Most CenturyLink services work with common third-party modem routers if you are not using the ISP gateway in bridge mode. Always confirm your plan type and device support before purchasing.
Most CenturyLink services work with third-party devices if you aren’t bridging the gateway. Check your plan first.
Should I use bridge mode or keep the CenturyLink gateway in router mode?
Bridge mode is preferred when you want full control from your own router and minimal double NAT. Router mode is simpler but may limit advanced configurations. Choose based on your comfort with network settings.
Bridge mode gives you more control; router mode is easier but less flexible.
How do I find PPPoE credentials or login information?
PPPoE credentials are provided by CenturyLink or visible in your account portal. If you don’t see them, contact support to obtain or reset them.
Check your account or contact CenturyLink to retrieve PPPoE credentials.
Why am I not getting expected speeds after setup?
Speeds can be affected by line quality, Wi‑Fi interference, or misconfigured QoS. Verify wiring, test with a wired connection, update firmware, and adjust channel settings.
Test with a wired device, update firmware, and optimize channels to improve speeds.
Do I need a fiber or DSL plan to use a modem router?
Your plan type (fiber or DSL) determines which modem-router features you should pursue. Ensure the device supports your service specification before purchasing.
Your plan type dictates compatibility; confirm DSL vs fiber support before buying.
Will CenturyLink support my third-party equipment if I face issues?
Support for third-party equipment can vary. If issues arise, contact CenturyLink for guidance, but they may direct you to troubleshooting only for their gateway.
Support may be limited for third-party gear; check with CenturyLink for guidance.
Watch Video
What to Remember
- Verify service type before buying devices.
- Bridge mode often reduces NAT-related issues.
- Secure Wi‑Fi with strong passwords and WPA3.
- Document settings for future troubleshooting.
- Regularly check firmware updates and compatibility.