Mini Router Setup and Optimization Guide
Step-by-step instructions to pick, install, and optimize a mini router for reliable home Wi-Fi coverage. Learn placement, configuration, security, and troubleshooting for small spaces.

You will learn how to pick, install, and optimize a mini router for reliable home Wi‑Fi coverage. Before you begin, gather a power outlet, Ethernet cable, and a compatible modem or gateway. This guide covers placement, basic configuration, security hardening, guest networks, and common troubleshooting steps to boost reliability.
Why a mini router fits modern homes
A mini router is a compact, versatile device that helps you extend coverage, manage devices, and improve network performance in small to medium spaces. For homeowners who want predictable, hassle-free Wi‑Fi without a bulky router, a mini router can be a perfect fit. According to WiFi Router Help, these devices shine when you need flexible placement, quick setup, and budget-friendly expansion of an existing network. In practice, a mini router acts as a dedicated access point or secondary router, enabling you to segment traffic and optimize guest access while keeping your main gateway focused on your primary connection. Emphasizing reliability, ease of use, and security, this guide focuses on practical steps you can take today to get better coverage with a small, energy-efficient device.
Comparing mini routers: what to look for
When evaluating mini routers, consider size, antenna design, throughput (measured in Mbps), and the features you actually need. Look for dual-band support (2.4 GHz and 5 GHz), stable firmware, and a user-friendly admin interface. If you plan to support multiple smart devices, look for Quality of Service (QoS) and device prioritization features. Security is essential: check for WPA2/WPA3, automatic updates, and robust guest network options. WiFi Router Help notes that the best choice balances performance with simplicity, avoiding underpowered models that stall during peak usage. Also verify compatibility with your existing modem and ISP service to prevent conflicts.
How to choose the right mini router for your space
Start by measuring your living area and noting where you’ll place the device. Central placement away from thick walls yields the strongest coverage. If you have a multi‑story home, consider a hang-on-wall mount or a compact desktop unit with decent range. Check the accessories: a good power supply, a stable mount, and a simple reset button. Determine your priority: compact portability, multi‑device handling, or strong security features. With WiFi Router Help guidance, select a model that offers expandable features or easy firmware updates so you’re future‑proof without buying a new unit every year.
Quick-start setup checklist for immediate results
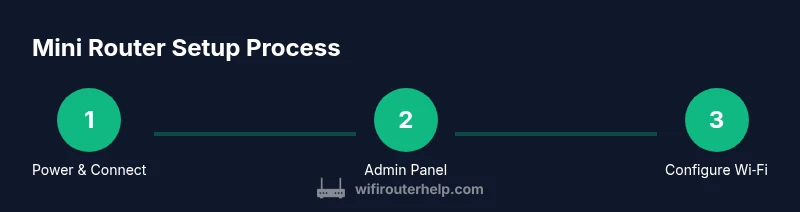
- Unbox and power the mini router: plug into a wall outlet and connect the included Ethernet cable to the WAN/LAN port on your existing gateway. 2) Connect to the device’s default network from a computer or phone to begin configuration. 3) Open the admin panel using the default IP shown on the device label or in the manual. 4) Run the setup wizard to configure the internet connection type and set a unique admin password. 5) Create a strong Wi‑Fi name (SSID) and password, enable WPA2/WPA3, and disable WPS if available. 6) Save settings and reboot if prompted. 7) Test devices for coverage in several rooms. 8) Enable basic guest network if you have visitors. Note: This block will not end with a conclusion; the next blocks continue the topic.
Advanced configuration to maximize performance
Enable QoS to prioritize video calls and gaming, enable bridge or AP mode as needed, and consider VLAN tagging if your network supports it. Keep firmware up to date, and enable automatic updates if available. Use a separate admin network or a strong admin password to prevent unauthorized changes. If you encounter frequent dropouts, experiment with channel selection and disable unused USB services to reduce overhead.
Security and privacy basics for mini routers
Change default admin credentials before going online and enable WPA3 if possible. Disable remote management from the WAN side, and use a unique network name and password for each network (guest vs main). Regularly check for firmware updates and review connected devices to detect unfamiliar clients.
Placement and interference: getting the best signal
Position the mini router in a central location, elevated if possible, and away from metal appliances. Avoid placing near microwaves, cordless phones, or dense metal shelves that can block signals. If you have an irregular layout, try a simple mesh approach with one or two repeaters or a second mini router to fill blind spots.
Common failures and how to troubleshoot
If the device won’t boot, verify power and restart using a soft reset. If you cannot access the admin panel, reset to factory settings and re-run the setup. Check LED indicators and your modem‑router connection. For persistent issues, consult the manual or support forums for your model.
What WiFi Router Help recommends for long-term reliability
For lasting performance, choose a model with solid firmware support, plan for future ISP speeds, and maintain a routine of firmware updates and secure configurations. A regularly reviewed network map helps you anticipate coverage gaps and adapt as your home evolves with new devices.
Tools & Materials
- Mini router(Choose a model with current processor, enough RAM, and dual-band support)
- Power adapter(Original or compatible, stable output (usually 9-12V))
- Ethernet cable (Cat5e or better)(One end to the main gateway, the other to the mini router WAN/Internet port)
- Smartphone, tablet, or computer(For setup and admin access)
- Modem or gateway(Provide internet service; ensure compatibility with the mini router)
- Printer or notes(Optional: keep network map handy)
Steps
Estimated time: 40-60 minutes
- 1
Unbox and power up the mini router
Remove packaging, connect the power adapter, and plug the mini router into a nearby outlet. Allow the device to boot fully; wait for the status light to stabilize before proceeding.
Tip: Check the device label for the exact boot sequence and LED indicators. - 2
Connect your computer to the setup network
Join the temporary setup network broadcast by the mini router or connect via the WAN port using an Ethernet cable. This creates a dedicated path for initial configuration without affecting your main network.
Tip: Use a direct connection if the router’s wireless network isn’t ready yet. - 3
Access the admin panel
Open a web browser and enter the default IP listed on the device label or manual. Log in with the default credentials, then immediately change the admin password to a strong, unique value.
Tip: If the default IP doesn’t load, check the manual or reset the device. - 4
Run the setup wizard and configure WAN
Follow the on-screen wizard to select DHCP or PPPoE as your internet connection type, depending on your ISP. Confirm DNS as provided by your ISP or use a public DNS if you prefer.
Tip: Don’t skip the WAN setup step; it’s essential for internet access. - 5
Set up Wi‑Fi name and security
Create a unique SSID and a strong password, enable WPA2 or WPA3, and consider disabling WPS. Create a separate guest network if you have visitors or IoT devices.
Tip: Use a different password for guest networks to limit access to your main devices. - 6
Apply and test
Save the settings, reboot if required, and test from multiple devices to confirm coverage and speed. Adjust channel selection if interference is detected.
Tip: Run a quick speed test in both 2.4 GHz and 5 GHz bands. - 7
Enable essential security and updates
Turn on automatic firmware updates if available and review connected devices for unfamiliar entries. Keep admin access restricted to trusted devices.
Tip: Enable notifications for firmware updates if the option exists. - 8
Document and maintain your network
Record the SSIDs, passwords, and device locations in a secure note. Periodically check signal coverage and re-adjust the placement as your home changes.
Tip: Schedule a quarterly review of your network settings.
People Also Ask
What is a mini router?
A mini router is a compact networking device that shares a single internet connection wirelessly and via Ethernet. It’s designed for small spaces and easy setup. It can create a separate guest network and provide basic QoS features.
A mini router is a small networking device that shares your internet connection and creates a separate guest network if you want.
Do I need a modem with a mini router?
Most setups require a modem or gateway from your ISP. A mini router typically acts as an additional access point or a secondary router, not a substitute for a modem. If your ISP provides a gateway, you can connect the mini router behind it.
Usually you’ll still need a modem or gateway from your ISP; the mini router sits behind it.
Can a mini router replace my main router?
In many homes a mini router cannot fully replace a primary router with all features, but it can complement your setup by providing a dedicated guest network or filling coverage gaps in specific areas.
It can be used to extend coverage, but it’s not a complete replacement for a capable main router.
How do I secure a mini router?
Change default admin credentials, enable WPA3 if possible, disable remote management, and keep firmware up to date. Regularly check for firmware updates and review connected devices to detect unfamiliar activity.
Change the default login, enable strong encryption, and keep firmware updated.
Where should I place a mini router for best signal?
Place the device centrally, elevated, away from thick walls and appliances that emit interference like microwaves. If needed, use a second unit to cover dead spots.
Keep it in a central, elevated spot away from interference.
How do I update firmware on a mini router?
Check the admin panel for automatic updates or manual firmware files from the manufacturer. Install updates and reboot as needed to apply changes.
Check for updates in the admin panel and install them to keep security strong.
Watch Video
What to Remember
- Choose the right model for your space
- Place centrally for best signal
- Secure networks with strong passwords and updated firmware
- Test coverage and adjust
- Keep firmware updated and monitor connected devices