How to Use a Router: A Practical, Step-by-Step Guide
Learn how to use a router with clear, practical steps to set up, secure, and optimize your home Wi-Fi. This guide covers hardware, admin access, network security, and troubleshooting for reliable coverage.

Learn how to use a router to set up reliable home Wi‑Fi, secure your network, and optimize coverage. This step‑by‑step guide covers essential setup tasks, basic security, and practical tips for troubleshooting common issues. By the end, you’ll know how to connect devices, customize settings, and keep your home network running smoothly.
How routers function in a home network
Your home network hinges on a router that directs traffic between devices and the Internet. In simple terms, the router creates a local network (LAN) using an SSID and a Wi‑Fi password, assigns IP addresses via DHCP, and translates private IPs to a public IP with NAT so your devices share a single Internet connection. Core concepts you should know include the WAN port that connects to your modem, the LAN ports for wired devices, and the difference between 2.4 GHz and 5 GHz bands. Understanding these elements helps you choose a good placement, avoid interference, and troubleshoot slower speeds. Security features like firewall, WPA/WPA2/WPA3 encryption, and guest networks are part of the router’s job, not an extra task. When you use a router, you’re coordinating multiple data streams and keeping your home network safe from unauthorized access.
Preparing to use a router: prerequisites and planning
Before you start, map out your goals: Do you want better coverage in the far corner of the house? Are you configuring a dedicated guest network? Clarify which devices should connect over Wi‑Fi vs Ethernet. Gather equipment: your router, a modem (if separate), an Ethernet cable, a power adapter, and a device to configure settings (computer, smartphone, or tablet). Ensure you have a reliable power source and a quiet place to work. If you’re replacing an existing router, note the current SSID and password in case you want a seamless transition. For ISPs that provide a gateway, decide whether you will disable the gateway’s Wi‑Fi to use your own router or run the combined device in bridge mode. Planning in advance saves time and prevents repeated resets.
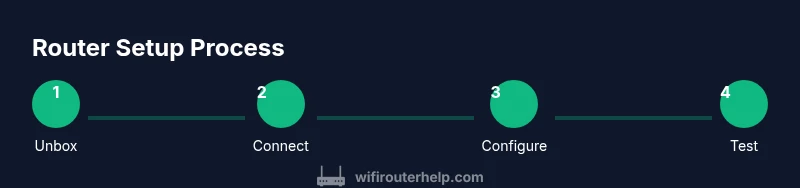
Step-by-step: initial hardware connections and power-up
- Unbox and verify components: confirm you have a router, modem (if separate), at least one Ethernet cable, a power adapter, and a device for setup. 2) Position the modem and router near a power outlet and in a central location away from thick walls. 3) Connect the modem to the router using an Ethernet cable from the modem’s Ethernet port to the router’s Internet/WAN port. 4) Plug in the power adapters and turn on the modem first, then the router when the modem’s lights stabilize. 5) Wait about 2–3 minutes for the devices to boot and negotiate connections. 6) If your router supports a factory reset, note you can perform it later if necessary to restore defaults. 7) Check LEDs for a stable Internet or Wi‑Fi indicator.
Accessing the router interface and basic config
Next, you’ll access the router’s admin interface to set up the network. Use a computer or mobile device connected to the router’s Wi‑Fi or via Ethernet. Open a browser and enter the default IP address (commonly 192.168.1.1 or 192.168.0.1) or use the app if provided by the manufacturer. When prompted, log in with the default username/password found in the manual or on the router label. Change the admin password immediately and document it securely. If you can’t reach the interface, double-check the connections, disable VPNs on the setup device, and try a different browser. Some routers require you to connect to the router’s temporary network before the full configuration loads.
Securing your router: essential protections
Security is about layers. Start by changing the default admin credentials to a strong, unique password and enabling WPA3 (or WPA2 if WPA3 isn’t available) for your Wi‑Fi. Update the router’s firmware to the latest version to fix vulnerabilities. Disable WPS unless you have a compelling reason to keep it enabled, and consider turning on a guest network for visitors so your main network remains private. Turn off remote management unless you need it, and enable a firewall to filter incoming traffic. If you’re handling sensitive devices, enable TLS/HTTPS for the admin interface and regularly review connected devices to spot unfamiliar clients. Keep a log of changes and set a reminder to check for updates every few weeks.
Optimizing for coverage and performance
Placement matters more than you may think. Mount the router at a central height (not on the floor), away from metal appliances and thick walls. Use the 2.4 GHz band for longer range and the 5 GHz band for higher speeds in close proximity; if your router supports dual-band operation and band steering, enable it. For large homes, consider mesh extenders or a satellite system for seamless roaming. Adjust channel settings to minimize interference: in many areas, 1, 6, or 11 are good defaults for 2.4 GHz. For 5 GHz, you may need to experiment with channel width (20/40/80 MHz) depending on your environment. Enable QoS (Quality of Service) if you have latency-sensitive devices like gaming consoles or VoIP. Finally, set up a basic firewall profile and limit remote access to trusted IPs.
Advanced features and ongoing maintenance
As you grow more confident, explore advanced features to tailor your network. Create a guest network to isolate visitors, implement parental controls for family safety, and set up device-based access rules or time schedules. Regularly check for firmware updates, back up your settings, and document any changes. If you manage multiple routers or a mesh system, ensure consistent SSIDs and passwords across units for seamless roaming. Periodically run a speed test from different locations to identify dead zones and adjust placement or hardware as needed. Finally, consider logging security events and enabling alerts for new devices or failed login attempts to stay ahead of potential threats.
Tools & Materials
- Router(Your WiFi router or mesh hub)
- Modem(The device provided by your ISP (if separate from router))
- Ethernet cable (RJ-45)(Used to connect modem to router (or router to computer during setup))
- Computer, smartphone, or tablet(For accessing the router’s admin interface)
- Web browser or official router app(To log in and configure settings)
- Power adapter and outlet(Stable power during setup)
Steps
Estimated time: 30-60 minutes
- 1
Verify components and plan
Unbox all parts and confirm you have a router, modem, Ethernet cable(s), power adapter, and a setup device. Define your goals (coverage, guest network, parental controls) to guide configuration decisions.
Tip: Keep a notebook or digital note with your planned SSID and password changes for reference. - 2
Position devices for best coverage
Place the modem and router in a central, elevated location away from thick walls and metal appliances. This reduces interference and dead zones across the home.
Tip: Avoid enclosing in cabinets; a small open area often yields stronger signals. - 3
Connect hardware components
Connect the modem to the router via an Ethernet cable from the modem’s LAN port to the router’s Internet/WAN port. Use a secondary Ethernet cable if you plan to access the router from a wired computer during setup.
Tip: Make sure the cables are fully seated in the ports for a stable connection. - 4
Power up in the correct order
Plug in the modem first and wait for its indicators to stabilize. Then power up the router and wait for its lights to indicate a healthy connection.
Tip: If a device won’t boot, disconnect and retry after 30 seconds. - 5
Access the router admin interface
From your setup device, open a browser and enter the router’s default IP (commonly 192.168.1.1 or 192.168.0.1) or use the manufacturer’s app. Log in with the default credentials and prepare to change them.
Tip: If you don’t see the login page, ensure you’re connected to the router’s network (wired or wireless). - 6
Secure the admin account
Immediately change the default admin password and enable encryption for your Wi‑Fi (prefer WPA3, fallback to WPA2).
Tip: Write down the new password and store it securely. - 7
Configure Wi‑Fi name and password
Set a unique SSID for each band (2.4 GHz and 5 GHz if available) and choose strong, unique passwords. Consider disabling SSID broadcast if you want extra privacy, though that can complicate setup for devices.
Tip: Use separate networks for guests and main devices to improve security. - 8
Enable security features and update firmware
Turn on the router firewall, enable automatic firmware updates if available, and disable WPS unless you have a compelling reason to keep it enabled.
Tip: Regular firmware updates fix known vulnerabilities and improve performance. - 9
Test connectivity and fine-tune
Connect multiple devices to verify Internet access and test speed in various rooms. Adjust placement, channel width, and QoS rules if needed to optimize performance.
Tip: Run a speed test near far edges of the home to gauge coverage gaps.
People Also Ask
Do I need a modem to use a router?
In most setups, a modem connects to the Internet and a router provides local Wi‑Fi and wired connections. Some devices combine both functions in a gateway. If you have a separate modem, you will connect the router to it via the WAN port.
Usually you need a modem to get online, and a router to create your home network. If you have a gateway, you can use it as a modem-router combo or place the router in bridge mode for improved performance.
Can I use any router with my ISP?
Most ISPs support third‑party routers, but some features may require using their gateway. Check with your provider for compatibility and whether you should disable the ISP’s modem features when using your own router.
Most ISPs work with third‑party routers, but you may lose some features unless you bridge the gateway or use a compatible setup.
What is the best security setting for a home router?
Use WPA3 if available; otherwise WPA2‑AES. Change the admin password, enable the router firewall, disable WPS, and keep firmware up to date. Create a separate guest network for visitors.
Enable WPA3 if possible, keep firmware current, and use a strong admin password. A guest network helps protect your main devices.
How often should I update the router firmware?
Check for updates regularly and install them when available. Firmware updates fix security vulnerabilities and improve performance. Enable automatic updates if your router supports it.
Check for updates often and install them when they’re available to keep the network secure and fast.
Why can’t I access the router admin page?
Confirm you’re connected to the router (wired or wireless) and using the correct IP address. If needed, reset the router to factory defaults and try again. Disable VPNs or proxies that could block access on your setup device.
Make sure you’re on the network and using the right IP. If it still doesn’t work, a reset might be required.
Should I disable WPS?
Yes. WPS can be convenient but is a well-known security risk. Disable it and use manual PIN or passphrase methods to connect devices.
Disable WPS for better security and connect devices using your Wi‑Fi password instead.
What to Remember
- Know your router’s role in the home network.
- Secure the admin interface and Wi‑Fi with strong passwords and current firmware.
- Optimize placement and settings for reliable coverage.
- Use guest networks and parental controls to protect devices.