Corner Router Placement: A Practical Guide
Learn how to position and optimize your WiFi router in a corner for stronger coverage, reduced dead zones, and tidy cable management. This step-by-step guide covers planning, orientation, mounting options, testing, and troubleshooting for real homes.

Learn how to position a WiFi router in a corner to maximize coverage, minimize dead zones, and keep cables tidy. You’ll need a router, basic mounting or stand options, and a simple signal test method. Follow a clear, step-by-step approach for orientation, mounting, and tuning to improve home Wi‑Fi reliability.
Why Corner Placement Matters for WiFi Coverage
Corner placement can influence signal behavior due to reflections and air paths. According to WiFi Router Help, mounting a router near a corner can both help and hinder coverage depending on distance to walls and furniture. In many homes, a diagonal line from the corner toward the center of the living space yields fewer dead zones when the unit has dual-band antennas. Understanding these dynamics helps you place the router where its signals can propagate most effectively across open spaces while minimizing interference from metal appliances and large furniture. By planning a deliberate corner setup, you can avoid common pitfalls and improve reliability across multiple rooms.
Planning Your Corner Setup: Measurements and Materials
Before moving the router, measure the room and identify the corner that offers the most open space and least obstruction. Use a simple map or floor plan to note distances to walls, doors, and major furniture. Gather materials: the router, a stand or wall-mount kit if you plan elevated placement, cable clips, spare ethernet cable for a ready backhaul, and a surge-protected power strip. For testing later, keep a phone or laptop handy to run quick speed checks. The WiFi Router Help team recommends documenting initial placements to compare later results.
Choosing the Right Orientation for Corner Placement
Position the router so its antennas face into the largest functional area; if possible, place the unit high enough to clear obstructions but not so high it loses line of sight to devices. For most desktop or shelf placements, orient antennas vertically to maximize multi-path propagation across floors. If you have a tall corner, experiment with slight tilts away from hard surfaces. Sharp reflections from nearby glass or metal can degrade certain frequencies, so aim for an open line of sight where your primary devices are used most often.
Cabling, Power, and Cable Management in Corner Installations
Plan cable routes to avoid stepping on cords or creating tripping hazards. Use adhesive cable clips or Velcro ties to secure power and ethernet cables along the baseboard or behind furniture. Keep the router away from heat sources like radiators or direct sunlight to maintain performance and longevity. If possible, route power and data cables separately to reduce interference and ensure you can unplug the router safely without disturbing other devices.
Wall Mounting vs. Desk Placement: Pros and Cons
Wall mounting can save desk space and place the router at an elevation that improves coverage, but it requires a mounting kit and careful cable routing. Desk or shelf placement is easier for quick adjustments and testing but may be more visible and prone to clutter. Consider your room shape and traffic patterns: high-traffic corners benefit from elevated, out-of-the-way mounting, while quiet corners work well on a stand or shelf at eye level. Evaluate both options and choose the setup that minimizes obstruction while maximizing reach.
Optimizing Antennas and Channel Settings After Corner Placement
After positioning, verify that the antennas point toward the majority of active spaces and devices. Use 2.4 GHz for longer reach and 5 GHz for higher speeds in close range, enabling band steering if your router supports it. Check for channel congestion in your neighborhood and manual channel selection if auto-optimization stalls. If you have a modern router, enable features like airtime fairness and beamforming to improve performance in a corner installation. Small tweaks can yield noticeable gains in throughput and stability across rooms.
Troubleshooting Common Corner Placement Issues
If you notice dead zones, reassess the corner choice: sometimes a slightly different corner improves coverage more than a major reposition. Check for thick walls, metal appliances, or large glass windows that can reflect or absorb signals. Re-run tests from different rooms using a simple speed test app or built-in diagnostics and compare results. If problems persist, consider adding a range extender or a mesh node in high-demand areas rather than over-pushing the main router’s placement.
Safety and Aesthetics for Corner Routers
Avoid blocking vents or placing the router inside a cabinet that traps heat. Ensure cords are secure and out of reach of children or pets. Use cable organizers to keep the look clean and minimize accidental contact. A tidy setup not only looks better but also reduces the risk of overheating caused by restricted airflow.
Real-World Scenarios: Corner Placement in Different Rooms
Living rooms, home offices, and bedrooms each present unique challenges. In open living spaces, the corner can act as a launchpad for distributing signals across multiple seating areas. In a small bedroom, prioritize proximity to primary devices and minimize obstacles. In a cramped office, elevated placement near the door side often yields better propagation than a desk-bound router. Adapt the approach to your floor plan, furniture, and daily activity patterns.
Tools & Materials
- WiFi router(Ensure it supports dual-band 2.4 GHz and 5 GHz)
- Ethernet cable(Use at least 1 m for backhaul if needed)
- Cable clips or zip ties(For tidy routes along walls and baseboards)
- Power strip with surge protection(Avoid daisy-chaining to protect equipment)
- Wall mount kit or stand(Optional for elevated corner placement)
- Measuring tape(Helpful for planning distances to walls and furniture)
- Stud finder(Optional if mounting on wall near studs)
Steps
Estimated time: 30-45 minutes
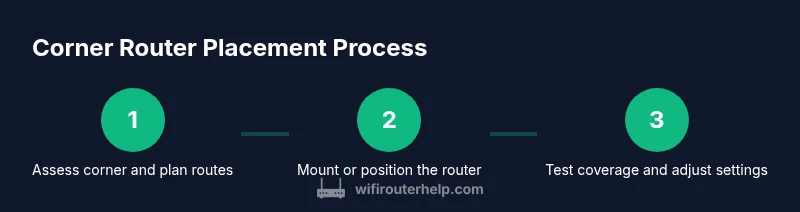
- 1
Assess the corner and plan layout
Survey the corner for open space, nearby walls, and potential obstructions. Sketch a simple layout showing where cables will run and how devices will be positioned in the adjacent rooms. This planning reduces the need for multiple repositionings later.
Tip: Use a floor plan or floor plan app to visualize coverage before moving the router. - 2
Choose orientation and height
Decide whether to mount or place the router on a shelf or stand. Elevation helps avoid furniture and improves line-of-sight to many devices. Align antennas toward the main living areas to maximize signal spread.
Tip: Experiment with vertical vs slight tilts to find the best balance of coverage. - 3
Mount or position the router
Install the router in the selected corner at the chosen height. If mounting, use the kit and ensure screws are secure. If placing on a shelf, keep it centered and away from metal objects that could interfere.
Tip: Leave several inches of clearance around vents and sides for airflow. - 4
Route and secure cables
Run power and data cables along walls or baseboards using clips or ties. Separate power from data lines where possible to reduce electromagnetic interference. Avoid tight bends in cables to prevent wear.
Tip: Keep the power cable separate from ethernet to minimize interference. - 5
Configure basic wireless settings
Log into the router’s admin interface and configure the SSID, password, and security protocol. Enable 2.4 GHz and 5 GHz bands and consider enabling guest networks if needed. Turn on features like band steering if available.
Tip: Change default admin credentials to improve security. - 6
Test coverage and adjust
Run speed tests from several rooms and note where signal is strongest or weakest. Adjust antenna orientation, channel, and transmit power as needed to balance coverage.
Tip: Use a smartphone app or laptop to test from typical device locations. - 7
Tidy and finalize
Secure all cables, hide excess length, and clean the area. Consider adding a mesh node if coverage gaps remain in far corners.
Tip: Document changes so you can revert if needed.
People Also Ask
Is corner placement the best option for every home?
No. Corner placement often helps in open floor plans but may not suit very thick-walled homes. Always test in your own space and adjust based on real measurements.
Corner placement can help, but always test in your space and adjust based on measurements.
Should I mount the router on the wall or keep it on a desk near the corner?
Mounting can improve clearance and reduce clutter, but it requires hardware and careful routing. A desk setup is easier to tweak but can be less tidy and may block airflow.
Wall mounting saves space but takes more setup; desks are easier to adjust but can look cluttered.
Will corner placement affect signal on other floors?
Yes, signals can travel vertically but may weaken on higher or distant floors if walls are thick. Consider additional nodes or repositioning if you notice dead zones upstairs.
Signal can drop on upper floors; you may need extra nodes for full coverage.
Can I rely on a mesh system if corner placement isn’t enough?
A mesh system is a robust solution for multi-room homes with dead zones. It complements proper corner placement by extending coverage where a single router struggles.
A mesh system is a strong option if one router isn’t enough.
What if I have large metal cabinets near the corner?
Large metal surfaces can reflect signals and create interference. Move the router away from metal, or use a mesh node to bypass obstructed paths.
Metal nearby can block signals; consider relocating or adding nodes.
How often should I retest after changes?
Retest after any major change like mounting height, orientation, or channel changes to confirm improvements or detect new dead zones.
Retest after changes to verify improvements.
Watch Video
What to Remember
- Plan corner placement to maximize open space.
- Test signal from multiple rooms after setup.
- Elevate and orient antennas for best coverage.
- Tidy cables to improve safety and appearance.