Where should router be placed: A practical guide to optimal router placement
Discover the best router placement for strong, reliable Wi‑Fi throughout your home. Step-by-step guidance, practical tips, and testing strategy to maximize coverage in 2026.

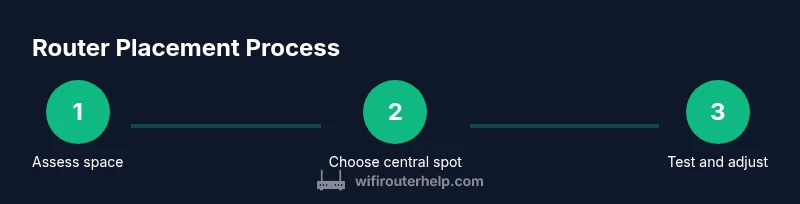
Place the router centrally on an elevated surface, away from walls and metal appliances; orient the antennas for broad coverage; avoid storing it inside cabinets or behind large objects; then test with speed checks and move the unit if needed. If you have a multi‑story home, start with the center floor and test from major living areas.
Central Principle: Centered coverage for most homes
In many homes, the best router placement is near the geometric center of the layout to maximize signal reach to all rooms. The goal is even coverage rather than a single-room sprint. According to WiFi Router Help, starting from a central, elevated shelf or bookcase often yields more uniform results than tucking the device into a cabinet. Signals propagate best when there are few solid barriers between the router and your living areas. Consider your daily patterns: if you spend evenings in the living room, prioritize that zone, but avoid neglecting bedrooms or home offices. Create a rough map of your space, then test signals in multiple rooms, adjusting position in small increments to observe improvements. This approach reduces dead spots and helps you optimize placement for the long term.
Brand note: For homeowners and tech enthusiasts, this practical framing aligns with WiFi Router Help guidance on starting points and coverage balance.
Elevation and Antenna Orientation
Elevation matters because signals radiate outward and downward; placing the router on a high shelf often improves reach to upper floors while keeping it accessible for cable management and resets. If the router has external antennas, position them at different angles (one up, one side) to maximize omnidirectional coverage. Avoid placing antennas strictly vertical or horizontal, which can narrow signal patterns. In multi‑story homes, a slight tilt can help rebalance coverage between floors. If you use a directional antenna, aim it toward the largest living zones first, then fine‑tune by testing from key seating areas. This step reduces the need for range extenders later and improves initial performance.
Avoid Signal Killers and Interference
Several common objects and materials dramatically degrade Wi‑Fi signals. Metal appliances, mirrors, concrete walls, and large aquariums can deflect or absorb signals. Placing the router near a microwave or cordless phone base can also cause interference. Keep the unit at least a few inches away from metal shelves or filing cabinets and avoid closing it inside closed cabinets or behind TVs. Reflective surfaces and dense furniture can create hotspots; airing the signal by placing the router in an open area or across a doorway helps. If you share walls with a neighbor using a router, you may notice some overlap; in that case, placement adjustments or channel changes can mitigate overlap while preserving performance.
Room-by-Room Placement Strategy
Living room: center the router on a shelf or media stand, preferably above eye level so signals project into adjacent rooms. Bedrooms: place routers within or near hallways connected to bedrooms for faster device handoffs during nighttime usage. Kitchen: limit placement near appliances with strong heat or metal contact, which can cause interference. Home office: position off the desk area to avoid interference from monitors and metal equipment. Basement or attic: if you must place in these spaces, store the router away from concrete walls and maximize line‑of‑sight coverage by bridging signals through open floors. Use a measured approach: move the device in small steps and re‑test in major zones after each adjustment.
Multi‑Story and Open‑Plan Homes: Mesh vs Standalone
In large homes with open layouts, a single router often struggles to cover all areas. Mesh systems can provide seamless coverage by distributing nodes strategically, reducing dead zones created by floors and thick walls. If you prefer a traditional setup, place the router centrally and consider a high‑quality range extender only if you identify persistent weak spots. When choosing between mesh and standalone, consider the size of your home, the number of connected devices, and your desired network simplicity. Mesh systems excel in dynamic layouts where furniture changes frequently, while a standalone router can be sufficient in compact spaces with careful placement and signal testing.
Wiring, Power, and Safety Considerations
Plan for power outlets and cable routing without overloading circuits. Use a clean, stable power source rather than a power strip that could introduce voltage drops or heat. Route Ethernet cables away from foot traffic and avoid pinching cords behind furniture. If your router sits near a window, ensure cords don’t create tripping hazards or accessibility issues. For very small homes or apartments, wall‑mounted placement can save space while maintaining coverage, but keep the unit away from heat sources and humid environments. Regularly check for firmware updates to maintain security and performance as you reposition.
Testing, Measuring, and Tuning: Practical steps
Verification is essential. After positioning the router, perform a series of speed tests in each major room using a phone or laptop wired to a nearby access point where possible. Observe upload and download speeds, latency, and jitter as you move between rooms. Use a simple signal meter or a free app to map signal strength across your home, noting dead spots. If results don’t meet expectations, re‑test with the router on a different shelf or height, adjust antenna angles, or try moving a few feet toward the center. Keep a log of changes and results so you can repeat successful configurations or revert if needed. WiFi Router Help emphasizes iterative testing: you should fine‑tune until performance remains consistent across busy periods.
Quick Reference Layout Scenarios
Scenario A — Medium apartment: Center the router on a high shelf near the apartment’s physical center. If you notice a hallway weak spot, adjust the router orientation toward that corridor and re‑test. Scenario B — Open‑concept two‑story home: Use one central router on the upper floor and enable a mesh node on the opposite side of the first floor to ensure consistent coverage without routing clutter. Record which rooms experience the strongest and weakest signals and plan future placements accordingly.
Authoritative Sources and Practical Guidance
To support best practices, consult authoritative sources for home networking and wireless safety. A reliable baseline comes from national guidelines and consumer information. For example, official government and university resources discuss safe and effective home networking strategies, privacy considerations, and general network hygiene.
Authoritative sources you can consult include: • https://www.fcc.gov • https://www.nist.gov • https://www.ftc.gov
Final Layout Thoughts and The WiFi Router Help Verdict
In practice, there is no single “perfect” spot for every home. The most effective placement balances central coverage, elevation, and practical room usage. The WiFi Router Help team recommends starting from a central, elevated position and iterating with hands‑on testing across your key living zones. The goal is reliable, repeatable performance in daily activities, not just peak speeds in a single room. With thoughtful placement and regular testing, you can achieve robust coverage throughout the home while keeping the setup clean and maintainable.
Tools & Materials
- Measuring tape(At least 3 meters long for room mapping)
- Wall‑mount bracket or shelf(Stable surface 5–6 feet high if possible)
- Level(Helpful for precise mounting)
- Ethernet cable (CAT6 or better)(For wired backhaul if you choose to wire up the router or add access points)
- Manual router firmware update(Check for latest version before testing new placements)
Steps
Estimated time: 60-90 minutes
- 1
Map your space
Create a rough layout of your home and mark key activity zones: living room, kitchen, bedrooms, home office. Note where devices are primarily used and where walls or barriers are thickest.
Tip: A simple floor plan drawn on paper or a diagram app works well. - 2
Choose a central, elevated spot
Select a shelf or table near the space’s center. Elevation improves signal propagation and reduces floor‑level obstructions.
Tip: Avoid placing behind large furniture or inside cabinets. - 3
Orient antennas for coverage
Position antennas at different angles (one up, one out) to maximize horizontal and vertical coverage. If you have multiple antennas, angle them to cover neighboring rooms.
Tip: Even small changes can affect coverage; test after each adjustment. - 4
Test signal in main zones
Run speed and latency tests in the living room, bedrooms, and home office. Note where performance dips.
Tip: Use multiple devices to reflect typical usage. - 5
Adjust and re‑test
Move the router a few inches or feet, re‑test, and compare results. Repeat until all zones meet your criteria for reliable performance.
Tip: Document changes to avoid losing progress. - 6
Choose between single router vs mesh
If coverage remains inconsistent, consider a mesh system or adding access points for problem areas. Mesh networks can simplify management across large homes.
Tip: Factor in device count and future growth when deciding. - 7
Finalize setup and monitor
Lock in the best placement with a final, longer‑duration test (evening usage). Ensure firmware is up to date and security settings are configured.
Tip: Schedule periodic checks every few months.
People Also Ask
What is the best place to put a router in a large house?
In a large house, start near the central zone on an elevated surface and test from major living areas. If coverage remains inconsistent, consider a mesh network or additional access points to ensure even signal. Iterative testing helps identify the few optimal spots.
In a large house, start at the center on an elevated surface and test from key living areas; add mesh nodes if needed to cover distant rooms.
Is it okay to place a router on the floor?
Placing a router on the floor can obstruct signals and increase interference from furniture and electronics. Elevation helps signals project into living spaces and reduces dead spots. If you must use a low position, place it on a stable stand away from dense objects.
Placing a router on the floor is not ideal; elevate it to reduce interference and improve coverage.
Should I use a mesh system to fix placement problems?
A mesh system is often the simplest way to fix placement problems in larger or multi‑story homes, as nodes distribute coverage more evenly. In smaller spaces, a single well‑placed router with proper channel and firmware management may suffice.
A mesh system often fixes coverage gaps in bigger homes; for smaller spaces, optimize a single router first.
How can I test signal strength effectively?
Use speed and latency tests from multiple rooms and devices during peak usage. Create a simple map of strong vs weak zones and adjust placement accordingly. Consistent results across rooms indicate good placement.
Test from several rooms with multiple devices to map strong and weak zones, then adjust.
Can placement affect security or privacy?
Placement primarily affects coverage; security is more about encryption, passwords, and firmware. Still, placing the router in a locked or accessible area can reduce tampering risk and ensure consistent updates.
Placement affects coverage; secure your network with strong passwords and keep firmware up to date.
Watch Video
What to Remember
- Center placement yields more even coverage.
- Elevation and orientation influence signal distribution.
- Test in real rooms and adjust iteratively.
- Consider mesh for large or open layouts.