How to Route a Cable in a Straight Line: A Step-by-Step Guide
Learn how to route a network cable in a straight line from your WiFi router with planning, tools, and testing tips for a neat, reliable home network.

How to router in a straight line means routing a network cable or pathway in a clean, straight line from your router to another room. This quick guide covers planning, path selection, securing the route, and verifying signal integrity, with safety and wall/ceiling routing considerations. Follow the steps to minimize interference and tangle-free cables.
Why a straight-line cable route matters
A straight and tidy routing path reduces signal loss, minimizes interference from nearby electrical cables, and makes future changes easier. While a bent path may seem convenient, it invites excess cable length, signal reflections, and potential hazards from trailing cords. For home networks, keeping lines straight helps maintain consistent speeds across rooms and simplifies troubleshooting when devices move. According to WiFi Router Help, upfront planning minimizes guesswork and keeps your setup scalable as your home evolves.
A well-planned straight path also reduces clutter and improves airflow around devices, which can indirectly support better network performance and device longevity. By visualizing the route early, you can anticipate pinch points and select the right hardware to accommodate future upgrades without rerouting.
Assessing the route and constraints
Before you cut or drill, map your space and measure distances. Identify obstacles such as doors, baseboards, and crown moldings. Choose routes that follow walls or ceilings to minimize visible cables. Check for hidden power lines or plumbing with a stud finder or wall scanner. Decide whether you will run the cable behind furniture, along baseboards, or inside walls, and confirm your chosen path will not require risky wall penetrations unless you are confident in wall work.
A thorough assessment helps you select the best path for performance and aesthetics, reducing the need for repeated corrections later.
Tools, materials, and planning resources
Select a cable type suitable for the distance and environment, typically Cat6 or higher for home networks. Gather cable clips, wall plates, and a low‑voltage mounting bracket. Have a stud finder, fish tape, a drill with the correct bit, a tape measure, and a cable tester on hand. If routing through walls, plan for conduit and proper firestop. Keep extra length for turns and future changes. Having the right tools on hand prevents mid‑project trips to the hardware store and speeds up completion.
Choosing quality materials now saves time and reduces the chance of needing to redo sections later.
Step-by-step planning before you cut or drill
Start by marking the exact route with painter’s tape and a pencil. Verify there are no obstacles behind the walls where you plan to drill, and confirm the router location and destination room. Prepare your tools and test lengths on a scrap piece of cable. Finally, seal any entry points with proper low‑voltage wall plates and avoid over-tight bends.
Planning is the most critical phase; rushing here often causes mistakes that propagate through the build.
Securing the route and testing performance
Secure the cable along the path using clips or conduit, keeping bend radii gentle. Use wall plates where the cable passes through walls to protect the interior and keep the aesthetic clean. After installation, use a cable tester or an end‑to‑end speed test to verify there is no unexpected loss and that the device at the far end receives reliable performance.
Testing confirms your path works as intended and helps you catch issues before they become ongoing problems.
Safety, maintenance, and common pitfalls
Never drill into live electrical boxes or water pipes. Always turn off power at the breaker when drilling near electrical lines and use a stud finder to avoid nails or pipes. Use weather-resistant outdoor-rated cable if routing outside, and label both ends of the run for easier troubleshooting in the future. Maintain a tidy pathway to prevent tripping and damage.
Common pitfalls include underestimating bend radii, ignoring future expansion, and neglecting proper sealing at entry points.
Tools & Materials
- Cat6 Ethernet cable (Cat6a for future-proofing)(Choose shielded if routing near electrical lines; estimate extra 10-15% for turns.)
- RJ45 wall plates and keystone jacks(For clean terminations in floors/walls.)
- Cable clips or raceways(Secure along baseboards or furniture edges.)
- Low-voltage mounting bracket or conduit(Recommended for long runs or through-wall routes.)
- Cable tester (LAN tester)(Test continuity and performance at both ends.)
- Stud finder(Locate studs and avoid nails, pipes, and wires.)
- Fish tape or wire snake(Helpful for wall routing in tight spaces.)
- Drill with appropriate bits(Use proper bit for wall material and firestop compliance.)
- Safety gear (goggles, gloves)(Protect during drilling and handling cables.)
Steps
Estimated time: 60-90 minutes
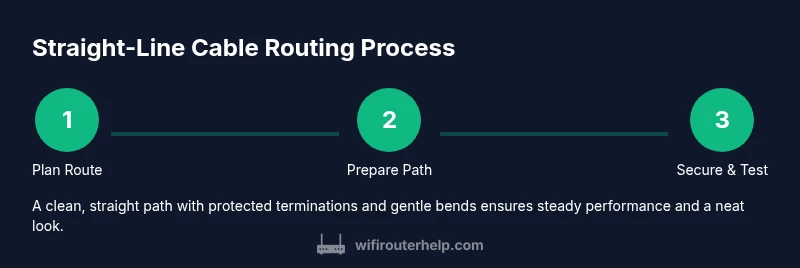
- 1
Plan the route
Define the router location and the destination room. Measure distance, note obstacles, and decide whether the path will run along baseboards, ceilings, or inside walls. Create a mock path on the floor with tape to preview the route before any cutting.
Tip: Document measurements; a small error early on saves much rework later. - 2
Mark and verify the path
Mark the route on walls or baseboards using painter’s tape, then verify there are no hidden hazards behind the walls with a stud finder or wall scanner. Confirm you can access both ends without detours. Prepare your entry points for future maintenance.
Tip: Double-check heights and alignment with doorways and furniture so you don’t end up with awkward bends. - 3
Choose mounting method
Decide between clips, conduit, or a low‑voltage solution. For longer runs or through-wall routing, conduit provides protection and a cleaner look. Ensure mounts won’t interfere with wall anchors or electrical boxes.
Tip: Avoid over-tightening clips; leave a little slack to accommodate cable movement. - 4
Run the cable
Thread the cable along the planned path using fish tape if needed. Keep the run as straight as possible, with gentle bends (radius indoors > 3× cable diameter). Leave extra length at endpoints for devices and future changes.
Tip: Plan turns around corners to minimize bending stress on the cable. - 5
Terminate and secure
Install wall plates or keystone jacks at the ends. Secure the cable with clips or conduit at regular intervals, ensuring the path remains straight and neat. Label both ends for easier troubleshooting later.
Tip: Use color-coded labels for easy identification in the future. - 6
Test and finalize
Connect endpoints and run a network speed test to verify performance. Inspect the entire route for neatness and safety, fixing any loose clips or exposed cables. Document the route for future maintenance.
Tip: Keep a test note with dates and device names for quick reference.
People Also Ask
Do I need to turn off power when routing cables near walls?
No power is required for data cable routing, but you should exercise caution near electrical outlets and avoid drilling through electrical boxes. Use a stud finder to avoid hidden hazards.
You don’t need to turn off power to route data cables, but be careful near outlets and boxes.
What cable type should I choose for a long run?
Cat6 or higher (Cat6a for very long runs) is recommended for home networks to maintain speed and reduce interference over longer distances.
Go with Cat6 or Cat6a for longer runs to preserve speed.
Can I route cables inside walls myself?
Yes, but ensure you follow local codes, use proper firestop, and avoid electrical lines. If you’re unsure, consult a professional.
You can route inside walls if you follow code and safety guidelines; consider a pro for through-wall work.
How much slack should I leave at the ends?
Leave about 1–2 feet of slack at each end to accommodate device movement and future relocations.
Leave a comfortable amount of extra cable at both ends for adjustments.
What signs indicate a failed cable route?
Intermittent connectivity, unusually slow speeds, or signal drops when moving devices indicate a routing issue or poor terminations.
If speeds drop or connections fail when you move devices, recheck the path and terminations.
Are wall plates necessary?
Wall plates protect the cable terminations and provide a neat finish, especially for runs that pass through walls or floors.
Wall plates help keep things tidy and protected.
Watch Video
What to Remember
- Plan the route before cutting or drilling
- Choose the safest, cleanest mounting method
- Test performance after setup
- Label ends for easy future maintenance