How to Fit a Router: Step-by-Step Home Setup Guide 2026
Learn how to fit a router in your home with clear, step-by-step instructions. This guide covers placement, cabling, basic configuration, and safety tips to ensure stable, fast Wi-Fi across your rooms in 2026.

By the end of this guide, you will know how to fit router for optimal home Wi‑Fi: select the best location to minimize dead zones, connect power and the modem, route cables neatly, and perform essential configuration like DHCP, wireless security, and basic firewall settings. This quick answer version highlights the key steps and safety checks before you dive into the full steps.
Why fitting a router correctly matters
A strong home network starts with where you place your router. According to WiFi Router Help, correct placement reduces dead zones, improves signal stability, and simplifies future upgrades. The WiFi Router Help team found that a well-placed router often delivers noticeably better coverage across multiple rooms with minimal interference. In this guide, we focus on the practical steps of how to fit router in a typical home, with emphasis on safety, organization, and sustainable performance. By planning ahead, you’ll avoid common pitfalls such as placing the device in a cabinet, behind electronics, or near heat sources. This sets the foundation for a reliable, long‑term Wi‑Fi setup.
Assessing space and planning coverage
Before you touch cables, map your home in your head or on paper. Start by identifying the central high area that minimizes wall interference and distance to the farthest rooms where you use Wi‑Fi most. Consider floors, stairwells, and large metal appliances that can reflect or block signals. For larger homes, plan for potential mesh support or a second access point. The aim is to create a mental heat map of signal strength and to ensure your router's broadcast range reaches common living spaces, the home office, and bedrooms. This planning phase helps you avoid later repositioning that disrupts service and creates dead zones. As you design your layout, keep in mind that flexibility is valuable for future upgrades or changes in your household's device mix.
Placement guidelines and common obstacles
Keep the router away from metal surfaces, mirrors, and dense cabinetry. Elevation helps; placing the unit on a shelf or high cabinet often yields better line-of-sight to devices. Avoid bathrooms and kitchen counters close to microwaves or other appliances that generate RF interference. If you must place near a window, keep the router away from glass where possible to reduce reflection and external interference. When you’re ready to fit router, protect cables by routing them along baseboards or behind furniture to reduce trip hazards. If you share walls with a neighbor with a strong wireless signal, consider slightly adjusting height or orientation to minimize cross-talk.
Physical setup: wiring, placement, and mounting
Unbox the router and verify you have all required items from the Tools & Materials list. Connect the modem to the router’s Internet WAN port with a Category 5e/6 Ethernet cable. Plug in the power adapter and power on both devices. If your router supports mounting, choose a sturdy location and use safe mounting hardware. Keep the cable runs tidy with cable clips or Velcro ties. This physical setup lays the groundwork for smooth configuration and reduces the chance of accidental unplugging during everyday use.
Initial configuration and naming your network
With devices powered, access the router’s admin interface using a web browser, typically via 192.168.0.1 or 192.168.1.1. Log in with the default credentials and change the admin password immediately. Then configure your network name (SSID) and security settings. If available, select the latest encryption standard (WPA3) and disable WPS if your router supports it to reduce risk. Save settings and note them for future changes. After setup, verify connected devices appear in the client list to ensure DHCP is functioning correctly.
Security, optimization, and maintenance
Turn on automatic firmware updates if your router offers them. Set a strong Wi‑Fi password and enable a guest network for visitors. Review UPnP and NAT settings; disable UPnP if you don’t need it to reduce attack surface. Position a device to monitor coverage and adjust the router or add a secondary access point if there are still weak spots. Regular maintenance includes firmware updates, password changes, and re-testing coverage after changes. In 2026, staying current with security practices remains essential for protecting home networks.
Verdict: a practical approach for most homes
For homeowners, the recommended approach is a central, elevated router with current standards, a secure password, and DHCP enabled. A compact layout, tidy cabling, and regular firmware checks typically yield reliable, fast home Wi‑Fi. The WiFi Router Help team recommends starting with a central placement, ensuring devices can access the network, and expanding coverage with a second access point or mesh system only if needed.
Authoritative sources for router setup
- FCC: https://www.fcc.gov/
- CISA: https://www.cisa.gov/
- NIST: https://www.nist.gov/
Tools & Materials
- Router(Ensure 802.11ac/ax support and up-to-date firmware)
- Modem(From ISP, ensure it’s functioning before setup)
- Ethernet cable (Cat5e or better)(For initial connection between modem and router or computer)
- Power outlet near central location(Stable power, surge protection recommended)
- Cable management supplies ( Velcro ties, clips)(Keep runs tidy and safe)
- Notebook or device for config(Record SSID, password, and settings)
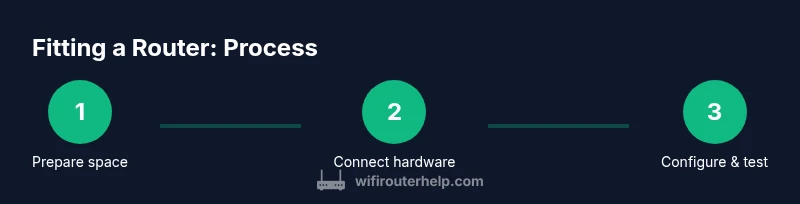
Steps
Estimated time: 60-90 minutes
- 1
Power down and prep
Turn off the modem and any existing router (if present). Unplug all devices from power and take a quick photo of the back panel to reference connections later. This prevents miswiring and speeds up the initial setup.
Tip: Take a photo of the current connections before changing anything. - 2
Choose central elevated location
Select a central, elevated spot that minimizes walls and obstructions. This improves signal reach to most living areas and reduces dead zones. Avoid placing near heat sources or dense metal appliances.
Tip: Avoid placing the router in closed cabinets or behind large appliances. - 3
Connect the hardware
Connect the modem to the router’s Internet WAN port with an Ethernet cable. Plug in the router and power it on. If you plan a wired laptop setup, connect a computer to the router via Ethernet for faster initial configuration.
Tip: Use a Cat5e/6 cable for the WAN link to ensure stable speeds. - 4
Boot and access the admin interface
Wait for the router to boot fully (a minute or two). Open a web browser and enter the router’s IP address (commonly 192.168.0.1 or 192.168.1.1). Log in with default credentials and prepare to change them for security.
Tip: Login with the default admin credentials, then immediately change the admin password. - 5
Set up network basics
Create your SSID (network name) and pick a strong password. Enable the latest encryption standard available (WPA3 if possible) and disable WPS if your device allows it. Save changes after configuring.
Tip: Choose a unique SSID and a strong password for every device. - 6
Configure DHCP and security
Ensure DHCP is enabled so devices receive IP addresses automatically. Review NAT settings and disable UPnP if not required for your setup to reduce exposure.
Tip: Document DHCP ranges and keep firmware updated. - 7
Test coverage and adjust
Test Wi‑Fi in core rooms using a phone or laptop. If signals are weak, adjust orientation or height, and consider adding a mesh node or second AP for large homes.
Tip: Test in the farthest room from the router to verify coverage. - 8
Document and maintain
Record your network name, password, and admin credentials in a safe place. Schedule periodic checks for firmware updates and re‑test coverage after major room rearrangements.
Tip: Keep a small network notebook for quick reference.
People Also Ask
What is the best location to place a router in a small apartment?
In small spaces, place the router high and centrally to minimize obstructions. Test a few spots to find the most reliable signal path.
Place the router high and central in a small apartment for the best signal, then test a couple of spots to confirm reliability.
Do I need to connect a router directly to a modem?
Yes, connect the router's Internet port to the modem with an Ethernet cable. This creates your local network and enables wireless access.
Yes—hook up the router to the modem with an Ethernet cable to create your home network.
What should I change first after setting up a new router?
Change the default admin password, set a strong Wi‑Fi password, and enable encryption (WPA3 if available). Update firmware when prompted.
Remember to change the admin password and set a strong Wi‑Fi password first.
How can I improve Wi-Fi coverage in a large home?
Place the router in a central, elevated location and consider a mesh extender or secondary access point for distant rooms.
Put the router in a central spot and add a mesh extender if you still have dead zones.
Is UPnP safe to enable on my router?
UPnP is convenient but can pose security risks. Enable it only if you need it, and monitor connected devices; disable port‑forwarding unless necessary.
UPnP can be handy, but watch for security—enable only if you need it and keep an eye on devices.
Watch Video
What to Remember
- Central, elevated router placement improves coverage
- Enable DHCP and strong WPA3 security
- Change admin credentials and document settings
- Test coverage after changes and adjust placement
- Keep firmware updated for security and performance