How to Connect a Router Without Ethernet Cable
Learn how to set up and configure your router without a wired Ethernet connection. This guide covers wireless setup, using apps, and troubleshooting to get reliable home Wi‑Fi quickly.

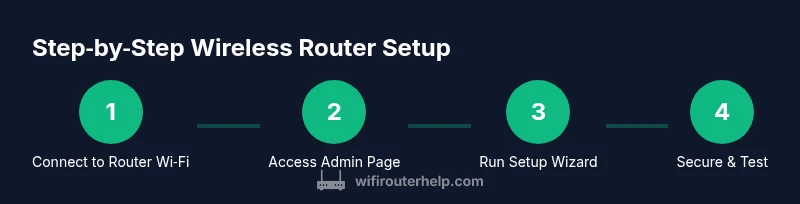
You can set up and configure most consumer routers without an Ethernet cable by first connecting via the router's built-in Wi-Fi, using the manufacturer app, or via a temporary wireless connection on your device. Then open the router's admin page, run the setup wizard, and update security settings. You'll need a smartphone or laptop with Wi‑Fi and the router powered on.
Understanding the goal: connect a router without Ethernet
In a typical home network, the router serves as the central hub that distributes your internet connection to all devices—via Wi‑Fi and wired ports. When you don’t have an Ethernet cable handy, the goal is to boot the router, access its configuration interface over the air, and complete the initial setup so the router can establish internet access, broadcast a secure Wi‑Fi network, and manage connected devices. This approach works for most modern consumer routers, but there are model variations to watch for, especially around how the WAN/Internet connection is configured and how the admin interface is accessed without a wired link.
Why wireless setup is practical and safe
Wireless setup is practical because it removes the need for a physical cable during the initial configuration phase. It’s also safer for temporary adjustments in a living space where cables may be in the way. Modern routers typically provide a built‑in Wi‑Fi network that you can join with a phone or computer. Using official apps from the manufacturer can further simplify the process by guiding you through the steps and auto‑detecting your router's preferred settings. Always verify the source of the app to avoid phishing or spoofed interfaces.
Starting with your router’s built‑in Wi‑Fi
Most routers broadcast a default SSID on first power‑up. To connect without Ethernet, locate the router’s label on the bottom or back, which lists the default network name (SSID) and password. Enable Wi‑Fi on your phone or laptop, then connect to that SSID. If the label is missing or you cannot see the network, try moving the router to a clearer spot, power cycling it, or performing a factory reset using the reset button. Once connected, you’ll be able to access the admin interface through a web browser or the manufacturer’s app.
Using the manufacturer app for wireless setup
Manufacturer apps often streamline setup by auto‑detecting your router on the same Wi‑Fi network. Download the app from the official store, sign in if required, and follow the guided steps to establish your internet connection, name your Wi‑Fi network, and set strong security settings. Apps typically provide status indicators, firmware update prompts, and quick access to parental controls and guest networks. If you’ve got multiple routers or a mesh kit, the app can often unify management across the network.
Accessing the router admin page without a wired connection
If you prefer a web interface, open a browser and enter the router’s IP address, commonly 192.168.0.1 or 192.168.1.1. If you don’t know the IP, check the router’s label or the manual, or use a network scanner app from your phone. The login credentials are usually on the same label or in the manual unless you’ve changed them. Some routers offer cloud or local access via a companion app instead of a traditional web interface. In either case, you’ll need to complete the initial configuration steps provided by the app or the web wizard.
Configuring Internet and wireless settings without Ethernet
During setup, you’ll configure the Internet (WAN) connection type. Most ISPs use DHCP for dynamic IP addresses; others require PPPoE or a static IP. If you don’t have the exact details, contact your ISP or consult your service agreement. In many cases you can choose DHCP and then fine‑tune later. Next, set your wireless network name (SSID) and a strong password, enable WPA3 if available, and consider enabling a guest network for visitors. Save changes and reboot if prompted.
Security basics after wireless setup
Security should be a priority from day one. Change the default admin password to a strong, unique passphrase. Enable the highest available encryption (preferably WPA3; if not available, WPA2‑AES). Disable remote management unless you need remote access, and keep the router’s firmware up to date. Consider enabling automatic updates, setting up a guest network, and turning off WPS if you don’t trust it. Regularly review connected devices and adjust firewall settings as needed.
Troubleshooting common wireless setup issues
If the admin page wouldn’t load over Wi‑Fi, try a different browser or device, clear cache, or reboot the router and your device. Ensure you’re connected to the router’s network, not a neighbor’s. If you still can’t reach the login screen, reset the router to factory defaults and start over. Some routers require a brief physical reset to re‑broadcast the default Wi‑Fi settings. If the network isn’t visible, check that the router is broadcasting its SSID and that you’re within range. Finally, verify that the firmware is not corrupted and consider reinstalling it via the manufacturer app if export/import options exist.
Maintenance: keeping wireless setup reliable over time
After the initial setup, perform periodic maintenance to keep the network resilient. Regularly check for firmware updates, review security settings, and back up your configuration if the router supports it. Schedule routine reboots to clear memory leaks or degraded performance, especially in homes with many connected devices. Keep your network map up to date so you know which devices are allowed on your network and can quickly spot unfamiliar connections.
Tools & Materials
- Smartphone or laptop with Wi‑Fi(Device to connect to router’s wireless network and run setup apps)
- Router (powered on)(Use a model you own or a new one with default credentials visible on the label)
- Power adapter(Keep router powered during setup; avoid power interruptions)
- Internet service or modem(Ensure service is active; you may need provider details for PPPoE or static IP)
- User manual or quick-start guide(Helpful for model‑specific IPs and app instructions)
- Ethernet cable(Optional for fallback or advanced scenarios; not needed for wireless setup)
Steps
Estimated time: 15-40 minutes
- 1
Power up router and ensure wireless is broadcasting
Plug in the router and wait for the status lights to indicate it is ready. Confirm that the built‑in Wi‑Fi is active by checking the LEDs and, if needed, perform a quick reset to factory defaults so you know you’re starting from a clean slate.
Tip: If the front LED indicators are unclear, consult the quick-start guide for your model. - 2
Connect your device to the router’s default Wi‑Fi
On your phone or laptop, scan for the router’s default SSID from the label and join the network using the password printed there. Stay within a few meters to avoid weak signal issues during setup.
Tip: If you don’t see the network, move the router away from thick walls or metal objects and try again. - 3
Open the admin interface or use the manufacturer app
In a web browser, enter the common IP addresses (e.g., 192.168.0.1 or 192.168.1.1) or launch the official app. Follow the guided setup wizard that appears after you log in.
Tip: If the IP is unknown, check the router’s label or perform a quick search for your model’s default address. - 4
Configure Internet connection type
Choose DHCP for most consumer broadband; if your ISP uses PPPoE or a static IP, enter the credentials provided by the ISP. Some setups also allow a ‘Wireless WAN’ option; ignore it unless your model explicitly supports it for this use case.
Tip: If unsure, contact your ISP to confirm the required WAN type before proceeding. - 5
Set up Wi‑Fi name (SSID) and password
Create a unique SSID and a strong password. Prefer WPA3 if available; otherwise WPA2‑AES. Disable WPS if you don’t need it for convenience temporarily.
Tip: Use a passphrase longer than 12 characters that includes a mix of letters, numbers, and symbols. - 6
Enable security features and save
Turn on automatic firmware updates if offered and apply any security recommendations shown by the wizard. Save the configuration and reboot if prompted.
Tip: Record the new admin password in a password manager for future access. - 7
Test the connection and reconnect devices
Disconnect from the old network and reconnect to the newly named SSID. Open a browser or app to confirm internet access on at least one device.
Tip: Test on both a phone and a computer to ensure consistency across devices. - 8
Update firmware and back up settings
If a new firmware is available, install it. Create a backup of the router configuration in case you need to restore later.
Tip: Backups help you recover quickly after a factory reset or hardware change.
People Also Ask
Is it possible to set up a router without any Ethernet connection?
Yes. Most consumer routers support wireless setup via their built‑in Wi‑Fi or a manufacturer app. You can complete the initial configuration without a wired link.
Yes, you can usually set up your router using its built‑in Wi‑Fi or a manufacturer app.
What should I do if I can't see the router's default Wi‑Fi network?
Check the router’s label for the default SSID, move closer, or perform a factory reset if necessary. If the network still doesn’t appear, consult the manual for model specifics.
If you can't see the default network, check the label, bring the router closer, or reset it.
Can I use a mobile phone hotspot to configure the router?
Yes. You can temporarily connect your phone's hotspot to access the router's setup page, then switch to your home network after configuration.
Yes, you can temporarily use your phone's hotspot to reach the router's setup page.
Do I need to update firmware during setup?
Firmware updates improve security and stability; update after initial config via the admin interface or app.
Absolutely, update the firmware after you gain access.
What is the best way to secure the router after setup?
Change the default login, enable WPA3 or WPA2‑AES, disable remote management, and enable automatic updates.
Change login, use strong encryption, and enable auto updates.
What should I do if I can't access the admin page over Wi‑Fi?
Verify you’re connected to the router’s network, try a different browser, clear cache, then reboot. If needed, reset to factory defaults and retry.
If you can't reach the admin page, check your connection, IP address, and try rebooting.
Watch Video
What to Remember
- Connect via built‑in Wi‑Fi for wireless setup
- Use the official app or web wizard to configure
- Secure your Wi‑Fi with strong encryption and a unique admin password
- Test internet connectivity on multiple devices after setup
- Keep firmware current and back up settings