Google Nest Wifi Pro Setup Guide: From Unboxing to Optimization
A comprehensive, step-by-step guide to setting up Google Nest Wifi Pro, maximizing coverage, and troubleshooting common issues for a fast, reliable home network.

With google wifi pro, you can build a fast, reliable mesh network for most homes. This quick guide shows you how to set up, optimize, and troubleshoot your Nest Wifi Pro system using the Google Home app, place nodes for best coverage, and enable essential security features. By following best practices, you’ll reduce dead zones and improve overall reliability, according to WiFi Router Help.
What google wifi pro is and why homeowners care
The google wifi pro ecosystem represents a modern approach to home networking, designed to deliver strong, consistent coverage across multiple rooms and floors. At its core, google wifi pro uses a mesh topology that helps eliminate dead zones by placing smaller access points around your home rather than relying on a single router. For homeowners and tech enthusiasts, the appeal lies in easy setup, centralized management, and scalable coverage that can adapt as your living space changes. The system works with the Google Home app to guide you through installation, monitor device connections, and adjust settings to balance speed, reliability, and security. If you’ve been frustrated by buffering in the living room or weak signal in the home office, google wifi pro offers a practical path forward. According to WiFi Router Help, planning placement based on your floor plan and typical traffic patterns yields noticeable performance gains, especially when streaming high-definition video or supporting multiple smart devices. This guide keeps the focus on actionable steps you can take today, with a clear eye toward real-world layouts and timing.
Nest Wifi Pro architecture and capabilities
Nest Wifi Pro is designed with a mesh architecture that relies on multiple nodes working together rather than a single point of failure. Each node acts as a wireless access point with intelligent backhaul capabilities, allowing data to travel through the network via the fastest available path. The system supports simultaneous bands, which helps distribute traffic from streaming, gaming, and smart-home devices without overwhelming any single channel. In practical terms, you can start with a primary router and add one or more satellite points to extend coverage into remote corners of your home. The setup is streamlined for enthusiasts who want to minimize hands-on configuration while still enabling advanced features such as guest networks, parental controls, and device prioritization when needed. For a typical home, the result is smoother video calls, quicker file transfers, and more reliable smart-home responsiveness. This section lays the groundwork for choosing node placement and understanding how the mesh works in the real world.
Planning your Nest Wifi Pro deployment
Successful deployment begins with a plan. Start by mapping your floor plan and marking areas with known weak signals, basements, and rooms farthest from the internet entry point. Aim to place the main router in a central location with minimal obstructions, preferably off the floor and away from metal appliances. If your home has multiple floors, consider placing at least one additional node on each level to maintain strong backhaul and reduce hops. Keep distances reasonable; excessive gaps can force devices to switch back to the slower backchannel. Don’t cluster all nodes in one area; spread them to cover hallways, stairwells, and study spaces. For larger spaces, consider expanding with extra nodes to maintain consistent performance, especially in zones where you work or stream regularly. Additionally, check your wall materials—thick concrete or metal can attenuate signals—so you can optimize placement accordingly. WiFi Router Help notes that careful planning often yields noticeable uplink/downlink improvements across day-to-day tasks like video conferencing, online gaming, and large file transfers.
Setup considerations and best practices
Getting the physical setup right is half the battle. Before powering up, ensure your ISP modem is compatible and set to bridge mode if you’re using a separate modem, to simplify routing. Use the Google Home app on a phone or tablet to begin the setup, letting the app guide you through naming your network and creating a strong password. If you’re adding more than one node, position the primary router first, then pair the additional points one by one via the app, ensuring each device shows as connected. Use auto-updates to keep firmware current, which helps maintain security and performance. During setup, enable features like guest networking to isolate visitors, and adjust device priority for bandwidth-sensitive tasks when needed. The end result should be a cohesive, easy-to-manage network that adapts as you move devices around your home.
Performance optimization techniques
Once your network is up, there are several levers you can pull to squeeze out extra performance. Enable QoS (Quality of Service) to prioritize latency-sensitive tasks such as video calls and gaming, while still allowing ample bandwidth for streaming and general browsing. Take advantage of band steering to guide devices toward the most appropriate wireless band, balancing congestion across the network. Periodically run a speed test from a device near the main node to establish a baseline, then recheck after repositioning nodes or adjusting settings. If you notice persistent hotspots, consider moving nodes closer to them or adding another node to create shorter, more direct routes. For households with many smart devices, enabling separate networks for IoT devices can improve security and reduce interference with primary devices.
Troubleshooting common issues
Many issues come down to placement, firmware, or simple misconfigurations. If devices intermittently disconnect, first verify the node status in the Google Home app and ensure all LEDs indicate normal operation. Reboot the primary router and any satellite points, and re-run the setup flow if necessary. If speeds drop, test wired backhaul by temporarily connecting a device with an Ethernet cable to the main router to confirm if wireless performance is the bottleneck. Check for interference from household electronics, microwaves, or dense walls, and adjust placement accordingly. In persistent cases, factory reset the system and set it up anew, preserving your network name if possible. WiFi Router Help recommends keeping a small maintenance window every few months to refresh firmware and review security settings.
Security, updates, and maintenance
Regular maintenance is essential for long-term reliability. Keep firmware updated via the Google Home app, enable automatic security updates, and review connected devices periodically to remove unknown access. Use strong WPA2/3-compatible passwords and consider enabling a guest network for visitors to prevent guest devices from accessing your main network. Periodically audit your network map to ensure devices are where you expect them to be and that no new nodes have appeared without your knowledge. For families with kids, adjust parental controls to manage screen time and content appropriately. Taken together, these practices help protect your smart home while preserving performance and ease of use over time.
Real-world deployment scenarios
In practice, google wifi pro shines when deployed with a thoughtful layout that matches the home’s architecture. A two-node setup can cover most multi-bedroom homes, while larger residences or spaces with thick walls benefit from additional nodes placed at strategic locations like upstairs hallways and the home office. In apartments or open-plan living areas, a central location for the main router plus a satellite near the farthest living area often yields the best balance of speed and reliability. Families report smoother streaming, quicker file transfers, and fewer buffering events when nodes are placed away from large metal cabinets or dense shelving that can block signals. The goal is to create a seamless mesh where devices automatically switch paths to maintain strong connections without user intervention.
Tools & Materials
- Google Nest Wifi Pro router (main unit)(Central device in the network; connects to the modem via Ethernet)
- Nest Wifi Pro satellite node(s) (optional)(Expand coverage to hard-to-reach areas)
- Smartphone or tablet with Google Home app(Used to install and manage the network)
- Active internet connection from the ISP(You’ll connect the main router to your modem)
- Ethernet cable (Cat 5e or better)(Useful for wired backhaul or initial setup if needed)
- Pen and paper for network naming and passwords(Helpful for keeping track during setup)
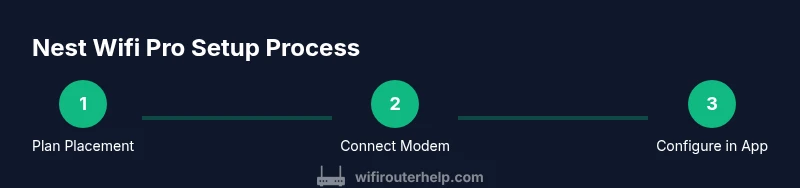
Steps
Estimated time: 45-60 minutes
- 1
Confirm ISP compatibility
Verify your modem works with a router and is compatible with mesh networking. If your ISP requires a specific bridge mode, configure that before starting the Nest setup.
Tip: Check for any firmware updates on your modem before connecting the Nest Wifi Pro. - 2
Unbox and place the main router
Position the main unit in a central, elevated location away from metal appliances. Avoid cramped closets and large shelves that block airflow and signals.
Tip: Aim for a spot roughly halfway between common usage areas like the living room and home office. - 3
Connect to your modem
Use an Ethernet cable to connect the Nest Wifi Pro’s WAN port to your modem. Power on both devices and wait for lights to indicate normal operation.
Tip: If the modem requires bridging, perform that setup before continuing. - 4
Launch the Google Home app and start setup
Open the app, follow on-screen prompts to create or sign in to a Google account, and select Add > Set up device > New device. The app will guide you step by step.
Tip: Keep the location permissions active to help with device discovery and diagnostics. - 5
Name your network and set a strong password
Choose a unique network name and a robust password. Avoid personal data in the SSID and enable security features as soon as possible.
Tip: Use a passphrase rather than a simple password to deter guessing. - 6
Add satellite nodes if needed
If you have areas with weak Wi‑Fi, add a Nest Wifi Pro satellite and pair it via the app. Place satellites where they can maintain a direct line of sight or minimal obstruction.
Tip: Place satellites mid-way between the main router and weak spots for best backhaul. - 7
Configure QoS and guest network
In the app, enable QoS for latency-sensitive tasks and set up a guest network to isolate visitors from your primary devices.
Tip: Test different QoS profiles to see what delivers the best balance for your family’s needs. - 8
Run a speed test and adjust placement
Test speeds from key rooms to ensure coverage matches expectations. Relocate nodes if speeds dip below a comfortable threshold.
Tip: Perform tests at different times of day to gauge performance under typical load. - 9
Update firmware and enable automatic updates
Ensure the system is on the latest firmware and keep automatic updates enabled for security and performance improvements.
Tip: Manual checks every few months help catch updates you might miss automatically. - 10
Set up security safeguards
Activate security features such as firewall prechecks, device isolation, and regular password audits to keep your network safe.
Tip: Review connected devices periodically and remove any unfamiliar entries. - 11
Document your network configuration
Record your network name, password, and node locations for future reference or reinstallation.
Tip: Keep a simple network map handy for troubleshooting or future expansion. - 12
Plan periodic maintenance
Schedule quarterly checks for firmware, placement re-evaluations after major renovations, and re-test speeds.
Tip: A light maintenance window prevents slow performance from creeping in over time.
People Also Ask
Is google wifi pro still supported in 2026?
Google continues to offer basic operation and security updates for Nest Wifi Pro devices via the Google Home app. For feature updates, check Google support resources and product announcements. Even as new models arrive, the core setup and troubleshooting steps remain applicable.
Yes. Nest Wifi Pro devices remain usable and receive ongoing security updates. Check Google support for the latest information.
How many nodes do I need for a 2,000 sq ft home?
A two-to-three node setup often covers a 2,000 square foot space with decent signal in most homes. Consider adding a node on each floor or in far corners based on dead spots and your Wi‑Fi usage.
Two to three nodes usually cover a 2,000 square foot home, depending on layout and walls.
Can I use google wifi pro with my existing router?
Google Nest Wifi Pro is designed to work as a mesh system. You can use it with an existing modem, but it is most effective when used as the primary router or in bridge-mode setups advised by your ISP.
It works best as the main router; with an existing router, you may need bridge mode or a specific setup advised by your ISP.
How do I reset Nest Wifi Pro?
To reset, press and hold the reset button for about 10 seconds until the LED flashes. Then follow the app prompts to set up the device again.
Hold the reset button for 10 seconds, then follow the app prompts to set up again.
What speeds can I expect with Nest Wifi Pro?
Speeds depend on your internet plan and home layout. Nest Wifi Pro tends to deliver reliable performance for typical streaming, browsing, and conferencing in well-positioned areas.
Speeds vary by plan and layout, but you can expect steady performance in well-placed areas.
Does Nest Wifi Pro support guest networks?
Yes, nest wifi pro supports guest networks separate from your main network to keep devices isolated while still providing guest access.
Yes, you can set up a guest network to keep visitors away from your main devices.
Watch Video
What to Remember
- Position nodes strategically for even coverage
- Use QoS and guest networks to optimize performance
- Keep firmware updated for security and reliability
- Regularly test speeds and adjust placement as needed
- Document network settings for easy maintenance