Google Wifi Mesh Guide: Setup, Optimize & Extend Coverage
Learn how to design, install, and optimize a Google Wifi Mesh network for complete home coverage. This step-by-step guide covers setup, placement, troubleshooting, and security tips.

Goal: blanket your home with reliable, seamless Wi‑Fi using Google Wifi Mesh. You'll need a broadband modem, one or more Google Wifi points, and the Google Home app for setup and ongoing management. Plan node placement for coverage, use a single SSID, and keep firmware updated for best results.
Why Google Wifi Mesh Matters
Google Wifi Mesh is designed to eliminate dead zones by using multiple interconnected nodes that share a single network name (SSID). In homes with multiple floors or thick walls, a mesh setup typically offers smoother handoffs as you move between rooms, better overall coverage, and simpler management compared with traditional single-router layouts. As you plan a google wifi mesh deployment, think about peak living areas, stairwells, and rooms where you work or stream most. The goal is to create consistent signal strength from the basement to the attic, so your devices can roam without dropping connections. This approach aligns with the broader concept of mesh networking, which prioritizes coverage, reliability, and simple management over chaining a single access point to every corner of your home. According to WiFi Router Help, a well-designed mesh layout often yields fewer dead zones and more predictable performance, especially in complex floor plans.
In the context of home networks, a google wifi mesh system can be easier to scale than a legacy router plus extender setup. The system automatically routes traffic across nodes to balance load and maintain throughput, which means you can add rooms or floors later without a major network overhaul. For homeowners, this translates into a practical, scalable path to reliable Wi‑Fi that stays consistent as your home changes over time.
How Google Wifi Mesh Works
A google wifi mesh network consists of a primary node connected to your modem and additional satellite nodes that communicate with each other to provide coverage across your home. Each node acts as a wireless access point and collaborates with the others to form a single, seamless network with one SSID. When a device moves, the system automatically selects the best route to the nearest node, which helps maintain stable speeds. The Google Home app is used to configure the network, add nodes, and adjust settings. This architecture reduces the need for extra extenders and minimizes the complexity of managing multiple networks. In practice, google wifi mesh leverages dynamic routing and automatic backhaul management to optimize performance across rooms and floors. WiFi Router Help analysis shows that mesh networks can deliver more uniform coverage in typical residential layouts than traditional routers with separate extenders.
For families with streaming devices, video calls, or smart-home gadgets, a mesh network can simplify administration and improve reliability. You’ll still want to consider interference sources (like thick walls or dense furniture) and place nodes to minimize signal blockage while maximizing line-of-sight opportunities where possible.
Planning Your Google Wifi Mesh Deployment
Before buying hardware, map your home’s layout and identify key coverage zones. Start with a single main node near your modem and plan for one or more satellite nodes to extend reach into far rooms, basements, or upper floors. Consider high-traffic areas such as living rooms, home offices, and bedrooms where stable Wi‑Fi improves daily tasks like video conferencing, gaming, and streaming. A practical approach is to sketch a rough floor plan and mark potential node locations that balance distance and obstruction. Remember that google wifi mesh relies on wireless backhaul; in homes with many walls or metal structures, you may want to place nodes closer to ensure a reliable connection between units. This planning phase helps you estimate the number of nodes needed and reduces the need for reconfiguration after setup.
Node Count, Placement, and Coverage Expectations
Determining how many nodes you need depends on your home’s size and construction. In a typical two-story home with several thick walls, start with 1 main node near the modem and add 1–2 satellites to extend coverage to upper and lower living spaces. Place nodes in central locations that are elevated (on a shelf or high table) and away from large metal appliances or dense cabinetry. Space nodes roughly so they’re within reasonable distance of each other—too far apart can break the mesh links; too close can waste bandwidth. In practice, aim for even coverage across rooms where devices are used most, then iterate by testing signal strength as you move through the home. You’ll likely adjust after your first live test, but thoughtful planning reduces the need for major changes later.
In line with WiFi Router Help’s guidance, a google wifi mesh setup performs best when you plan for a single, clean roaming environment. A well-spread layout with minimal interference yields the most consistent speeds for all family members and devices across living spaces.
Optimization Tips: Placement, Interference, and Band Behavior
Once your google wifi mesh is up and running, optimize performance by paying attention to placement and interference sources. Elevate nodes off shelves, avoid blocking lines of sight with furniture, and keep units away from microwaves, mirrors, and metal cabinets. Even though the system handles auto-optimization, you can improve results by ensuring each node has a clear path to adjacent units. The 2.4 GHz band offers broader reach but slower speeds, while the 5 GHz band provides faster performance at shorter distances. In many homes, devices will automatically switch to the best band and the closest node for a stable experience. Regularly check for firmware updates in the Google Home app to benefit from security patches, bug fixes, and performance enhancements.
If you’re dealing with persistent slowdowns, consider re-positioning a node to fill gaps, or adding another satellite if you anticipate growing bandwidth needs. A clean, centralized layout usually yields the most reliable google wifi mesh performance across rooms and floors.
Troubleshooting Common Issues
Even a well-planned google wifi mesh can encounter issues. If you notice slow speeds, unstable connections, or devices failing to connect, start with a soft reset by rebooting the primary node and satellites. Ensure the Google Home app reports all nodes as online and that firmware is current. If a device cannot connect, forget the network on the device and reconnect; verify the network name and password are correct. For dead zones, reassess node placement and consider adding another satellite. In some cases, bridging an ISP gateway may be necessary, but using a dedicated mesh network behind the gateway often yields simpler management and better overall performance.
More complex issues, such as DNS or port-forwarding needs, can be addressed in the app’s advanced settings or by temporarily bypassing the mesh to test a direct connection. If problems persist, a factory reset followed by a fresh setup can resolve stubborn misconfigurations.
For reliability, keep a running test routine: measure speeds in common rooms, check coverage on multiple devices, and watch for drops during peak usage times. This approach helps you maintain a high-performing google wifi mesh environment.
Security and Privacy Best Practices
Security should be a default consideration in any home network. Enable a strong WPA3 (or WPA2) password, use the guest network feature for visitors, and keep firmware up to date through the Google Home app. Regularly review connected devices and remove anything unfamiliar. Disable unnecessary remote management features and consider enabling automatic security updates if available. Strong authentication, automatic updates, and careful device management reduce risk and help safeguard smart-home ecosystems connected to google wifi mesh. Remember that privacy is a shared responsibility; keep your network access controls aligned with your household’s privacy preferences.
Compatibility, Bridging, and Expanding With Other Gear
A google wifi mesh setup can coexist with some ISP gateways when configured properly. In many cases, you’ll place Google Wifi behind the ISP gateway (not in bridge mode) or enable bridging if your ISP supports it. The maximum benefit is achieved by using Google Wifi as the primary router with the ISP gateway in bridge mode when possible; otherwise, you’ll run the mesh behind the gateway. If you plan to upgrade, ensure adjacent devices like smart speakers, streaming players, and gaming consoles stay compatible with the single network SSID. This approach simplifies management and typically yields better roaming behavior as you expand the mesh network with additional nodes.
Maintenance, Updates, and Long-Term Growth
A google wifi mesh network requires minimal ongoing maintenance. Regularly check the Google Home app for firmware updates and schedule occasional reboots to keep the system running smoothly. As your home grows or moves to new devices, you can simply add more nodes or reposition existing ones to extend coverage. Plan periodic reviews of network usage to ensure your mesh configuration continues to match your household needs, especially if you introduce new smart-home devices or higher-bandwidth activities like 4K streaming or gaming.
Tools & Materials
- Broadband modem(Connects to your ISP service; consider bridging mode if you still use an ISP gateway)
- Smartphone or tablet with Google Home app(Needed for initial setup and ongoing management)
- Ethernet cable(Optional but helpful for initial hard-wired connection to the modem)
- Stable power outlet near the modem(Keep devices powered during setup)
- Additional Google Wifi points (optional)(Only if you plan to expand coverage)
Steps
Estimated time: 60-90 minutes
- 1
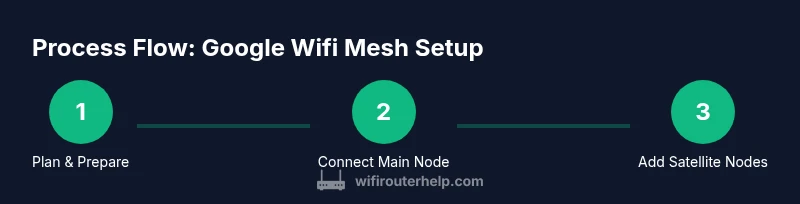
Prepare your network and space
Assess your home, map coverage areas, decide where the main point will sit near the modem, and plan for future expansion.
Tip: Start with a rough map of high-traffic areas and potential node locations. - 2
Connect the main Google Wifi point to your modem
Power off your modem, connect Ethernet from the modem to the primary Wifi point's WAN port, then power both back on. Allow the point to boot and appear in the app.
Tip: If you’re using an all-in-one gateway, consider bridging mode for best results. - 3
Install the Google Home app and begin setup
Open the app, sign in with your Google account, and follow prompts to add Google Wifi and name your network.
Tip: Label your network with a clear name and strong password for easy recall and security. - 4
Add additional Wifi points as needed
Place new units to extend coverage; follow the app’s guided placement suggestions and test in key rooms.
Tip: Avoid placing nodes behind large appliances; higher placement improves reach. - 5
Test coverage and adjust placements
Walk through your home with a phone to identify dead zones, then reposition nodes to improve reliability.
Tip: Run speed tests in multiple rooms to verify performance improvements. - 6
Configure security and network settings
Enable guest network, review connected devices, and ensure firmware is up to date.
Tip: Schedule automatic updates if available to keep security current.
People Also Ask
What is Google Wifi Mesh and how does it differ from a traditional router?
Google Wifi Mesh is a scalable system of interconnected nodes that creates a single Wi‑Fi network, extending coverage more reliably than a single traditional router. It simplifies management and roaming across rooms and floors.
Google Wifi Mesh uses multiple nodes to create one network with seamless roaming, which is often easier to manage than a single router with extenders.
Do I need a Google account to set up Google Wifi Mesh?
Yes. The setup is performed through the Google Home app, which requires a Google account for initial setup and ongoing management.
Yes, you’ll use the Google Home app with a Google account for setup.
Can I use Google Wifi Mesh with my ISP gateway?
In many cases you can place Google Wifi behind your ISP gateway or use bridging if supported. Check your ISP settings; bridging can simplify management and possibly improve performance.
Some ISPs let you bridge; otherwise you can use it behind the gateway.
How many nodes do I need for a multi-story home?
Start with one main node near the modem and add one or two satellites per floor depending on coverage and obstructions.
One main node plus extra units per floor usually works well.
What maintenance does a Google Wifi Mesh require?
Minimal maintenance is required: check for updates in the app and reboot occasionally if recommended.
Just check for updates and reboot when asked.
What should I do if I still have dead zones after setup?
Reposition existing nodes, check for interference, and consider adding additional points to fill gaps.
Move nodes and add more points if needed.
Watch Video
What to Remember
- Plan coverage before buying nodes
- Use a single SSID for seamless roaming
- Place nodes high and central
- Keep firmware updated
- Test with real devices to verify speeds