How to Set Up and Optimize an eero wifi extender
A comprehensive, step-by-step guide to installing and optimizing your eero wifi extender for reliable, whole-home coverage. Learn placement, app setup, troubleshooting, and security best practices.

This guide shows you how to add an eero wifi extender to your existing network to improve coverage and eliminate dead zones. You’ll need your eero device, a smartphone with the eero app installed, and a nearby power outlet. We’ll walk you through placement, app setup, testing, and basic security practices to ensure a reliable, scalable home network.
Understanding the eero wifi extender ecosystem
An eero wifi extender is designed to work within the eero mesh ecosystem to broaden coverage beyond your primary gateway. Unlike traditional repeaters, which simply relay a signal, an eero extender participates in the mesh network to create seamless handoffs as you move through your home. In practice, this means devices stay connected to the strongest access point automatically, often without noticeable drops in speed. According to WiFi Router Help, integrating an extender with your existing eero setup can significantly improve coverage in rooms that previously struggled with reliable signal. The WiFi Router Help team found that most homes experience a meaningful boost in usable wifi when an extender is placed and configured correctly, especially in multi-story layouts or homes with many interior walls. As you plan, remember that the goal is uniform signal strength, not just higher peak speeds in a single room.
Top differences between extenders and standalone routers
- Extenders vs. mesh hubs: Extenders extend an existing network; mesh hubs create a larger network with multiple routing points.
- Backhaul options: Some extenders can use wired backhaul for stability; wireless backhaul is more common but can reduce throughput if many devices are online.
- Management: With eero, management is centralized in the app, simplifying updates and parental controls.
Understanding these distinctions helps you set realistic expectations for speed and reliability as you scale your home network. The goal is to map coverage to living areas, home offices, and entertainment zones.
Planning your coverage and placement
Before you buy or place anything, map your home layout and identify worst-case zones—rooms with thick walls, basements, or far corners of the house. For best results, avoid placing extenders behind obstacles like refrigerators or large metal appliances, and keep them away from microwaves and cordless phones that can cause interference. Start with a rough plan using a floor map or a simple sketch, then test with the app signal indicators after plugging in the extender. This planning stage is crucial because a poorly placed extender can create new dead zones or only marginally improve performance. When done thoughtfully, even a modest increase in coverage can transform daily tasks—from video calls to streaming high-definition video.
Compatibility and prerequisites
Most eero extenders work best when paired with an existing eero gateway (the primary router). Ensure your current gateway firmware is up to date, and that you have the latest eero app version installed on your phone. If you’re moving from a non-eero router, consider replacing the gateway first or using a bridge mode if your model supports it, to avoid network conflicts. Keep in mind that some older extender models may not support the latest eero features, so confirm compatibility before purchasing. Collectively, these steps reduce setup friction and improve long-term stability.
Quick-start setup with the eero app (initial pairing and configuration)
Once you’ve chosen locations, download or update the eero app on your smartphone. The app guides you through adding the extender to your existing network, performing a quick health check, and naming the device. During pairing, you’ll see a brief on-screen prompt to scan a QR code on the extender or press a pairing button. If you encounter a pairing problem, ensure the extender is powered up and within a few meters of the gateway during the initial step. After successful pairing, the app will run a quick diagnostic and suggest placement tweaks for optimal coverage. Remember, the first run is the most important for setting a baseline.
Advanced config for performance and stability
After basic setup, you may want to fine-tune performance using the app’s advanced settings. Features like Smart Backhaul can route traffic efficiently through the best path in the mesh, while QoS (Quality of Service) lets you prioritize essential activities such as video calls or gaming. If you have smart home devices, consider creating dedicated bands or SSIDs to isolate traffic where possible. Periodic channel optimization helps avoid interference from neighbors’ networks. Always test after changes to confirm real-world improvements. In higher-demand homes, enabling backhaul stabilization can yield noticeable gains in consistency.
Troubleshooting common issues
Even with careful planning, issues can arise. Common symptoms include intermittent drops, slow speeds, or devices failing to connect to the extender. Start with the basics: reboot the extender and gateway, check for firmware updates, and verify that the extender is in the recommended location. If devices still struggle, try a wired backhaul if feasible, or re-run the pairing process to re-establish a clean connection. For persistent problems, consult the app’s diagnostics, which may suggest a more favorable placement or a reset of the device to factory defaults. Documenting steps you’ve already tried saves time when seeking support.
Security best practices with eero extenders
Security is a core part of a healthy home network. Keep the gateway and extender firmware up to date, enable automatic security updates, and review the network password regularly. Use unique, strong passwords for your eero account and consider enabling two-factor authentication. If you have guests, enable a guest network with time-limited access to reduce risk to your primary network. Regularly audit connected devices within the app to spot unfamiliar entries and remove them promptly. With these practices, you reduce exposure to threats and maintain a robust, private home network.
Maintenance and future-proofing
Technology changes quickly, so plan for ongoing maintenance. Schedule regular checks in the app to verify signal strength and performance across zones, and re-check extender placement after any major furniture rearrangements or renovations. When new eero firmware or features are released, review the benefits and apply updates promptly. If your home expands or you add more devices, you can incrementally extend coverage while preserving a reliable mesh. Keeping a simple inventory of devices and their locations helps you spot coverage gaps and adjust as needed.
How to summarize your setup and next steps
In summary, a well-planned placement strategy, consistent app-guided setup, and periodic maintenance will maximize the value of your eero wifi extender. The goal is a stable, fast, and simple experience across your home. As you refine your network, you’ll notice fewer buffering moments, smoother video calls, and more reliable smart-home performance. The process is iterative, but with careful steps, you’ll achieve a robust home network that scales with your needs.
Tools & Materials
- eero wifi extender(Ensure it’s compatible with your current eero network (model-specific if needed))
- smartphone with the eero app installed(iOS or Android; keep app updated)
- AC power outlet near a location with poor coverage(Avoid power strips if possible)
- existing modem/router(Ensure firmware is up to date)
- Ethernet cable (optional)(Wired backhaul for best stability)
- room layout or floor plan(Plan placement for even coverage)
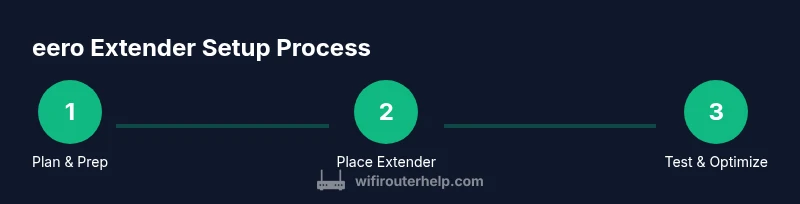
Steps
Estimated time: 60-90 minutes
- 1
Prepare and update firmware
Power on the new extender and connect it temporarily to your modem or existing router. Open the eero app and check for firmware updates for both the extender and your existing devices. This ensures bug fixes and security patches are in place before deployment.
Tip: Update before placement to avoid rework if a newer firmware exists - 2
Position for coverage
Place the extender halfway between the router and the dead zone, aiming for a spot with a clear line of sight and minimal interference from walls or appliances. Avoid placing behind large metal objects or in cramped closets.
Tip: Use the app's signal strength indicator to find the best spot - 3
Add extender to the network
In the eero app, select Add Device and follow prompts to add the new extender to your network. The app will guide you through pairing, which typically involves scanning a QR code or pressing a pairing button.
Tip: If asked, connect via the extender's own temporary network to proceed - 4
Test performance
Run a quick speed test from several rooms to confirm improved coverage and stable speeds. If performance is weak in a critical area, try moving the extender 1–2 meters closer to the router.
Tip: Test on multiple devices to ensure consistency - 5
Enable advanced features
In the app, enable features like Smart Backhaul or QoS if available to optimize traffic. This helps prioritize video conferencing or gaming when multiple devices are active.
Tip: Do not enable too many features at once; test impact first - 6
Document and monitor
Note the extender's location and signal name. Over time, monitor for any drops or odd behavior and update firmware as needed.
Tip: Schedule a quarterly check for firmware and performance
People Also Ask
Do I need an existing eero router to use an eero wifi extender?
Yes. The extender works with an existing eero network. Ensure your primary gateway is up-to-date and compatible with the extender model.
Yes. You’ll need an existing eero network to extend coverage.
Can I use non-eero extenders with an eero network?
Non-eero extenders may not integrate smoothly with the eero app or mesh network. For best results, use official eero extenders.
Non-eero extenders can cause compatibility issues; stick to eero peripherals.
Where should I place the extender for best coverage?
Place the extender halfway between the router and the dead zone with minimal obstacles. Use app indicators to nail the best spot.
Place it between the router and dead zones for strongest signal.
Does the extender support 5 GHz and 2.4 GHz bands?
Yes. The eero mesh system uses band steering to manage traffic across both bands automatically, maximizing performance.
It uses both 5 GHz and 2.4 GHz and helps route devices accordingly.
How often should I update firmware on the extender?
Check for updates monthly via the app and apply them when available to improve security and stability.
Check and install updates when they show up in the app.
Can I enable parental controls on the extender network?
Parental controls are managed through the main eero account and apply to all devices on the network, including extenders.
Parental controls apply across your eero network via the app.
Watch Video
What to Remember
- Plan placement for even coverage
- Use the eero app to simplify setup
- Test in multiple areas for reliability
- Enable selective advanced features carefully
- Keep firmware current for best security