Complete Guide to Setting Up and Optimizing the eero 6 Router
Step-by-step setup, placement, security, and optimization tips for the eero 6 router to improve home WiFi coverage and reliability.

By following these steps, you will set up an eero 6 router, connect it to your modem, create a network name and password, and optimize coverage across your home. Before you begin, gather a computer or mobile device with the eero app installed, an active internet connection, and your ISP credentials if required. This guide also covers basic security settings, how to place the units for best coverage, and common troubleshooting tips.
What makes the eero 6 router a compelling choice for home networks
According to WiFi Router Help, the eero 6 router is a consumer-friendly WiFi 6 mesh system designed to simplify whole-home coverage. Its compact gateway unit pairs with additional beacons to blanket a multi-room home with a stable wireless signal. Users benefit from an easy setup flow via the eero app, automatic firmware updates, and guest-network capabilities that help keep IoT devices isolated. The goal is to reduce dead zones without requiring advanced networking knowledge. While the hardware is accessible, you still get robust features such as WPA3 security, quality-of-service (QoS) options for prioritizing critical devices, and simple parental controls for households with kids. Understanding these fundamentals helps homeowners decide whether to start with a single gateway or expand to a two- or three-node mesh network as needs evolve.
Planning your home layout for optimal mesh performance
A successful eero deployment starts with thoughtful placement. Place the gateway centrally within the area you want to cover, ideally away from thick walls and metal appliances that can impede signal. Beacons should be positioned to create overlapping coverage so devices can roam without dropping connections. Avoid large appliances, microwaves, and dense furniture that can absorb or scatter waves. In larger homes, map out “coverage zones” and plan where to place nodes for uniform strength in common living spaces, home offices, and bedrooms. If possible, run a quick app-based room-by-room check to identify weak spots and adjust locations accordingly. Keep in mind that the initial placement may require a few trips to refine if certain rooms exhibit poorer performance.
Prerequisites and security basics for a smooth setup
Before spinning up the network, confirm you have access to your modem and a device that can run the eero app (phone, tablet, or computer). You may need to bridge your modem if your ISP provided a combination modem/router; consult your ISP’s documentation to ensure the eero acts as the primary router. Create a strong, unique admin password and enable WPA3 when available. Configure a memorable network name (SSID) and a robust passphrase. Consider enabling a guest network for visitors and IoT devices to keep your main network secure. Finally, disable remote admin access unless you specifically need it, and ensure automatic updates are enabled so you stay protected against known vulnerabilities.
Using the eero app: UI overview and essential settings
The eero app is designed to simplify daily network management. In the Home screen, you’ll see connected devices, current network status, and signal quality for each node. Use the app to create your primary network name and password, set up a guest network, and adjust security settings. The app also provides parental controls, allowing you to schedule internet access and filter content by profile. You can label devices to distinguish phones, laptops, and smart home gadgets, making it easier to assign bandwidth priorities or pause access for specific devices. Regularly check firmware updates and run speed tests from within the app to ensure the network remains healthy over time.
Improving coverage with placement and extenders
If you notice weak spots after initial setup, add more nodes to strengthen coverage. Place extenders roughly equidistant from the gateway and other beacons to maintain a stable mesh. Avoid stacking devices in a single electrical outlet or placing them behind furniture where signals get trapped. For larger homes, consider adding one or two beacons upstairs to ensure uniform coverage across floors. In some configurations, re-balancing the network through the app can help direct clients toward the nearest node with the strongest signal, improving overall performance.
Troubleshooting common situations and quick fixes
Connectivity hiccups are common after first setup. If devices report no internet despite being connected to the network, verify the gateway’s internet source is active and that the modem is functioning. Reboot the modem and gateway in sequence to refresh the connection. If a device cannot obtain an IP address, forget the network on the device and rejoin. Slow speeds can result from interference, outdated firmware, or too many devices demanding bandwidth at once—prioritize critical devices in the app and reduce simultaneous high-bandwidth usage where possible. When all else fails, a factory reset of the entire system can resolve stubborn issues, but you’ll need to reconfigure from scratch.
Maintenance, updates, and long-term care for continued reliability
Regular maintenance helps keep the system secure and performing well. Enable automatic firmware updates to receive the latest security patches and feature improvements. Periodically review connected devices and privacy settings; remove unfamiliar devices and update passwords if you notice any suspicious activity. If you plan to expand coverage, add beacons in a staggered pattern to avoid creating coverage gaps. Finally, maintain a simple documentation trail for your network names, passwords, and device labels so future setup or troubleshooting remains quick and accurate.
Advanced options and final checks for power users
For those who want more hands-on control, the eero ecosystem supports features like device-level QoS, network-wide DNS customization, and targeted content filtering. While advanced settings are typically straightforward in the app, consider documenting your chosen configurations and testing changes with a small subset of devices before broad deployment. A final check should include confirming all nodes show green connectivity, guest network access works, and that parental controls are functioning as intended. The goal is a reliable, easy-to-manage home network with clear visibility of devices and performance.
Quick-start recap and choosing the right setup strategy
To wrap up, decide how many nodes you truly need based on your home size, layout, and the number of connected devices. Start with a single gateway and add beacons only where coverage gaps persist. For many homes, a two-node setup covers typical two-story layouts, while larger residences may benefit from three or more nodes. Remember to keep your firmware up to date, secure your network with strong passwords, and leverage the brand’s app-driven diagnostics to stay ahead of problems before they impact daily use.
Tools & Materials
- Computer, smartphone, or tablet with internet access(Used to install and run the eero app during setup and ongoing management)
- Active internet connection from an ISP(Essential for initial connectivity and testing after setup)
- Modem (existing from ISP)(The eero connects to this modem; ensure it’s functioning)
- Ethernet cable (Cat5e or better)(Optional but helpful for a wired gateway connection or bridging steps)
- Additional eero units (optional)(Use if you plan a multi-room mesh or large home coverage)
- Backup power source or UPS(Keeps network available during short outages)
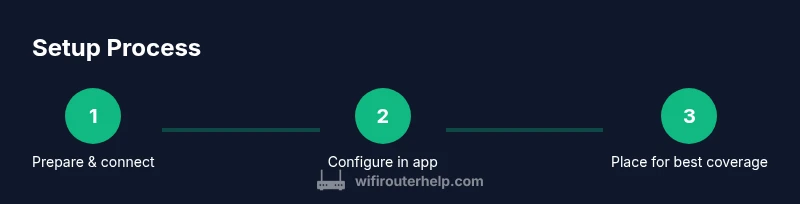
Steps
Estimated time: 15-30 minutes (excluding additional beacons or complex bridging)
- 1
Prepare equipment and verify compatibility
Confirm you have a modem, a device with the eero app, and internet access. If your modem is a combo device, check whether bridge mode is needed so the eero acts as the primary router. Have credentials ready for your ISP if required and consider enabling automatic firmware updates later.
Tip: Bridge mode can simplify setup but may disable some ISP-specific features; confirm what you need before changing modes. - 2
Connect gateway to the modem
Power off the modem, connect the eero gateway to the modem via Ethernet, then power both devices back on. Wait for the gateway LED to indicate a stable connection. If you don’t see internet, double-check cable snugness and port activity.
Tip: If your modem is in bridge mode, the gateway should obtain an IP address automatically once powered. - 3
Install the eero app and create an account
Open the eero app and follow on-screen prompts to create or sign in to your account. The app guides you through discovering the gateway and configuring your first network. Keep your login credentials in a safe place for future management.
Tip: Use a device that will stay connected during setup to avoid losing progress. - 4
Configure network name and security
Name your network clearly and set a strong password. Enable WPA3 if available and consider enabling a guest network for visitors. You can also adjust privacy settings and disable remote admin access if not needed.
Tip: Write down your SSID and password; you’ll need them to reconnect devices after changes. - 5
Place beacons for best coverage
Position beacons to create overlapping coverage windows, avoiding large metal appliances and heavy walls. In larger homes, place beacons on different floors to balance signal strength. Run the app’s diagnostics to verify coverage maps and adjust locations as needed.
Tip: Aim for central locations and avoid extreme corners to minimize dead zones. - 6
Test, adjust, and finalize
Run a quick speed test from multiple devices and rooms. If certain areas underperform, move the nearest beacon slightly or add an extra beacon. Review device connections and enable QoS for priority devices if necessary.
Tip: Document the final beacon locations and network name for easy future tweaks.
People Also Ask
What is the difference between the eero 6 router and other eero models?
The eero 6 router is a WiFi 6 mesh gateway designed for simple home coverage, while higher-end models typically offer more powerful processing and additional features. Most homes start with a single gateway and add beacons as needed to expand coverage.
eero 6 is a WiFi 6 mesh gateway intended for easy home coverage; other models may offer more processing power and features. Start small and expand as needed.
Can I use the eero 6 router with my existing modem?
Yes. The eero 6 connects to your modem via Ethernet. If your modem is a bridge device, ensure it remains compatible with your ISP’s service and that the eero acts as the primary router.
Yes. Connect the eero 6 to your modem with a cable. If your modem is a bridge device, make sure the setup still works with your service.
How many devices can the eero 6 router support?
The eero 6 is capable of handling many devices across a mesh network; performance depends on layout, interference, and bandwidth needs. In practice, most homes will maintain reliable performance with multiple smart devices and users.
It can support many devices, but performance depends on placement and bandwidth use. A mesh setup helps keep access steady.
Is the eero 6 router secure by default?
Yes, with WPA3 available, automatic updates, and straightforward admin controls. Enable a strong password and review guest network options to limit access for visitors and IoT devices.
Security is built in with WPA3 and automatic updates; use strong passwords and guest networks for extra safety.
What should I do if I can't access the admin interface?
Verify the gateway is online, your device is on the same network, and you’re using the correct app or browser interface. A reboot of the gateway often resolves access issues; avoid using outdated credentials.
Make sure you’re on the right network and try rebooting the gateway. If problems persist, check for app updates.
How do I reset the eero 6 router?
For a full reset, locate the reset button on the gateway, hold it for about 15 seconds until the LED cycles, then reconfigure from scratch using the eero app.
Hold the reset button on the gateway for about 15 seconds to reset, then set it up again with the app.
Watch Video
What to Remember
- Plan node placement before wiring to maximize coverage.
- Secure networks with strong passwords and guest networks for visitors.
- Use the app to monitor health, update firmware, and manage devices.
- Add beacons as needed to eliminate dead zones and improve speeds.