Does the Router Have to Be Plugged Into the Modem? A Practical Guide
Explore whether a router must be plugged into the modem, how to connect, and best practices for a reliable home network. Learn topologies, troubleshooting steps, and security tips.

Yes. In most home networks, the router should connect to the modem using an Ethernet cable, with the modem providing internet to the router and the router distributing it to your devices. If you have a separate modem and router, run the cable from the modem's LAN port to the router's WAN/Internet port. Some setups use gateway devices that combine both.
Understanding the Roles: Modem vs Router
To answer the question does router have to be plugged into modem, we first need to understand the distinct roles of these devices. A modem translates the wide area network (WAN) signal from your Internet Service Provider into a form your home network can use. A router takes that internet connection and creates a local network, assigning IP addresses, managing traffic, and enabling multiple devices to share the connection. In most households, the modem is the gateway to the internet, and the router distributes access to laptops, phones, smart devices, and other gear. Keeping the modem and router separate gives you more control over features like guest networks, parental controls, and advanced security, while a single gateway device combines both functions and can simplify setup for beginners. Understanding these roles helps prevent common misconfigurations that can lead to intermittent connectivity or IP conflicts.
Common Network Topologies: Gateway, Bridge, and Separate Devices
There are several viable setups, each with its own pros and cons. The most straightforward arrangement is a separate modem and router, where the modem connects to the ISP line and the router connects to the modem via an Ethernet cable on the WAN/Internet port. Some ISPs supply a gateway device that combines modem and router functions in one unit; this can be easier to set up but offers less flexibility for advanced features. In bridge mode, the gateway acts purely as a modem, and your own router handles all routing, NAT, and firewall duties. Bridge mode is useful when you want to run a high-performance third-party router. If you have a plain gateway, you can still use a separate router through one of the gateway’s LAN ports, but NAT and DHCP behavior may differ. The decision hinges on your priorities: simplicity vs. control, performance, and future-proofing.
How Port Roles Affect Your Network (WAN, LAN, NAT, DHCP)
The WAN/Internet port on a router is the conduit to your modem. When you connect the router’s WAN port to the modem’s LAN port, the router handles IP addressing for your devices, often enabling features like DHCP, NAT, firewall rules, and QoS. If you place a bridge-mode modem in front of your own router, you’ll disable the modem’s routing features so your router can take over. DHCP assignments should be managed by the router in most typical setups, but you may encounter networks where the modem handles DHCP for specific devices or guests. Always verify your IP addressing scheme to avoid overlaps, especially if you bring in additional switches or access points.
Special Scenarios: Modem-Router Combos, Bridges, and ISP Gateways
If you’re using a modem-router combo from your ISP, you might not have a separate WAN port exposed for a second router. In many cases, you can disable the wireless radios on the gateway and connect a separate router to the gateway’s LAN ports. In bridge mode, you turn off the gateway’s routing functions, allowing your own router to perform routing duties. Some ISPs require activation steps or specific firmware versions for third-party equipment to work reliably. If you plan to upgrade hardware, confirm compatibility with your service and consider potential service-level changes when you alter gateway behavior.
Troubleshooting Common Issues After Connecting
After you connect the router to the modem, you might encounter a few issues: no internet on wired or wireless devices, red or amber indicator lights, or devices failing to obtain an IP address. Common fixes include power-cycling both devices (modem first, then router), ensuring the Ethernet cable is connected to the correct ports (modem LAN to router WAN), resetting network settings if needed, and confirming firmware versions are up to date. If symptoms persist, check the status pages for both devices to confirm the router is obtaining a public IP on the WAN interface and that DHCP is enabled on the router. Sometimes ISP-provided equipment requires a quick activation step when a new router is introduced.
Wireless Considerations After Connection
Once the physical connection is established, configure Wi‑Fi on the router. Choose a unique SSID, a strong passphrase, and consider enabling guest networks for visitors. If your router supports dual-band (2.4 GHz and 5 GHz), use both bands to balance range and speed. Position the router in a central, elevated location away from interference sources like microwaves and cordless phones. For larger homes, adding access points or a mesh system can improve coverage without sacrificing performance. Remember to adjust DHCP, NAT, and firewall settings to align with your security posture.
Security, Performance, and Maintenance Best Practices
Security starts with a robust admin password and keeping firmware up to date. Disable remote management unless you need it, and enable WPA3 (or at least WPA2) on your wireless network. Regularly review connected devices and set up a reasonable guest network for visitors. To optimize performance, enable QoS only if you have a specific use case like gaming or video conferencing, and consider channel selection for 2.4 GHz and 5 GHz bands to minimize interference. Schedule periodic reboots or enable automatic firmware updates where available, and back up your router configuration after making significant changes. A little maintenance goes a long way in preserving reliability.
Quick Setup Checklist
- Confirm the modem is powered on and registered with your ISP.
- Connect the router’s WAN/Internet port to the modem’s LAN port with a reliable Ethernet cable.
- Power-cycle the modem first, then the router, and wait for status indicators to indicate an active connection.
- Access the router’s admin page to configure basic settings (SSID, password, admin password).
- Test wired and wireless devices for connectivity and speed, and verify device IP assignments.
Summary and Practical Takeaways
- A typical home network relies on a modem-to-router connection to share internet access.
- You can have a separate modem and router, a gateway device, or a bridge mode configuration depending on your needs.
- Proper port connections, security settings, and firmware updates are essential for a reliable network.
Tools & Materials
- Modem(Ensure it’s powered on and functioning from your ISP.)
- Router(New or existing router; supports WAN/Internet port.)
- Ethernet cable (Cat5e or better)(One end to modem LAN port, other end to router WAN/Internet port.)
- Power adapters for modem and router(Plug in before testing connectivity.)
- Laptop or smartphone for configuration(Used to access router admin page and test network.)
- Optional: network switch(Useful if you need more wired ports.)
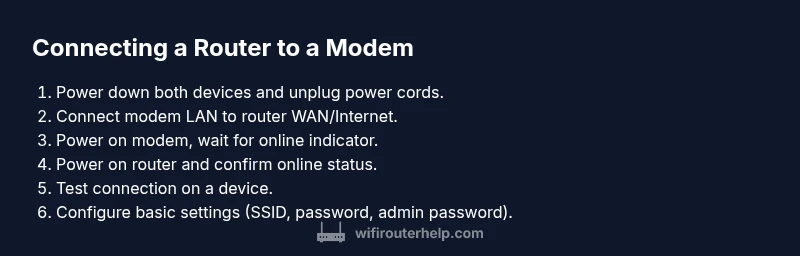
Steps
Estimated time: 20-30 minutes
- 1
Power down all devices
Turn off the modem and router, then unplug the power cords to ensure a clean start. This minimizes the risk of electrical surge or firmware conflicts during the setup.
Tip: Wait 20 seconds after unplugging before reconnecting to ensure capacitors discharge. - 2
Connect the modem to the router
Plug one end of the Ethernet cable into the modem’s LAN port and the other end into the router’s WAN/Internet port. This creates the pathway for the router to manage your local network.
Tip: Use a high-quality CAT5e or better cable to reduce potential interference. - 3
Power on the modem first
Reconnect and power on the modem. Give it time to initialize and establish a connection with your ISP. Status lights should stabilize before proceeding.
Tip: If the modem has multiple lights, look for the “online” or “internet” indicator. - 4
Power on the router
Plug in the router and wait for the status lights to indicate a successful WAN connection. This ensures the router can assign IPs and manage traffic.
Tip: If the router doesn’t reach online after a minute, reboot the modem and router in sequence. - 5
Test connectivity with a device
Connect a laptop or phone to the router’s network and verify internet access. Open a browser to confirm external reach and test a quick speed check.
Tip: Try both wired and wireless tests to ensure full coverage. - 6
Configure basic router settings
Access the router’s admin page using a web browser, set a strong admin password, configure the SSID, and secure Wi‑Fi with a modern encryption standard.
Tip: Document your SSID and password in a secure location.
People Also Ask
Does a router need to be plugged into the modem?
In most home networks, yes. The router connects to the modem to obtain internet access and then distributes it to devices. If you’re using a gateway or bridge mode, the setup changes so the router may not sit directly between the ISP line and the network.
Yes, typically the router plugs into the modem to share the internet, unless you’re using bridge mode or a gateway device.
What if the modem has multiple Ethernet ports?
Use one port to connect to the router’s WAN/Internet port and leave the others available for direct devices if needed. Some setups may require bridging to avoid double NAT.
Hook the router to the modem’s LAN port and use other ports as needed; bridging may be required in some configurations.
Do I always need a separate modem and router?
Not always. Some ISPs provide gateway devices that combine modem and router functions. You can also use a separate modem and router for greater control, flexibility, and features.
Not always; you can have both separate devices or a gateway, depending on your needs.
What is bridge mode and when should I use it?
Bridge mode turns off the gateway’s routing features so your own router performs all routing duties. Use it when you want maximum control over advanced settings and performance.
Bridge mode makes the router handle the routing, which helps if you have a high-performance setup.
How do I test my connection after setup?
Connect devices to both Wi‑Fi and wired networks, run a quick speed test, and verify IP addresses and gateway status. Check for consistent access across multiple devices.
Test by connecting and running a quick speed check on multiple devices.
What are common mistakes to avoid?
Forgetting to power cycle devices, plugging into the wrong ports, or using outdated firmware. Also avoid leaving default admin credentials active for too long.
Common mistakes include not rebooting and sticking with default passwords.
Watch Video
What to Remember
- Connect the router to the modem using a reliable Ethernet cable.
- Choose the topology that matches your needs: separate devices, gateway, or bridge mode.
- Secure your network with a strong password and current encryption.
- Test wired and wireless connectivity after setup to verify performance.