How to Tell If Your Router Uses 2.4 or 5 GHz
Learn how to identify whether your router operates on the 2.4 GHz or the 5 GHz band with simple, actionable steps. Learn to recognize band indicators, review settings, and optimize dual‑band performance.

Within minutes, you can tell if your router uses 2.4 GHz or 5 GHz by checking three quick sources: the hardware label, the router's admin page, and your connected devices. If you see two distinct SSIDs or a 2.4 GHz / 5 GHz indicator, map each network to its band accordingly. This quick check boosts reliability and performance.
What 2.4 GHz and 5 GHz Mean
Two wireless bands power most home routers: 2.4 GHz and 5 GHz. The 2.4 GHz band travels farther and better through walls but offers lower maximum speeds and is more prone to interference from neighbors and household devices. The 5 GHz band delivers higher speeds with less interference, but its signal doesn’t penetrate walls as well. Most modern routers are dual-band, meaning they broadcast both bands simultaneously. According to WiFi Router Help, understanding these bands helps you optimize coverage and throughput for all devices. WiFi Router Help analysis shows that many users misinterpret SSID names and assume a single network covers both bands, which can lead to slow connections on crowded networks. Being able to identify the active band on each device makes troubleshooting quicker and more effective.
Quick Ways to Identify the Band Without Logging In
If you want a fast, no-login check, start with the obvious signs: look for separate SSIDs like “HomeWiFi_2.4” and “HomeWiFi_5” or similar naming conventions. Some routers label the bands directly on the front panel LEDs or in the quick-start sheet. The label on the router’s bottom or back might list the model and indicate dual-band capability. When in doubt, grab your phone and try to connect to each network name; devices typically show which band they are connected to in the network details. If you see two networks, you’re likely seeing both 2.4 GHz and 5 GHz bands. This approach is quick and doesn’t require admin credentials, making it ideal for renters or new homeowners who want an at-a-glance assessment.
Reading the Router Label and Documentation
Physical labels on the router (bottom or rear) often provide the model number, default SSIDs, and sometimes hints about dual-band support. If the label is not explicit about the frequencies, consult the user manual or visit the manufacturer’s support site using the model number. Documentation usually clarifies whether the device is dual-band and may list default names for each band. If your router uses a single combined SSID, the documentation will confirm whether “Smart Connect” or a similar feature is in use, which can automatically steer devices to the best band.
Checking the Admin Interface for Band Details
Log in to your router’s admin page to inspect Wireless settings. Common login addresses are 192.168.0.1 or 192.168.1.1, and you’ll need the admin credentials. Navigate to Wireless or Wireless Settings, where you’ll often see separate sections for 2.4 GHz and 5 GHz with distinct SSIDs and security settings. If you see both sections and distinct SSIDs, you’re viewing a true dual-band setup. Some interfaces display a single “Smart Connect” toggle that combines bands; disable it if you want explicit per-band control. Confirming the presence of two active bands through the admin page is a reliable method.
Interpreting SSIDs and Naming Conventions
Many users identify bands by naming conventions. Common patterns include appending “_2.4” or “_2.4G” for the 2.4 GHz network and “_5” or “_5G” for the 5 GHz network. If your router uses a single SSID, you may see a suffix or a dedicated label for the frequency (e.g., “MyWiFi-5G”). If you’re unsure, check the admin page’s per-band settings to map each SSID to a band. Consistent naming helps keep devices on the intended band and simplifies future changes.
How Devices Show Band Information (iOS/Android/Windows/macOS)
When connected, most devices display the network name and sometimes the frequency in the details panel. On iOS and Android, tap the connected network to see signal strength and band details in the Wi‑Fi settings. Windows shows the network’s frequency in the Wireless Properties, while macOS users can hold the Option key and click the Wi‑Fi icon to view the network’s channel or band. If a single network name is used for both bands, devices often roam between bands based on signal quality, which can make steady band identification harder but still possible by testing speeds on each network.
Step-by-Step Live Verification Using a Laptop and Phone
- Locate the router’s model and default SSIDs on the label and manual. 2) Log into the router admin page and locate the Wireless section. 3) Confirm whether there are two bands (2.4 GHz and 5 GHz) with separate SSIDs. 4) On a laptop, connect to the 2.4 GHz network and run a quick speed test; then connect to the 5 GHz network and compare results. 5) On a phone, repeat the speed tests under each network. 6) If one network is missing, verify firmware and settings. 7) Document the final mapping of SSIDs to bands. 8) Consider setting clear per-band names for future troubleshooting.
When Both Bands Share the Same SSID (Unified Network) and What to Do
Some routers use a single SSID and automatically steer devices to the best band. In this case, you won’t see two distinct networks, which makes direct identification harder. You can still determine the active band by testing device connections: monitor whether a device consistently improves speed when moving closer to or away from the router or by checking the admin page for band assignment. If you prefer explicit control, disable the unified network and create separate SSIDs for 2.4 GHz and 5 GHz. This approach simplifies troubleshooting and device management.
Best Practices After Identification
Once you’ve identified the bands, document which SSIDs correspond to which frequency, and consider separating the networks to improve reliability in a busy home. Use clear, memorable names and consider giving guests a separate SSID with limited access. If your devices frequently roam, enable band steering only if you understand its impact on latency. Regularly check firmware updates and review channel selections to minimize interference from neighbors or other electronics. Keeping a simple map of devices to networks helps ongoing maintenance and troubleshooting.
Tools & Materials
- Laptop or smartphone with Wi‑Fi capability(Used to view network names and access the admin page if needed.)
- Router login credentials (admin username/password)(Needed to access the router’s web interface.)
- Ethernet cable (optional)(Useful for stable admin login when Wi‑Fi is unreliable.)
- Manual or model number(Refer to docs for exact band information.)
- Notebook or note-taking device(Record your findings and final mappings.)
Steps
Estimated time: 15-25 minutes
- 1
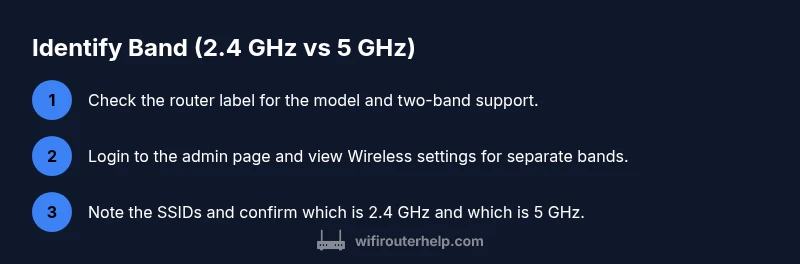
Locate the router label
Flip the router over and inspect the bottom or back for model numbers, serials, and possible dual-band indicators. This quick check often reveals if the device is designed to support multiple bands.
Tip: Take a photo of the label for quick reference. - 2
Log in to the router’s admin page
Enter the router’s IP address (commonly 192.168.0.1 or 192.168.1.1) in a browser and log in with admin credentials. This is where per-band settings are found on most dual-band routers.
Tip: If you forgot credentials, use the reset option only as a last resort and back up settings first. - 3
Open Wireless Settings
Navigate to the Wireless or Wireless Settings section to see if there are separate entries for 2.4 GHz and 5 GHz, each with its own SSID.
Tip: Look for explicit mentions of ‘2.4 GHz’ and ‘5 GHz’ or for a toggle like “Smart Connect.” - 4
Identify per-band SSIDs
Note the SSIDs assigned to each band and confirm which one corresponds to 2.4 GHz versus 5 GHz.
Tip: If the names are unclear, refer back to the admin page’s per-band details. - 5
Test with a connected device
Connect a device to each SSID and run a quick speed test. A higher speed on one network suggests the higher-frequency band is active there.
Tip: Test in the same room for consistent results. - 6
Cross-check with device details
On the connected device, view network details to confirm the band. iOS/Android and Windows/macOS each show different indicators that help confirm the frequency.
Tip: Document which device shows which band for future troubleshooting. - 7
Optional: use a manufacturer app
Some routers offer a mobile app that clearly shows which band a device is on and lets you manage bands more easily.
Tip: Apps can simplify ongoing management. - 8
Document and adjust
Record the final mapping of SSIDs to bands and consider separating networks for easier management. Update firmware if needed.
Tip: Clear labeling reduces future confusion.
People Also Ask
What is the difference between 2.4 GHz and 5 GHz in a home network?
2.4 GHz covers larger distances and penetrates walls better but offers slower speeds and can suffer from interference. 5 GHz provides higher speeds with shorter range and less interference, making it ideal for nearby devices and high-bandwidth activities.
The 2.4 GHz band reaches farther but is slower, while the 5 GHz band is faster but shorter-ranged.
Why would a device show only one network name or SSID?
Some routers use a single SSID with a feature like ‘Smart Connect’ that steers devices to the best band automatically. In this case you might not see two separate networks unless you disable the feature.
Many routers use one name and steer devices; you’ll only see two networks if you turn that off.
Can I force devices to stay on a specific band?
Yes. In the router’s Wireless settings, disable automatic band steering and assign devices to the desired band by selecting the appropriate SSID. You can also create separate SSIDs for each band and connect devices manually.
You can keep a device on 5 GHz by assigning it to that SSID and turning off automatic steering.
Is it safe to disable one of the bands?
Disabling a band reduces options for devices. Keep both bands active if you have multiple devices needing different performance profiles; disable only if you’re sure you won’t need the band.
Disabling a band lowers flexibility; do it only if you’re certain no devices rely on it.
What if I can’t access the admin page?
Try a wired connection, use a different browser, or reset the router if necessary. If you reset, have your backup configuration ready to restore settings.
If you can’t log in, connect via Ethernet and retry; a factory reset is a last resort.
Do all routers support dual-band?
Most modern routers support both 2.4 GHz and 5 GHz bands, but some older or budget models may be single-band. Check the device’s specs or admin interface to confirm.
Most new routers are dual-band, but check your model’s specs.
Watch Video
What to Remember
- Identify bands via admin page and labels
- Use distinct SSIDs for clarity
- Test with multiple devices to verify performance
- Document mappings for ongoing maintenance