How to Put Your Router on 2.4GHz: A Step-by-Step Guide
Learn how to set your home router to the 2.4GHz band for better range. This guide covers when to use 2.4GHz, how to enable it, channel choices, security tips, and troubleshooting for a reliable home network.

To put your router on 2.4GHz, log into the router’s admin panel, enable the 2.4GHz wireless band, and apply the changes. If you have separate 2.4GHz and 5GHz SSIDs, keep both active for compatibility. After saving, verify the 2.4GHz network appears and that devices can connect. The 2.4GHz band offers greater range but slower speeds.
Why the 2.4GHz Band Still Matters
In many homes, the 2.4GHz wireless band remains essential. It penetrates walls better than 5GHz, so it covers larger areas with fewer dead zones. According to WiFi Router Help, optimizing this band can improve reliability for smartphones, tablets, smart speakers, and IoT devices that are far from the router. While 2.4GHz is slower than 5GHz, its broader reach makes it a practical baseline for mixed environments where devices move between rooms and floors. This section explains when to use 2.4GHz and how to set it up without sacrificing security or speed on the devices that need high performance.
Understanding When to Use 2.4GHz Versus 5GHz
Most homes benefit from running both bands simultaneously. 2.4GHz provides better wall penetration and device compatibility, which helps older devices and IoT gadgets stay connected. 5GHz offers higher data rates and less interference but shorter range. By design, modern routers can broadcast both bands with separate SSIDs or a combined setup. If your devices frequently move around the house or sit on the other side of thick walls, the 2.4GHz band becomes your reliable backbone.
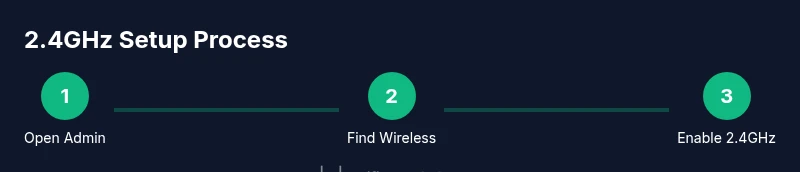
Step-by-Step: Practical Setup Guide (Overview)
This section complements the hands-on steps in the dedicated STEP-BY-STEP section. You’ll learn how to verify compatibility, select the correct wireless mode, and confirm that clients connect to the 2.4GHz network. Keeping both bands active with distinct SSIDs makes it easy to route bandwidth-intensive tasks to 5GHz while using 2.4GHz for general connectivity and IoT devices. The following steps assume you have admin access to your router and a device to apply changes.
Channel Selection and Interference
2.4GHz channels overlap more than 5GHz. In most regions, using channels 1, 6, and 11 minimizes co-channel interference because these channels do not overlap. If you experience congestion, try adjusting to one of these clean channels and monitor performance. Some routers offer an auto-channel feature; if your network is stable, you can disable auto-channel and pick a fixed channel to reduce fluctuation.
Security and Network Naming Tips
Assign distinct SSIDs for 2.4GHz and 5GHz so devices can reliably choose the right band. Use WPA3 or at least WPA2 security, and set a strong, unique passphrase. Periodically reviewing connected devices helps you spot unfamiliar clients. If you previously used a single SSID, consider updating your network name to avoid confusion.
Troubleshooting Common Issues
If the 2.4GHz network does not appear on devices, verify that the band is enabled in the admin interface, confirm the SSID broadcast is on, and check for firmware updates. A simple reboot of the router can resolve minor configuration glitches. If problems persist, reset the wireless settings to default (after backing up your current configuration) and reconfigure the 2.4GHz band from scratch.
Tools & Materials
- Router with admin access(Know the admin username/password; default credentials are often on a sticker on the router.)
- Smartphone or computer(Used to access the router’s web interface or mobile app.)
- Ethernet cable (optional but recommended)( Helpful if you can connect directly during setup or if Wi‑Fi is unstable.)
- Current network details(Have SSIDs and passwords handy for both bands if already configured.)
- Paper and pen(Log changes and channel selections for future reference.)
Steps
Estimated time: 20-40 minutes
- 1
Open the router’s admin page
Connect your device to the router via Ethernet or Wi‑Fi, then enter the router’s IP address (commonly 192.168.0.1 or 192.168.1.1) in a web browser. Log in with the admin credentials. This is the gateway to the wireless settings.
Tip: If you can’t reach the page, check the device’s gateway IP in your network settings or reset the router if you’re sure you have the right credentials. - 2
Navigate to Wireless Settings
Find the Wireless or Wi‑Fi settings menu. Some routers separate bands into Wireless 2.4GHz and Wireless 5GHz pages. If you see a Quick Setup, choose Advanced mode for full control.
Tip: Use the search within the admin interface to locate 'Wireless', 'Wi‑Fi', or 'Radio' settings quickly. - 3
Enable the 2.4GHz band
Turn on the 2.4GHz radio, and ensure it is not disabled. If your router uses a single 'Smart Connect' option, disable it to force independent band selection if you need explicit 2.4GHz control.
Tip: Keep 5GHz enabled in most cases; separate control helps with both bands without losing speed for high‑band devices. - 4
Set SSID for 2.4GHz
Create or confirm a distinct SSID for the 2.4GHz network (e.g., MyWiFi-2.4). Avoid using the same name as the 5GHz network to prevent devices from sticking to the wrong band.
Tip: Record the exact SSID and password for easy future reference. - 5
Choose the channel
Select a 2.4GHz channel that minimizes interference. Start with channel 1, 6, or 11 depending on neighboring networks; avoid auto if your environment is stable.
Tip: If you have many nearby networks, try channel 6 first and move to 1 or 11 if interference remains visible. - 6
Apply changes and reboot if required
Save your settings and, if prompted, reboot the router. Some devices show the new network immediately; others require a reboot for changes to take effect.
Tip: Avoid disconnecting power during the reboot; ensure all critical devices can reconnect afterward. - 7
Connect a device to the 2.4GHz network
On a phone or laptop, scan for the 2.4GHz SSID and connect using the password you configured. Verify you have internet access and stable signal in the areas you tested.
Tip: Test with a low‑band device first to confirm basic connectivity before moving to high‑band devices. - 8
Verify and document
Check client lists in the admin interface to confirm devices are connected to the 2.4GHz network. Keep a note of channel, SSID, and security settings for future reference.
Tip: Periodically revisit settings if you add new devices or change home layout.
People Also Ask
How do I know if my router supports 2.4GHz?
Most dual-band routers support both 2.4GHz and 5GHz. Check the Wireless settings page or the label on the router.
Most dual-band routers support 2.4GHz. Look in the Wireless section or on the router label to confirm.
Do I need to reboot after enabling 2.4GHz?
Yes, applying 2.4GHz changes often requires a reboot or re‑connect for devices to see the new band.
Yes, reboot if prompted, then reconnect devices to the 2.4GHz network.
Can I run 2.4GHz and 5GHz at the same time?
Yes. Most modern routers broadcast both bands simultaneously, which helps balance bandwidth and range.
Yes, you can run both bands at the same time to get the best of speed and range.
Will 2.4GHz work with IoT devices?
Yes, 2.4GHz is commonly used by many IoT devices due to its range and stable connectivity.
Yes, most IoT devices use 2.4GHz because it travels farther and handles wall penetration well.
How can I reduce interference on 2.4GHz?
Choose a clear channel (1, 6, or 11) and keep other nearby 2.4GHz networks from overlapping.
Pick a clear channel and minimize overlap with nearby networks to reduce interference.
What if my 2.4GHz network still doesn’t show up?
Double-check that the band is enabled, SSID broadcast is on, and the router firmware is up to date. A factory reset may be needed if issues persist.
Make sure the band is on, the SSID is broadcasting, and the firmware is current. If necessary, reset to factory defaults and reconfigure.
Watch Video
What to Remember
- Enable and separate the 2.4GHz band for broader coverage.
- Choose non-overlapping channels (1, 6, or 11) to reduce interference.
- Use distinct SSIDs for 2.4GHz and 5GHz to simplify device routing.
- Test with multiple devices and document the settings for future tweaks.