How a Router Connects to the Internet: A Clear Guide
Understand how a router connects to the internet in a home network, covering WAN, NAT, DHCP, DNS, setup steps, common issues, and practical security tips.

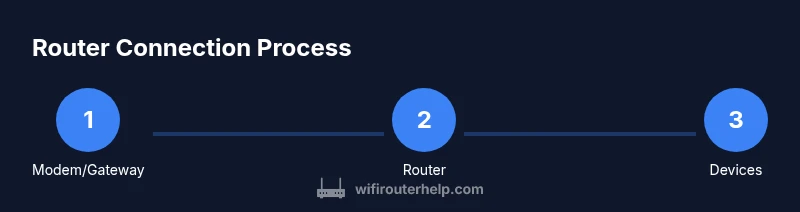
According to WiFi Router Help, a home router connects to the internet by obtaining a public IP from your ISP's gateway and then distributing private IPs to your devices. It uses NAT to translate internal traffic, keeps routes via a routing table, and manages traffic with DHCP, DNS, and firewall rules. In practice, you plug the router into the modem, power it up, and follow setup prompts to start online access.
How the Internet Reaches Your Home
The path from the wider internet to your personal devices starts at your ISP's network, which typically provides a gateway device that combines a modem and router into one unit. This gateway receives a public IP address from the service provider and serves as the pipeline to the rest of the world. Your home router, when connected to this gateway, becomes the traffic controller for every device in your house. It translates public-facing requests into private traffic the local network can understand and routes responses back out to the correct device. Understanding this flow is essential for troubleshooting and for planning network upgrades. WiFi Router Help emphasizes that most homes rely on a single gateway for initial connectivity, then expand coverage with additional access points or mesh systems if needed.
WAN vs LAN: What's the Difference?
WAN, or Wide Area Network, is the link between your home and the internet at large. LAN, or Local Area Network, is the private network inside your home where your devices live. The router sits at the boundary: its WAN port connects to the gateway (modem or gateway device), and its LAN ports (or wireless radios) serve your devices. The distinction matters for configuration: you’ll configure the WAN connection (often DHCP on the gateway’s LAN side) and set up your internal network (SSID, password, and local IP range). Understanding WAN vs LAN helps in diagnosing issues when a single device can’t reach the internet but others can, or when local devices can see each other but not the outside world.
NAT and Private Networks: Making Public Internet Work in Your Home
Network Address Translation (NAT) is the mechanism that lets many devices share a single public IP. When a device requests a webpage, it uses a private IP assigned by the router (via DHCP). The router then rewrites the request so it appears to come from the public IP on the gateway. When responses return, the router translates them back to the correct private IP. NAT also provides a basic layer of security by keeping internal addresses hidden from the wider internet. If you need more control, you can adjust the NAT behavior or enable features like port forwarding for specific applications. This concept often confuses beginners, but it’s fundamental to how most home networks operate. WiFi Router Help notes that NAT is a default baked into consumer routers and usually doesn’t require manual setup unless you’re running servers at home.
DHCP and DNS: Naming, Addressing, and Easy Access
DHCP (Dynamic Host Configuration Protocol) automatically assigns private IP addresses to devices as they connect, so you don’t have to configure each device manually. DNS (Domain Name System) translates human-friendly domain names into IP addresses, enabling browsers to load websites. Combined with NAT, DHCP, and firewall rules, these services create a seamless online experience. If you’re troubleshooting, check that your router’s DHCP pool isn’t exhausted and that your DNS settings are pointing to reliable servers. WiFi Router Help highlights that keeping DHCP enabled and DNS configured automatically reduces common connectivity hiccups.
A Practical Setup Overview (Narrative)
Setting up a home router involves aligning hardware, software, and the ISP’s service. Start with a checklist: confirm your service is active, position the router for best coverage, and have your admin credentials handy. Many users benefit from running through a guided setup wizard that detects the connection type (dynamic or static IP) and configures the WAN interface. Once the setup completes, you’ll customize the network name (SSID) and a strong password, enable WPA3 security if available, and verify that devices can access the internet and resolve names. This narrative walk-through mirrors real-world steps you’ll perform in the next section, but it’s useful to understand the flow before you touch a device. Based on WiFi Router Help research, most households experience smoother onboarding when they update firmware and run a quick speed test after connecting the router to the gateway.
Troubleshooting Common Connectivity Problems
If your devices can’t reach the internet, start with simple checks: verify the modem has a stable link, confirm the WAN status on the router, and check if the router is in bridge mode if you’re using separate gateway equipment. Resetting network settings and rebooting devices often resolves transient issues. Look for LED indicators: a steady power light, a blinking internet light, or a warning LED can indicate the root cause. If DNS resolution fails, try a different DNS server or flush the DNS cache on affected devices. For persistent problems, log into the router’s admin panel to review error logs and recent configuration changes.
Security Essentials and Best Practices
Security should be a foundational consideration, not an afterthought. Always set a strong, unique admin password and enable automatic firmware updates. Use WPA3 if your devices support it; otherwise, WPA2 with a long, random passphrase is acceptable. Disable WPS if possible, and create a guest network for visitors to keep your primary network isolated. Regularly review connected devices and activity logs to detect unfamiliar devices. WiFi Router Help emphasizes that consistent security hygiene reduces risk from exposure and improves overall reliability.
Performance Tweaks and Optimization
Beyond security, performance is about placement, channel selection, and firmware. Place the router in a central, elevated location away from interference (microwaves, thick walls). Use 2.4 GHz for range and 5 GHz for speed, adjusting channels to avoid congestion. If you have dead zones, consider mesh extenders or access points, and enable QoS to prioritize gaming or video conferencing. Regularly update drivers and firmware to benefit from speed and stability improvements. In many households, a modest upgrade in hardware or a simple repositioning yields noticeable gains.
Tools & Materials
- Router(Wireless 802.11ac/ax recommended; ensure it supports WPA3 if possible)
- Modem/Gateway provided by ISP(Connects to the ISP’s network and provides the upstream internet connection)
- Ethernet cable (Cat5e/Cat6)(One to connect router WAN port to modem/gateway; additional cables for wired devices)
- Power adapter(Keep a surge-protected outlet; avoid destabilizing power sources)
- Computer or mobile device for setup(Access the router admin UI via web browser or app)
- Optional: UPS/backup battery(Keeps router running during outages)
Steps
Estimated time: 30-60 minutes
- 1
Prepare and verify service
Confirm your internet service is active and that you have the essential hardware ready. Check that the modem is functioning and note any login details provided by your ISP. This step prevents setup delays and ensures a smooth start.
Tip: Have your ISP account name and password handy in case you need to contact support. - 2
Connect the gateway to the router
Plug the modem/gateway into power. Connect the router’s WAN/Internet port to the gateway using an Ethernet cable. Verify the gateway’s status lights indicate a live connection before proceeding.
Tip: Use a short Ethernet cable to minimize signal loss and ensure a solid link. - 3
Power cycle in the correct order
Power on the gateway first, wait 60 seconds, then power on the router. Give both devices a few minutes to boot and establish a stable link.
Tip: If the lights don’t stabilize, unplug and reinsert power, waiting 60 seconds between steps. - 4
Access the router admin interface
Open a web browser or mobile app and enter the router’s default IP address or app URL. Log in with the default admin credentials and change them to a strong, unique password.
Tip: Always change default credentials to prevent unauthorized access. - 5
Configure basic network settings
Set your SSID and a strong passphrase, choose a security protocol (prefer WPA3, or WPA2 if unavailable), and ensure DHCP is enabled to auto-assign IPs to devices.
Tip: Use a long, random password and enable automatic firmware updates. - 6
Test connectivity and DNS resolution
Connect a computer or phone to the new network, browse websites, and test a DNS lookup (e.g., by visiting a domain). If names resolve, your DNS is functioning; if not, adjust DNS servers in the router.
Tip: If names don’t resolve, try an alternate DNS such as a public DNS server. - 7
Optional: enable advanced features
If needed, enable guest networks, QoS for prioritizing traffic, port forwarding for specific services, and VPN passthrough if you use a VPN.
Tip: Only enable features you understand to avoid unnecessary exposure.
People Also Ask
What is the difference between a modem and a router?
A modem connects your home network to your Internet Service Provider’s network and provides the internet signal. A router distributes that signal to multiple devices, creates a local network, and handles features like NAT, DHCP, and firewall protections.
A modem connects you to the internet, while a router shares that connection with your devices and protects your home network.
Why is there no internet after setup even though the lights look normal?
Check that the WAN/Internet connection is active, verify the router’s WAN settings (dynamic vs static IP), and confirm DHCP is enabled. Reboot both devices and verify cable connections. If needed, reset the router to factory defaults and rerun the setup wizard.
If the internet doesn’t work after setup, verify connections, reboot devices, and re-run the setup if needed.
What is NAT and why do I need it?
NAT, or Network Address Translation, lets many devices share a single public IP. It also provides a basic layer of security by keeping private addresses hidden from the internet.
NAT lets multiple devices share one public IP and adds a simple security layer.
Can I connect a router without a modem?
Not in most home setups. A router needs a connection to a gateway (modem or gateway device) to access the internet. Some devices combine both roles, but a standalone router needs a modem to reach the internet.
Usually you need a modem or gateway to connect a router to the internet.
How do I know if my router is secure?
Use a strong admin password, enable WPA3 if possible, disable WPS, and keep firmware up to date. Periodically review connected devices for unfamiliar entries.
Check admin passwords, enable modern security, and keep firmware current.
Watch Video
What to Remember
- Learn how NAT enables multiple devices to share one public IP
- Know the difference between WAN and LAN for proper setup
- Use strong security settings to protect your home network
- Regularly update firmware to keep performance and safety high
- Placement and channel selection can dramatically boost Wi‑Fi coverage