How to Connect a Router to a Modem (Step-by-Step Guide)
Learn a reliable method to connect a router to a modem, optimize for performance, and troubleshoot common issues. This educational guide covers wired setup, bridge mode considerations, and security best practices for a stable home network in 2026.

To connect a router to a modem, run a single Ethernet cable from the modem’s Ethernet port to the router’s WAN/Internet port, then power cycle both devices. Ensure DHCP is enabled on the router and set a strong Wi‑Fi password. If your modem supports bridge mode, enable it to avoid double NAT for simpler, more reliable performance.
Why This Connection Matters
Understanding how is router connected to modem influences every aspect of your home network: reliability, speed, and security. According to WiFi Router Help, many households struggle with intermittent Wi‑Fi, slow page loads, or double NAT problems when devices are not configured properly. A clear modem-to-router setup reduces IP conflicts, simplifies troubleshooting, and makes it easier to manage features like DHCP, port forwarding, and guest networks. Framing your setup correctly from the start helps homeowners and tech enthusiasts build a robust, scalable network that grows with internet plans and smart devices. The steps outlined here apply across common ISP environments and consumer gear, without requiring advanced technical expertise.
Understanding Modem, Router, and DHCP Basics
A modem translates your internet signal from your ISP into data your devices can understand. A router then distributes that data to multiple devices, either via Ethernet or Wi‑Fi. DHCP (Dynamic Host Configuration Protocol) automatically assigns IP addresses to devices on your network, which is essential for smooth internet access. NAT (Network Address Translation) lets many devices share a single public IP address. Understanding these basics helps you diagnose why a connection might fail and choice points like bridge mode, IP passthrough, or changing the WAN settings on your router. WiFi Router Help emphasizes that a well‑defined DHCP range and clearly labeled LAN/WAN ports reduce confusion and speed up setup.
Wired Connection: The Simple Route
A clean wired connection is the foundation of a reliable home network. Use a high‑quality Ethernet cable (Cat5e or better) to connect the modem’s Ethernet port to the router’s WAN/Internet port. Power on the modem first, wait for the indicator lights to show an online status, then power on the router. Once both devices boot, use a computer or phone to verify that the router is receiving a public IP and that devices on the LAN are getting IP addresses. A wired uplink minimizes latency and interference, giving you a stable baseline before enabling wireless features.
Bridge Mode vs IP Passthrough: When to Use Each
Bridge mode disables the router functionality on the modem, turning the modem into a pure gateway. This is useful when you want to avoid double NAT and rely entirely on your own router for features like QoS and advanced firewall rules. IP Passthrough is similar but often offered by ISPs with their gateway devices. If you encounter gaming lags, VPN instability, or port forwarding issues, enabling bridge mode or passthrough on the modem can resolve NAT conflicts. However, enabling bridge mode may disable some ISP-provided features, so check with your provider before changing settings.
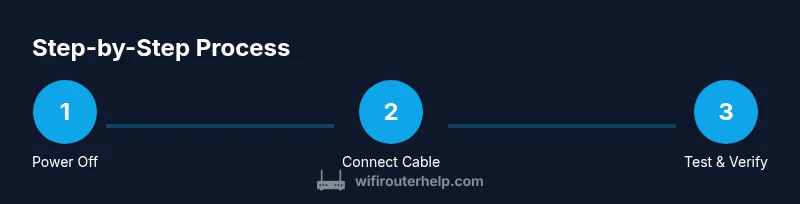
Step-by-Step Quick Wiring Diagram (Verbal) & Setup Overview
Think of the setup as a single link: Modem → Router → Devices. Start by turning off both devices, connect the modem to the router using a single Ethernet cable on the WAN/Internet port, then power on the modem followed by the router. After boot, use a connected computer to access the router’s admin page and confirm the WAN is set to dynamic IP (DHCP). If the modem supports bridge mode and you want to simplify NAT, enable bridge mode and reboot both devices. Finally, configure your wireless network (SSID and password) and verify that devices can browse the internet.
Troubleshooting Common Issues
If you don’t see internet after setup, recheck the Ethernet cable, ensure the correct ports are used (modem to router WAN), and confirm the router is assigning IP addresses. Look for indicator lights: a steady online state on the modem and an active WAN light on the router. If devices still can’t reach the internet, verify DHCP is enabled on the router, reset to factory settings if necessary, and re-enter your ISP login credentials only if required by your equipment. WiFi Router Help notes that most problems stem from misconfigured DHCP, double NAT, or wrong port connections.
Security, Performance, and Maintenance After Connection
Once connected, focus on security and performance. Change the default admin password, enable WPA3 (or at least WPA2) on the Wi‑Fi network, and set strong, unique passwords for all networks. Position the router centrally away from thick walls and metal appliances to improve coverage. Regularly check for firmware updates to fix vulnerabilities and improve stability. If you rely on smart home devices, consider enabling a dedicated guest network to isolate IoT devices from main PCs and phones. Periodically review device connections and logs to catch unfamiliar activity.
Tools & Materials
- Ethernet cable (Cat5e or better)(RJ-45 connectors; 1–3 meters recommended)
- Modem(Provided by ISP or separate device; ensure it’s powered off before connecting)
- Router(With a WAN/Internet port labeled; ensure firmware is up to date)
- Computer or mobile device(For accessing the router admin page and setup)
- Pen and paper or notes app(Record settings and IPs for future reference)
Steps
Estimated time: 20-30 minutes
- 1
Power off both devices
Shut down the modem and the router to ensure a clean start and avoid electrical feedback. Unplug power cords if needed and wait 30 seconds before reconnecting.
Tip: A cold boot helps clear temporary config glitches. - 2
Connect modem to router using WAN port
Insert one end of the Ethernet cable into the modem’s LAN/Ethernet port and the other end into the router’s WAN/Internet port. Make sure the cable is snug and not loose.
Tip: Use the dedicated WAN port on modern routers; avoid LAN ports for this uplink. - 3
Power on the modem and wait for online status
Reconnect power to the modem and wait 60–120 seconds for it to initialize. The lights should show a steady online state before proceeding.
Tip: If the lights don’t stabilize, power cycle the modem again and verify line integrity. - 4
Power on the router and wait for boot
Plug in the router and allow 60–90 seconds for the boot process. The WAN light should indicate an active connection when ready.
Tip: Do not press reset during boot; wait for a complete startup. - 5
Access router admin page using a computer
Connect a device to the network, open a browser, and enter the router’s default gateway (e.g., 192.168.0.1 or 192.168.1.1). Log in with the default credentials and change them after the first login.
Tip: If you don’t know the gateway, check the label on the router or user manual. - 6
Ensure WAN IP is obtained via DHCP
Navigate to the Internet/WAN settings and confirm the WAN type is set to Dynamic IP (DHCP). Save changes and reboot the router if required.
Tip: If your ISP requires a login, enter it here or leave DHCP as default if not needed. - 7
Configure bridge mode if needed
If you want the modem to act as a pure gateway, enable bridge mode (IP Passthrough) on the modem and reboot both devices. This reduces double NAT issues but may disable some ISP features.
Tip: Contact your ISP if you’re unsure about bridge mode compatibility. - 8
Set up Wi‑Fi name and security
Create a unique SSID and strong password. Use WPA2 or WPA3 encryption. Consider enabling a guest network for visitors.
Tip: Avoid common names; use a password and avoid reusing credentials across networks. - 9
Test connectivity and document settings
Connect multiple devices to verify internet access and speed. Record network names, passwords, and WAN settings for future reference.
Tip: Keep a small network cheatsheet handy for quick reconfigurations.
People Also Ask
Can I connect a router directly to a modem without a router?
Yes, you can connect a router’s WAN port to your modem to create a home network. You’ll lose features like advanced routing and guest networks if you skip a dedicated router.
Yes, you can connect a router’s WAN port to your modem to create a home network, but you’ll miss advanced features without a dedicated router.
What is bridge mode and when should I use it?
Bridge mode disables the router functions on the modem, turning it into a simple gateway. Use it when you experience double NAT or want full control from your own router.
Bridge mode turns your modem into a simple gateway; use it if you have NAT conflicts or want full control via your router.
Why is internet not working after connecting?
Check that the Ethernet cable is firmly connected to the correct ports, verify DHCP is enabled on the router, and confirm the modem is online. Reboot both devices if needed.
If the internet isn’t working, verify cables, DHCP, and modem status, then reboot both devices.
Do I need to reset the router after changes?
Usually not, unless you’ve locked yourself out or the device isn’t responding. Use a soft reset via the admin page before a factory reset.
Only reset if you’re locked out or nothing else works; try a soft reset first.
How can I improve Wi‑Fi performance after setup?
Position the router centrally, use the 5 GHz band for near devices, and ensure firmware is current. Consider separate guest networks for IoT devices.
Improve Wi‑Fi by central placement, 5 GHz for nearby devices, and up-to-date firmware.
What if my ISP provides a gateway device?
Many ISPs supply a gateway that combines modem and router functions. You can use it as the primary device or place it in bridge mode to rely on your own router.
If your ISP gives a gateway, you can use it or enable bridge mode to use your own router.
Watch Video
What to Remember
- Connect modem to router with a single Ethernet uplink
- Enable DHCP and secure the Wi‑Fi network
- Bridge mode can prevent double NAT when needed
- Test connectivity across wired and wireless devices
- Document settings for easy maintenance