Google Nest Wifi Pro: Complete Mesh Network Guide
Learn how to set up, optimize, and troubleshoot Google Nest Wifi Pro with WiFi Router Help. This step-by-step guide covers mesh basics, placement, security, and maintenance for reliable home coverage.

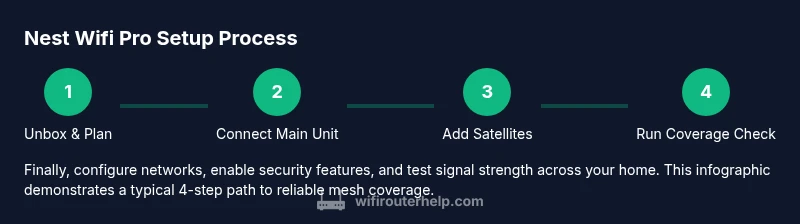
With Google Nest Wifi Pro, you will set up a robust mesh network, optimize coverage, and secure guest access. This guide from WiFi Router Help walks you through essential steps and best practices to get the Nest Wifi Pro running smoothly, including placement tips, app setup, and ongoing maintenance. The WiFi Router Help team found that most homes benefit from a simple, staged setup.
What Google Nest Wifi Pro is and why it matters
Google Nest Wifi Pro is a premium mesh router system designed to blanket a home with reliable Wi‑Fi by linking multiple units into a single, seamless network. The main unit connects to your modem, and satellite points extend coverage to farther corners, upstairs rooms, and basements. What makes Nest Wifi Pro popular is effortless roaming, straightforward app-based management, and features like guest networks and parental controls that are accessible to non-technical users. For homeowners, the real value is eliminating dead zones without complex networking jargon or setup headaches. The system integrates with Google Assistant and the Google Home app, which means you can control networks, pauses, and device priorities from a single place. According to WiFi Router Help, a well-planned Nest Wifi Pro mesh can dramatically improve coverage with a simple, staged setup. The team found that starting with a central main unit and adding satellites where coverage fades tends to yield the best results. In practice, you’ll experience a setup that scales from one floor to multi-floor homes, with predictable improvements in consistency and ease of use. While the Nest Wifi Pro shines in simplicity, this guide offers practical guidance on placement, securing the network, and routine maintenance to keep performance high. In short, Nest Wifi Pro remains a practical, future-friendly mesh solution for typical modern homes.
Planning your Nest Wifi Pro mesh layout
A thoughtful mesh layout is the foundation of strong coverage. Start with the main unit placed near your modem in a central, open area—ideally on a shelf or table not tucked behind furniture. Avoid placing units near metal appliances, thick walls, or large mirrors that can reflect or absorb signals. For most two-story homes, aim to position satellites in adjacent zones and near stairwells or hallways to minimize signal drop-off between floors. WiFi Router Help recommends treating the setup like a relay race: the first unit passes the signal, and the others carry it forward. Don’t overload a single outlet with multiple devices; power stability matters for consistent performance. Finally, map out known dead zones (workspaces, home office corners, or bedrooms far from the centre) and plan satellite placement to cover those areas first. This practical planning reduces the need for reconfigurations after installation and helps you achieve reliable, whole-home coverage from day one.
Step-by-step: Setup using the Google Home app
Setting up the Nest Wifi Pro through the Google Home app is intentionally straightforward for most homes. The steps below summarize the process you’ll see in the app flow and are designed to pair with the detailed instructions in the dedicated STEP-BY-STEP block. Begin by connecting the main Nest Wifi Pro unit to your modem via the WAN port, then plug it in and wait for the status light to indicate readiness. Open the Google Home app, select Add, choose Set up device, and follow the on-screen prompts to create or sign in to your Google account, name your network, and set a strong password. When prompted, add satellite units if you need expanded coverage and place them at recommended positions. After setup, run a quick network test from the app to verify signal strength in common areas and adjust placements as needed. Finally, enable essential features like a guest network, device prioritization for streaming or work devices, and automatic firmware updates. The app also provides prompts for ongoing maintenance and notifications about security updates. This overview aligns with the step-by-step guidance in the STEP-BY-STEP block and is designed to be accessible for non-tech users while remaining robust for enthusiasts.
Optimizing performance: placement, channels, and security
Optimization is about two things: coverage and secure access. Start by ensuring each Nest Wifi Pro unit is placed in open spaces, away from metal shelves, microwaves, or closets that can drain signal. If your home has thick walls or multiple floors, increase satellite placement to bridge the gaps rather than cramming units into a single location. In most homes, you’ll benefit from a well-balanced mix of central placement and elevation, such as on higher shelves, to maximize line-of-sight paths. The Google Home app will guide you through band steering and channel optimization automatically, but you can get extra performance by giving each network a clear name, using a strong password, and enabling a separate guest network for visitors. Security wise, keep firmware updated and review connected devices periodically. Parents can leverage parental controls by creating safe profiles and scheduling internet access for kids. Regular maintenance—like firmware updates and rechecking signal maps—helps sustain the mesh’s reliability over time. A practical tip: run a quick speed check in each key room a few days after setup and move satellites if certain spaces show weak coverage.
Troubleshooting common issues and maintenance
No network is perfect out of the box. If you notice dead zones or faltering performance, start with a simple power cycle on the main unit and satellites, then recheck connections to the modem. If devices fail to connect, verify your Google Home app settings, ensure you’re connected to the Nest network, and confirm the password matches. Intermittent drops can stem from interference, so relocate satellites away from cordless phones, Bluetooth devices, or heavy metal furniture. Sometimes a factory reset of the main unit is necessary to resolve persistent issues; after reset, re-run the setup from the Google Home app. If you encounter persistent outages, test with a wired device directly to the modem to isolate the issue between the modem, ISP, or Nest system. Regular checks for firmware updates and reviewing connected devices in the app further help maintain network health. For those in multi-floor homes, keep monitoring signal maps and adjust satellite placement as needed for consistent coverage.
Compatibility, future-proofing, and alternatives
Nest Wifi Pro is designed to work well in homes using common internet services and can coexist with other equipment when used thoughtfully. If you already have an ISP gateway or a separate router, you can place Nest Wifi Pro behind that device or set the existing gateway to bridge mode to optimize traffic through the Nest system. Take care to avoid double NAT scenarios, which can complicate port forwarding or gaming. In terms of devices, Nest Wifi Pro supports standard Wi-Fi clients and smart home devices, but advanced configuration is managed via the Google Home app rather than the hardware itself. If you anticipate future growth or a larger property, consider adding satellite units to extend coverage rather than replacing hardware. For many users, Nest Wifi Pro offers a balanced, practical upgrade path from older single-router setups.
Advanced features and daily use tips
Beyond basic coverage, Nest Wifi Pro offers features that enhance daily use and security. Use guest networks to isolate visitors’ devices from your main network, which raises security and privacy. The system simplifies device prioritization for bandwidth-heavy activities like video conferencing or gaming, enabling smoother experiences during peak hours. Regular firmware updates help protect against new threats and keep performance aligned with evolving standards. If you’re a tech enthusiast, you can experiment with naming conventions, parental controls, and device access logs to understand how your home network behaves. The key to long-term satisfaction is consistent monitoring, periodic reconfigurations as your home grows, and staying informed about new Nest Wi‑Fi Pro capabilities as Google updates the platform.
Tools & Materials
- Nest Wifi Pro main router(Connects to modem via WAN port)
- Nest Wifi Pro satellite unit (optional)(Adds extended coverage to dead zones)
- Smartphone or tablet with Google Home app(Needed for setup and ongoing management)
- ISP-provided or private modem(Primary internet connection)
- Ethernet cable(Useful for initial modem-to-router connection or bridging)
Steps
Estimated time: 30-60 minutes
- 1
Unbox and plan placement
Unbox the Nest Wifi Pro and identify a central, open space for the main unit. Avoid placing the router in closets, behind TVs, or inside cabinets to maximize signal reach. Mark potential satellite spots near stairwells or hallway junctions to extend coverage efficiently.
Tip: Use a stable shelf at a comfortable height for better line-of-sight and heat dissipation. - 2
Connect the main unit to the modem
Connect the main Nest Wifi Pro’s WAN port to your modem using a standard Ethernet cable. Ensure the modem is powered on and has an active internet signal before proceeding.
Tip: If you have a multi-device modem, temporarily disconnect other devices to establish a clean link for setup. - 3
Power on and wait for boot
Plug in the main unit and wait for the LED indicator to show a steady glow, signaling readiness. This can take a few minutes as the unit boots and negotiates with the modem.
Tip: Avoid unplugging during boot to prevent incomplete configuration. - 4
Open Google Home app and start setup
Open the Google Home app, tap Add, select Set up device, and choose New device. Follow prompts to connect to the Nest Wifi Pro and sign in with your Google account.
Tip: If you encounter connection prompts, ensure your phone is on the same Wi‑Fi network as the main unit during setup. - 5
Create network name and password
Name your network clearly and set a strong password. You can create a guest network option to keep visitors segregated from your main devices.
Tip: Use a unique password that combines letters, numbers, and symbols to improve security. - 6
Add satellite units to extend coverage
If you’re extending beyond the main unit, add satellite devices in the Google Home app and place them in the identified dead zones.
Tip: Place satellites roughly midway between the main unit and areas with weak signal for optimal handoff. - 7
Run a coverage check and adjust
Use the app’s signal-quality metrics to verify coverage in key rooms. Move satellites if needed so every room has a strong link to the network.
Tip: Re-run the check after repositioning to confirm improvements. - 8
Enable security features and firmware updates
Turn on automatic firmware updates and enable guest networks. Regularly review connected devices for unfamiliar activity.
Tip: Set up alerts for new devices joining your network and periodically audit access.
People Also Ask
What is Google Nest Wifi Pro best for?
Nest Wifi Pro excels for homes needing dependable mesh coverage across multiple floors, with simple app-based management and strong guest network options.
Nest Wifi Pro is best for homes needing reliable mesh coverage across multiple floors with easy app management.
Can I use Nest Wifi Pro with my existing router?
Yes, you can place Nest Wifi Pro behind a gateway router or modem. If you want all traffic to pass through the Nest system smoothly, consider setting the existing router to bridge mode.
Yes, you can use it with an existing router; bridge mode often helps centralize control.
How do I extend coverage with Nest Wifi Pro?
Add satellite units to create a mesh network and place them between the main unit and the weak spots to improve signal reach.
Add satellites and position them between the main unit and weak spots for better reach.
Is Nest Wifi Pro compatible with non-Google devices?
Yes, it uses standard Wi-Fi protocols and will work with most devices, but some advanced features are managed via the Google Home app.
Yes, it works with most devices, though advanced settings are managed through the app.
How can I secure my Nest Wifi Pro network?
Use a strong password, enable the guest network, keep firmware updated, and periodically review connected devices.
Use a strong password, enable updates, and monitor connected devices.
What should I do if the internet drops?
Check modem connection, restart the main unit, test with a wired device, and verify firmware status in the Google Home app.
Restart the main unit and check the app for status; verify your modem is functioning.
Watch Video
What to Remember
- Plan central placement for optimal mesh coverage
- Manage networks and guests via the Google Home app
- Add satellites to eliminate dead zones
- Enable security features and keep firmware updated
- Test coverage and adjust placement after setup