Complete Guide to the eero pro 7 router
A comprehensive, step-by-step guide to install, configure, and optimize the eero pro 7 router for reliable home Wi-Fi, including mesh coverage, security features, and troubleshooting tips.

Set up and optimize your eero pro 7 router quickly with a guided, step-by-step process. You’ll need your modem, a smartphone with the eero app, and an active internet connection. The WiFi Router Help team will walk you through configuring the mesh network, creating guest access, and tuning performance for reliable home WiFi.
Why the eero pro 7 router is a strong choice for modern homes
According to WiFi Router Help, the eero pro 7 router is designed to provide broad coverage through a mesh network, making it a strong option for multi-story homes with many devices. The WiFi Router Help team found that setup is notably user-friendly via the mobile app, and ongoing optimization—such as satellite placement and firmware updates—consistently yields better performance. As you plan your install, remember that the goal is a seamless, roaming experience where devices switch between nodes without manual intervention. This is particularly important for households with smart lights, assistants, and streaming devices that demand stable connections throughout the living space.
In practice, the eero pro 7 mesh system excels when you can position primary and satellite units to minimize dead zones. The system’s self-optimizing features help manage traffic, but for peak performance you should actively monitor coverage and speed in frequently used rooms. This research-backed approach aligns with best practices from WiFi Router Help, emphasizing careful placement, regular maintenance, and security-conscious configuration.
The tone here is practical: you don’t need to be a networking pro to get reliable results. Start with a central location for the main unit, then extend coverage where signals tend to fade. The goal is to achieve consistent speeds across common use cases like 4K streaming, online gaming, and video calls without frequent buffering or dropouts.
Planning your mesh network layout for optimal coverage
Before you plug in a single cable, map your space. Note where you need coverage most (living rooms, home office, bedrooms, basement). A typical guideline is to place the primary eero near the modem and allocate satellites to reach far corners of the house, while avoiding large metal appliances and thick walls that can impede radio signals. In practice, you’ll want clear lines of sight as much as possible, with the satellites positioned to form a gentle triangle around the home. If you have a two-story layout, aim to spread nodes across both levels to reduce stair-step handoffs that may slow connections. Regular adjustment after initial setup can dramatically improve reliability, especially if you add smart devices or new user profiles.
Key considerations for placement:
- Elevation matters: place units on shelves or media consoles rather than on the floor.
- Centralize high-traffic zones: the living room, kitchen, and home office are common anchors.
- Avoid obstructions: thick walls, large metal objects, and microwaves can degrade signals.
- Test and adjust: use the eero app’s signal map and speed tests to refine locations.
Basic app-guided setup and activation
The setup experience centers on the eero app, which guides you through creating or signing into your account, connecting the first unit to the modem, and adding satellites. Expect prompts to name your network, set a password, and configure security options. The app also provides an estimated coverage map based on your chosen locations, which helps you decide where to place additional nodes.
During this phase, you’ll be prompted to approve firmware updates, accept terms, and enable features like Guest Network and parental controls. Those steps are optional but recommended for households with frequent guests or children. The app will also suggest enabling speed-optimized settings based on your internet plan, which can improve performance out of the box.
Aesthetically, the interface is straightforward: you’ll see the main network and any connected satellites in a clean, color-coded list. If a device repeatedly disconnects, the app’s diagnostic tools can help you identify whether a node is misaligned, overloaded, or distant from the primary unit. This iterative approach is practical for non-technical users who want reliable Wi‑Fi with minimal fuss.
Optimizing mesh coverage and performance
Once the basic setup is complete, optimization becomes the focus. The eero app offers controls to tweak network priority, channel usage, and backhaul preferences. In general, you’ll want to enable Band Steering so dual-band devices can switch to the faster band automatically, and ensure that backhaul traffic doesn’t starve client devices of bandwidth. For homes with many IoT devices, you can create a dedicated IoT network segment to isolate traffic and boost security.
Another key optimization is satellite placement refinement. If test results show weak signals in a room, a quick relocation of a satellite a few feet can dramatically improve throughput. Some users benefit from temporarily turning off and then re-adding a satellite to trigger a fresh optimization pass. Keep firmware up to date to benefit from performance and stability improvements pushed by the manufacturer.
In larger homes or multipurpose spaces, you may reach a point where the existing layout isn’t sufficient. At that stage, expand with additional nodes or consider a dedicated access point for stubborn corners. Tracking performance over time with the app’s analytics helps you verify whether the changes deliver tangible improvements.
Security, privacy, and maintenance
Security should be built into your network from day one. The eero app enables features like guest networks, device-level access controls, and automatic firmware updates. Regularly verify that your Wi‑Fi password is strong and unique, and review connected devices for any unfamiliar entries. WPA3 is the current standard for most new routers; in the app, ensure security settings reflect this and enable automatic updates so you’re protected against emerging threats.
Privacy is another important consideration. You can enable privacy-friendly options within the app, such as limiting cloud data collection and configuring how diagnostics data is shared. If you rely on smart assistants for everyday tasks, ensure their traffic is gated through the appropriate network segments to minimize exposure. Establish a routine—monthly or quarterly—to review network activity, update device names, and prune orphaned devices.
Finally, plan for maintenance. Create a simple change log whenever you adjust the network, and set a reminder to check for firmware updates. Consistent maintenance reduces the likelihood of unseen vulnerabilities and helps your mesh network stay resilient over time.
Troubleshooting common scenarios and advanced tips
Even well-planned networks encounter hiccups. If a device reports no internet despite a healthy modem link, start with the basics: reboot the modem, then restart the primary eero. If the problem persists, check cable connections and re-check the app’s diagnostic tools. Signal drops or intermittent performance often trace back to placement issues, interference from neighboring networks, or overloaded nodes. Repositioning a satellite by a few feet or adjusting its height can clear interference and restore stability.
Common scenarios include: slow streams on a busy evening, devices that won’t join the network, or slow speeds despite a high-speed plan. In many cases, enabling QoS (Quality of Service) for critical devices (like work laptops or conference equipment) helps ensure stable performance during peak usage. If you’re still stuck, a partial factory reset of the eero system followed by a clean re-setup can resolve stubborn configuration conflicts. Remember that this is a last resort, as it clears all network settings.
For more nuanced issues, consult the app’s built-in help and the brand’s troubleshooting guides. Keeping a consistent backup of your network settings can save time when reconfiguring after resets. The goal is to maintain a robust, flexible wireless environment that adapts as devices and usage patterns evolve.
Tools & Materials
- Modem provided by ISP(Ensure it is powered on and functioning before starting the setup.)
- eero Pro 7 router kit(Includes primary router; add satellites if needed for larger homes.)
- Smartphone with the eero app installed(Sign in to your account during setup.)
- Ethernet cable (Cat 5e or better)(Used to connect the primary eero to the modem.)
- Stable power outlet near the modem(Keep a short power cord handy to minimize clutter.)
- Optional extra eero satellites(Use for larger homes or dead zones.)
- ISP account credentials (optional)(Needed for account linking or advanced settings.)
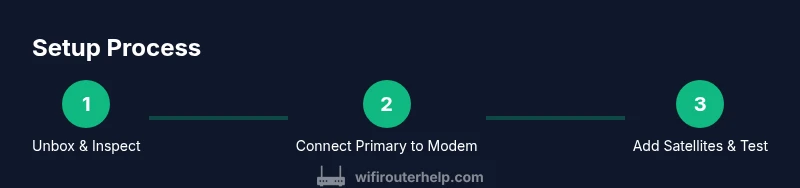
Steps
Estimated time: 30-60 minutes
- 1
Unbox and verify equipment
Unpack the kit and confirm all components are present. Inspect cables, power adapters, and the primary unit for any shipping damage. Keep small parts in a labeled bag so nothing gets misplaced during setup.
Tip: Check the contents against the packing list before you discard any packaging. - 2
Connect the primary eero to the modem
Power down the modem, connect the eero’s WAN/Internet port to the modem with an Ethernet cable, and then power the eero on. Give the device a moment to boot and acquire a link with the modem.
Tip: If your modem is in bridge mode, ensure the eero is the gateway. - 3
Install and sign in to the eero app
Download the official eero app on your smartphone, sign in or create an account, and follow the on-screen prompts to begin setup. The app will guide you through naming your network and setting a strong password.
Tip: Use a unique, long password and enable two-factor authentication if available. - 4
Add the first eero and configure your network
The app will prompt you to connect the primary eero to your network and name the network. Complete the basic security settings and confirm the internet connection is active.
Tip: Pay attention to the signal strength indicator in the app to optimize placement. - 5
Place satellites and extend coverage
Place any additional eero devices in strategic locations to fill coverage gaps. The app will map the best spots based on current signal strength.
Tip: Avoid placing satellites behind large obstacles or in enclosed closets. - 6
Test speeds and fine-tune settings
Run speed tests in the app to assess performance across rooms. Enable Band Steering and QoS for priority devices as needed.
Tip: If speeds lag in a room, try moving a satellite and testing again. - 7
Enable security features and guest network
Set up the guest network and review device permissions in the app. Ensure automatic firmware updates are enabled for ongoing protection.
Tip: Limit access for guests and periodically rotate WiFi passwords. - 8
Review firmware and maintain the system
Check for firmware updates in the app and install them. Keep a simple change log to track adjustments over time.
Tip: Regular maintenance reduces surprises and keeps your network secure.
People Also Ask
Is the eero Pro 7 router good for large homes?
Yes. The eero Pro 7 is designed to provide broad mesh coverage suitable for multi-room homes. For very large properties, adding satellites and optimizing placement can maintain strong performance throughout the house.
Yes—it's well-suited for larger homes, especially with additional satellites. Place nodes thoughtfully and run coverage tests.
How do I reset the eero Pro 7 router?
To reset, press and hold the reset button on the unit for about 15 seconds until the LED changes color. Then reconfigure using the eero app.
Hold the reset button for 15 seconds until the light pulses, then set up again in the app.
Can I use my existing modem with the eero Pro 7?
Yes. Connect the eero Pro 7’s WAN port to your modem via Ethernet. If you’re using a separate gateway, you may need to enable bridge mode on the modem.
Yes—just connect the eero to your modem with Ethernet. You may need to enable bridge mode if you have a gateway.
How do I enable a guest network on the eero Pro 7?
Open the eero app, enable the guest network, and set a password. Share this with guests to keep your main network secure.
Open the app, turn on guest network, and set a password.
Does the eero Pro 7 support WPA3 security?
WPA3 is supported on modern eero systems. Check the app’s security settings to confirm and enable it where available.
Yes, WPA3 is supported. Check the app to enable it.
What is the best practice for roaming with a mesh network?
Ensure satellites are evenly distributed and not blocked by obstacles. Let the app guide placement and use Band Steering for seamless device transitions.
Spread out the devices, and let the app guide placements for smooth roaming.
Watch Video
What to Remember
- Install the eero Pro 7 as a mesh backbone for whole-home coverage
- Place satellites strategically to eliminate dead zones
- Enable security features like guest network and WPA3 where possible
- Keep firmware updated for best performance and security
- Regularly test coverage and adjust placement as your home layout changes