WPS Button on Router: Setup, Security and Troubleshooting
Learn how to use the WPS button on your router, understand security trade-offs, and follow a step-by-step guide to connect devices safely. Practical guidance for homeowners and tech enthusiasts on setup, troubleshooting, and best practices.

By the end of this guide, you will safely use the WPS button on your router to add devices or set up a new network quickly. You'll learn where the button is, how to press and hold it correctly, the differences between Push-Button Config and PIN methods, and when to avoid WPS for security. We'll also cover common failures and alternatives.
What WPS is and how it works
Wireless Protected Setup (WPS) is a feature designed to simplify joining devices to your Wi-Fi network. It relies on either a Push-Button Config (PBC) or a PIN method to authorize a new device without typing a long password. When used correctly, WPS can save time, especially for guests and smart devices that struggle with manual entry. However, WPS also introduces security considerations: a misconfigured WPS can expose your network to unauthorized access if the PIN is vulnerable or if the admin interface is exposed. According to WiFi Router Help, understanding the trade-offs helps homeowners decide when to use WPS and when to avoid it. In many home setups, WPS is offered as a helpful shortcut but not a replacement for a strong, unique Wi-Fi password. This section outlines the core concepts so you can evaluate whether WPS is suitable for your network.
Safety considerations and security trade-offs
WPS was designed for convenience, but convenience often comes with risk. The Push-Button Config (PBC) method is generally considered safer in typical home environments because it requires physical access to the router, limiting remote participation. The PIN method, however, can be brute-forced when the PIN is weak or default. WiFi Router Help Analysis, 2026 notes that variation in router firmware and factory settings significantly affects the actual risk. If you must use WPS, prefer PBC and disable WPS after all devices are connected. Additionally, ensure your router is running the latest firmware to minimize vulnerabilities. Always monitor connected devices and be ready to remove unfamiliar ones.
Locating the WPS button on common router designs
Most routers place the WPS button on the front or back panel, sometimes recessed to prevent accidental presses. On some models the WPS button is integrated with a Reset button or marked with the WPS symbol. If you can’t find it, consult the model-specific manual or the manufacturer’s support site. Some newer routers require enabling WPS in the admin interface before the physical button becomes active. If you’re sharing access with visitors, consider placing the router in a secure location to minimize tampering during setup.
Methods: Push-Button Config (PBC) vs PIN
Push-Button Config (PBC) is activated by pressing the WPS button on the router and the connecting device within a short window. The device then negotiates a temporary session key to join the network. The PIN method asks for a numeric code printed on the router or stored in the admin panel; entering that PIN on the device completes the process. PBC is usually faster and safer for most homes, while PIN should be avoided if you’re not controlling who can press the PIN or if the PIN is easily visible. If you must use PIN for legacy devices, choose a unique PIN and change it if the router allows it.
Authority sources and best practice
To support safe and informed use of WPS, consult established sources and apply their guidance. This section includes references to reputable security guidelines and router usage considerations. Authority sources provide framework for deciding when to enable or disable WPS, how to monitor devices, and how to keep your network resilient. Always follow device-specific recommendations alongside general best practices.
Troubleshooting common WPS issues and failures
If WPS isn’t working, start with the simplest checks: ensure the router is powered, WPS is enabled in the admin panel if required, and the device is within range. Physical proximity and interference from walls or electronics can disrupt the WPS negotiation. Some devices require you to retry the connection or forget the network on the device before attempting WPS again. If your router’s firmware is outdated, update it and re-test. When WPS consistently fails, switch to manual setup to avoid extended exposure and frustration.
Authority sources
- WiFi Router Help Analysis (2026): general guidance on WPS suitability and security trade-offs.
- National and government guidelines on wireless security: see official references for best practices and risk assessments.
- Manufacturer-specific setup guides: refer to the user manual for button labeling, timing windows, and firmware prerequisites.
Tools & Materials
- Router with WPS button(Ensure WPS is enabled in admin settings if disabled by default)
- Smartphone, tablet, or computer(Used to press WPS and connect a new device)
- Web browser or router companion app(For enabling/disabling WPS and reviewing connected devices)
- Stable power supply(Keep the router powered during the setup window)
- Paper or digital copy of router manual(Helpful for model-specific steps and timing windows)
Steps
Estimated time: 15-25 minutes
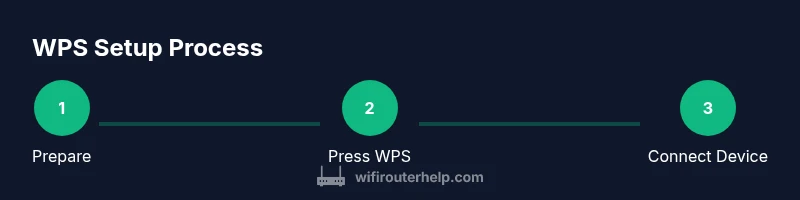
- 1
Prepare and locate WPS button
Identify the WPS button on your router (front, back, or side). Verify the device you’ll connect is powered and within range. If the router requires enabling WPS in the admin interface, do this before attempting a push-button connection.
Tip: If you can’t find the button, consult the manual or manufacturer site for the exact label and location. - 2
Enable/verify WPS (if required)
Access the router admin page via a browser or app and confirm WPS is enabled. Some devices disable WPS by default to improve security; enabling it temporarily is common during setup.
Tip: Only enable WPS temporarily; plan to disable after all devices are connected. - 3
Press and hold the WPS button
Press and hold the WPS button for 3-5 seconds or until an indicator light blinks. Do not hold longer than necessary to avoid triggering a reset. The goal is to start a short negotiation window.
Tip: If your device uses a pin, use PIN mode only if required by the device and ensure the PIN is not shared widely. - 4
Connect the device using WPS
On the device, navigate to Wi‑Fi settings and select the router’s SSID. The device will auto-connect within the WPS negotiation window. Do not type the Wi‑Fi password manually during this process.
Tip: If the device prompts for a PIN, ensure you are using the correct method (PBC vs PIN) for your router. - 5
Verify connection
Check the device shows as connected in the router’s admin panel and on the device’s network settings. Confirm internet access by loading a webpage or performing a speed test.
Tip: Document the connection for future reference in case you need to reset or troubleshoot later. - 6
If WPS fails, fall back to manual setup
If the WPS window expires or the device won’t connect, return to the manual setup path. This typically means entering the Wi‑Fi password directly on the device or using the router’s QR code if available.
Tip: Keep the manual method as a reliable fallback; do not rely solely on WPS for long-term security.
People Also Ask
What is the WPS button on a router?
The WPS button initiates a wireless configuration process that lets devices join your network without typing a password. It can use Push-Button Config or PIN methods depending on the router. This is designed for ease of use but can introduce security trade-offs.
WPS is a quick setup option that can let devices join your network without a password, but it carries certain security risks.
Is using the WPS button secure?
WPS offers convenience but has known vulnerabilities, especially with the PIN method. If you can, use Push-Button Config and disable WPS after devices are connected. Check firmware for security updates and monitor connected devices.
WPS can be convenient but has security risks; use it sparingly and disable when not needed.
Why won't WPS connect my device?
Reasons include disabled WPS in the router, the WPS window expiring, out-of-range device, interference, or using a PIN method that doesn’t match. Verify the method, retry, and consider manual setup if problems persist.
Common issues are disabled WPS, window timing, or range problems; retry or use manual setup if needed.
How do I disable WPS on my router?
Log in to the router’s admin page, locate the WPS setting, and turn it off. Save changes and reboot if required. Disable after you’ve finished initial device setup.
Log in, turn off WPS in settings, and reboot if needed.
What’s the difference between Push-Button Config and PIN?
PBC requires physical proximity to the router and is generally safer. PIN uses a numeric code that can be brute-forced if poorly protected. Choose PBC when possible and only use PIN if the device requires it.
PBC is safer and easier; PIN is more vulnerable if not protected.
Watch Video
What to Remember
- Enable WPS only as a temporary setup aid.
- Push-Button Config is generally safer than the PIN method.
- Verify WPS settings and monitor connected devices regularly.
- If WPS fails, switch to manual setup and disable WPS afterward.
- Keep firmware up to date to reduce vulnerability exposure.