How to Use the WPS Button on a Router
Learn how to safely connect devices to your Wi-Fi using the WPS push-button on your router. This educational guide covers compatibility, a step-by-step process, security considerations, and troubleshooting to help you manage your home network confidently in 2026.

According to WiFi Router Help, this guide shows how to use the WPS push-button method to add devices to your network without typing a password, with security-conscious steps and a quick, 2-minute window for pairing. You’ll verify compatibility, understand PIN vs. push-button methods, and follow a practical, step-by-step flow. Required: a WPS-capable router, a WPS-enabled device, and router access.
What the WPS button does and when to use it
According to WiFi Router Help, WPS stands for Wi‑Fi Protected Setup, and the push-button method provides a quick path to add a device to your network without typing a password. When you press the WPS button on the router and then on a supported device within a short pairing window, the two devices negotiate a secure connection and share credentials automatically. This is particularly convenient for streaming devices, printers, smart speakers, and guest devices that you want online quickly, especially if they’re physically close to the router. However, not all devices support WPS, and some routers require enabling WPS in the admin interface. If you’re using a guest network or an IoT network, consider connecting those devices through that network during pairing.
From a security perspective, WiFi Router Help analysis shows that WPS offers a balance between convenience and risk. The WPS PIN method carries vulnerabilities that can be exploited by attackers, so it is less secure and often discouraged; push-button pairing is typically safer, but it should be used sparingly and disabled after pairing. If WPS is left enabled, use a strong WPA2/WPA3 password and keep firmware up to date. As of 2026, WPS remains a useful convenience when used thoughtfully, but it should not replace password-based configuration for daily security.
In practice, weigh your needs. If you’re pairing a single device and can supervise the process, WPS saves time. If you manage many devices or require tighter security, manually entering the SSID and password is safer. Finally, verify the new device appears in your router’s connected devices list and has an active IP address. The WiFi Router Help team recommends verifying the device is online and properly segmented if you’re using a guest network.
WPS Button: push-button vs. PIN methods and device compatibility
Push-button WPS is the simplest method, requiring you to press the WPS button on the router and then on the device within the pairing window. The PIN method uses an 8-digit code entered on the device or router; many modern routers still support it, but it’s less secure and increasingly deprecated in consumer devices. For compatibility, ensure the device explicitly states WPS support and that it’s within range of the router’s signal. Some routers disable WPS by default for security reasons, so you may need to enable it in the admin interface. If the device lacks a WPS button, you’ll need to connect manually by entering the network name (SSID) and password.
Security-minded users should favor push-button pairing when using WPS and disable WPS after completing the pairing. If you must leave WPS enabled, limit it to your main network and use a strong WPA2/WPA3 passphrase, keeping firmware up to date. 2026 guidance from WiFi Router Help emphasizes that WPS should be treated as a short-term convenience rather than a long-term solution.
Step-by-step overview: what to do before, during, and after using WPS
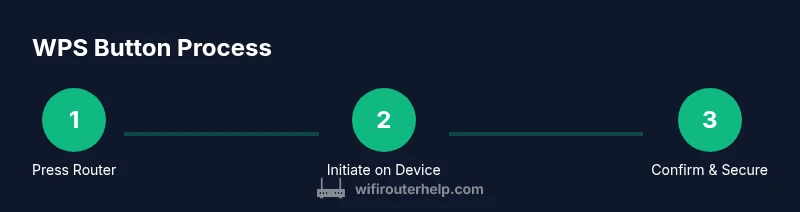
Before starting, check that your router supports WPS and that the device you want to connect is WPS-capable. Gather the router’s admin credentials and place the device within a reasonable distance to ensure a stable pairing signal. If your router requires enabling WPS in the web interface, log in and turn it on, then locate the WPS button on the hardware for the next step. During pairing, press the router’s WPS button, then initiate WPS on the device within the pairing window. If the device connects, you’ll see a notification or its status change to connected on the device or in the router’s interface. After pairing, consider disabling WPS and testing connectivity for reliability. For visual guidance, refer to Figure 1 in the associated diagram.
If your router includes a separate WPS PIN option, you can use that in place of the push-button method; however, many devices now rely on the push-button approach. Always verify you are pairing with the intended device and that the device obtains an IP address. The goal is to have a stable connection without exposing the network to unnecessary risk. The instruction set here aligns with best practices observed in 2026 and is designed to minimize disruption while keeping security in focus.
Troubleshooting common WPS issues
If the device fails to connect, first confirm that WPS is enabled on the router and that you are within range. Verify the device is truly WPS-capable and that you pressed the correct button for the intended method. Some devices require selecting WPS in the device’s Wi‑Fi settings rather than pressing a hardware button. If the router’s WPS LED blinks without a successful connection, check the admin interface for error messages and review the router’s logs. Ensure your main network uses WPA2/WPA3 and that the SSID isn’t hidden, as some devices struggle to connect to hidden networks. If needed, attempt a manual connection as a fallback. For devices that consistently fail, reboot the router and reattempt pairing after a short wait.
If issues persist across multiple devices, consider disabling WPS and setting up devices manually; this reduces attack surface and avoids repeated pairing failures. Finally, always confirm device attribution by checking the connected devices list on the router and the device’s own network status indicator.
Security considerations and best practices
WPS should be treated as a convenience feature, not a core security mechanism. The recommended practice is to use WPS only for temporary, quick device additions and to disable it after pairing. Always enable WPA2 or WPA3 on the main network and maintain a strong, unique password. To further protect your network, create a dedicated guest network for devices that require occasional access and segregate IoT devices from critical systems. Keep firmware up to date to mitigate known vulnerabilities, and periodically audit connected devices to detect unauthorized access. If you must use WPS frequently, consider configuring a separate, time-limited access policy and rotating credentials for enhanced security.
As WiFi Router Help notes, maintaining a secure default posture is essential; WPS can be a helpful shortcut, but it should never replace solid password hygiene and regular firmware updates.
Verifying connections and ongoing best practices
After pairing via WPS, verify that the device receives an IP address and appears in the router’s connected devices list. Run a quick speed test on the device to ensure performance meets expectations and check for any network interruptions. Maintain a habit of using a strong password and enabling WPA3 on supported hardware. Limit WPS usage to temporary, single-session connections and document which devices were paired via WPS. For networks with high security requirements, consider adopting manual pairing as the default method and reserve WPS for guest devices only when needed.
Authority sources and further reading
- This article references official guidance from government and academic sources and general best practices for home networking. For authoritative information, review the following resources:
- https://www.cisa.gov/publication/wireless-network-security
- https://www.fcc.gov/consumers/guides/wireless-wifi-security
- https://www.nist.gov/publications/guides-wireless-network-security
Tools & Materials
- Router with WPS button(Ensure the model actually has a WPS button and that it is functional)
- Device to connect (e.g., smartphone, printer, streaming stick)(Confirm the device supports WPS or has WPS options in settings)
- Computer or mobile device with web browser(Needed to access the router’s admin interface if WPS is not enabled by default)
- Router admin credentials(Needed if you must enable WPS or make security changes)
- Ethernet cable (optional)(Helpful for stable initial setup or firmware updates)
- Printed or digital router manual(Useful for model-specific WPS instructions)
Steps
Estimated time: Estimated total time: 15-20 minutes
- 1
Verify device compatibility
Confirm that both the router and the device support WPS. If the device lacks WPS, you’ll need to connect manually with the SSID and password. This step reduces wasted effort and ensures you’re using the correct pairing method.
Tip: If in doubt, check the device’s label or manual for WPS support and locate the exact WPS button on both devices. - 2
Prepare the router for WPS
Log in to the router’s admin page if required and locate the WPS option. Some routers enable WPS by default, but others require you to toggle it on. Verify that the correct network (2.4 GHz or 5 GHz) is active for WPS pairing if your router supports band-specific WPS.
Tip: If your router has multiple networks, enable WPS only on the network you intend to use for pairing. - 3
Initiate WPS on the router
Press and hold the WPS button on the router for a moment (or press briefly depending on model). The router’s WPS LED should indicate an active pairing window. If there is no LED, open the router’s admin page and enable the WPS feature there.
Tip: Some models require you to press the button on the back for 1-2 seconds; consult the manual for the exact duration. - 4
Trigger WPS on the device
Within the pairing window, activate WPS on the device you want to connect. This could be a hardware button on the device or an on-screen option in its settings. Follow the device’s prompts to complete the connection.
Tip: If the device lacks a hardware WPS button, look for WPS in the device’s Wi‑Fi settings. - 5
Confirm the connection
Check the device for a “connected” status and verify it receives an IP address from the router. You can also view the device in the router’s connected devices list. If the device connects, you’re done; if not, retry with a shorter distance and ensure you’re within the pairing window.
Tip: If you see a connection but with poor signal, move the device closer or adjust router placement. - 6
Secure after pairing
Once the device is connected, disable WPS to minimize risk unless you need it again soon. Ensure you’re using WPA2/WPA3 and a strong password. Consider placing the newly connected device on a guest network if you anticipate frequent re-pairing with others.
Tip: Document which devices were linked via WPS to manage future security settings.
People Also Ask
What is the WPS button and what does it do?
WPS stands for Wi‑Fi Protected Setup. The push-button method lets you connect a new device to your Wi‑Fi without typing a password by pressing the WPS button on the router and the device within a short window. It’s a convenience feature with security trade-offs.
WPS is a quick way to add devices by pressing a button on the router and device, but remember to secure your network after pairing.
Is using the WPS button safe?
WPS is convenient, but it has known security issues, especially with the PIN method. Push-button pairing is safer than entering a PIN, but it should be disabled after use when possible and paired devices should be limited to trusted ones.
WPS can be handy, but it carries security risks; use it briefly and disable afterward.
How long does the WPS pairing window stay open?
The pairing window lasts for a short period, typically a few minutes, during which you must initiate WPS on the device. If you miss the window, try again after re-initiating WPS on the router.
The pairing window is short; reattempt if you miss it.
What should I do after connecting via WPS?
Verify the device shows as connected and has an IP address, then consider disabling WPS and using a strong password on WPA2/WPA3. If security is a priority, place the device on a guest network.
Check the connection, then secure your network and consider a guest network for added safety.
What if my device doesn’t have a WPS button?
If a device lacks a WPS button, you’ll need to connect manually by entering the network name (SSID) and password. Some devices offer WPS via software options in their settings.
If your device doesn’t support WPS, connect manually with SSID and password.
Does WPS work with a guest network?
Some routers allow WPS for devices on a guest network, but this depends on the router model. In many setups, it’s safer to connect guest devices using manual entry or a dedicated guest network.
Guest-network support varies by router; manual setup is often safer for guests.
Watch Video
What to Remember
- Use WPS for quick pairing only when needed.
- Prefer push-button WPS over PIN for security.
- Disable WPS after pairing and use strong passwords.
- Verify device connection and keep firmware updated.
- Consider a guest network for guest devices.