WRX560 Router Setup and Optimization Guide
Learn how to set up and optimize the WRX560 router for a fast, reliable home network. Step-by-step setup, wireless configuration, security, guest networks, and troubleshooting advice from WiFi Router Help.

Goal: configure the WRX560 for a fast, reliable home network from first power-on to ongoing optimization. This guide walks you through setup, wireless configuration, guest access, security, and common troubleshooting. You’ll need the WRX560 router, a compatible modem, a computer or smartphone, an Ethernet cable, and ready access to the admin interface and your internet provider login.
Why WRX560 matters for home networks
The WRX560 is designed to deliver dependable Wi‑Fi coverage in typical family homes, supporting multiple devices without excessive latency. For homeowners and tech enthusiasts, understanding the WRX560’s core features—dual‑band wireless, QoS prioritization, and a straightforward admin interface—helps you tailor performance to your space. In practice, a well‑configured WRX560 reduces buffering during streaming, improves online gaming responsiveness, and simplifies device management. According to WiFi Router Help, leveraging automatic channel selection and a clean, separate guest network often yields noticeable gains in reliability and security. By starting with a solid baseline in your WRX560 setup, you build a network that scales with your family’s growing device footprint.
Key considerations include your home layout, the number of connected devices, and how you use the internet throughout the day. If your space has thick walls or several floors, you may need additional access points later, but a strong WRX560 foundation minimizes the number of dead zones. Keep in mind that consistent firmware updates from the manufacturer help maintain security and performance, so plan a regular check‑in as part of your routine.
Unboxing and initial setup
Unboxing is the easy part; the real work starts with a clean slate. Before powering on, locate the label on the bottom of the WRX560 for the default IP address and admin login details. Connect the modem to the WRX560’s WAN port with an Ethernet cable, then plug in the power adapter. If you have a modern device, use a wired Ethernet connection to your computer for the initial configuration to ensure a stable link during the setup wizard. The first boot will offer a guided setup, where you name your network (SSIDs for 2.4 GHz and 5 GHz) and choose a strong, unique admin password. If you encounter a blank screen, try a different browser or clear your cache. Regularly saving settings as you go prevents backtracking if you misconfigure a page.
Configuring wireless networks (2.4 GHz and 5 GHz)
Set up separate SSIDs for your 2.4 GHz and 5 GHz bands. Name them clearly to reflect their band so family devices connect automatically to the best signal. Use WPA2‑WPA3 mixed mode if available and choose a strong passphrase that combines letters, numbers, and symbols. Consider channel auto‑selection to reduce interference from neighboring networks, and disable legacy WPS if the option exists to bolster security. If you notice interference, you can manually select a channel in the 2.4 GHz band (channels 1, 6, or 11 in the US) and pick a high, non‑overlapping channel in the 5 GHz range. Finally, enable bandwidth control if your household includes latency‑sensitive devices like gaming consoles or video conferencing tools.
Security and parental controls fundamentals
Security starts with a strong admin password, disabling remote administration exposure, and enabling the firewall. On the WRX560, review the security settings to ensure the WAN firewall is active and consider enabling a basic intrusion prevention feature if available. Parental controls can help manage screen time and inappropriate content; configure profiles for each family member and assign time limits or category restrictions. For added protection, create separate guest networks with isolated access and a unique password, so guest devices don’t have access to your main network’s devices and files. Finally, consider enabling automatic firmware updates to keep pace with new security patches and feature improvements.
Guest networks, QoS, and device prioritization
Guest networks are excellent for keeping visitors off your primary network while still providing reliable internet access. Enable a guest SSID, limit bandwidth, and ensure client isolation so guests cannot see your home devices. QoS (Quality of Service) allows you to assign priority to critical devices like work laptops or gaming consoles during peak usage. If the WRX560 supports device/application‑level QoS, create profiles that favor videoconferencing, streaming, or gaming as needed. For households with many smart devices, enabling a simple device‑priority list helps prevent a single phone or tablet from monopolizing bandwidth, especially during peak hours.
Firmware updates and performance tuning
Firmware updates address security vulnerabilities and introduce performance improvements. Check for updates in the WRX560 admin interface and enable automatic updates if available. After updating, reboot the router to ensure all features initialize correctly. Performance tuning includes verifying that your wireless radios are operating on non‑overlapping channels and that transmit power is appropriate for your space. If you experience slowdowns, run a quick speed test near the router and at the far corners of your home to identify weak spots. Consider enabling a network monitor that logs bandwidth, connected devices, and error events to troubleshoot over time.
Troubleshooting common WRX560 issues
When issues arise, adopt a methodical approach: verify power, confirm cable connections, and check the WAN/Internet status in the admin panel. If devices can’t connect, recheck the SSID name and password, and ensure you haven’t inadvertently enabled MAC filtering that blocks your devices. If the Wi‑Fi drops intermittently, inspect interference from nearby electronics and other networks, then adjust channels or move the router to a more central location. For persistent problems, perform a factory reset (after noting your current settings) and re-run the setup wizard. Always back up your configuration before making major changes.
Power-user features: monitoring, maps, and advanced options
Advanced users can explore features like network maps to visualize coverage, client lists to monitor devices, and more granular QoS rules. Use these tools to identify dead zones, high‑bandwidth tasks, and rogue devices. A clean, organized network plan reduces troubleshooting time and helps you scale as your smart home grows. As you gain experience with the WRX560, you can experiment with additional features like IPv6 configuration or bridge mode if your network topology calls for it, but proceed with caution and keep backups handy.
Tools & Materials
- WRX560 router(Ensure it is powered and reset to factory settings when starting.)
- Modem(Compatible with your ISP; place near the router for best signal.)
- Ethernet cable (Cat5e or better)(Use for stable initial setup and firmware updates.)
- Computer or smartphone(Used to access the admin interface via a web browser or app.)
- Web browser or router app(Chrome/Edge/Safari or the manufacturer app for admin access.)
- Power supply and outlet(Keep a backup power source if you have unstable electricity.)
- Notepad or screenshot tool(Useful for saving configuration steps and settings.)
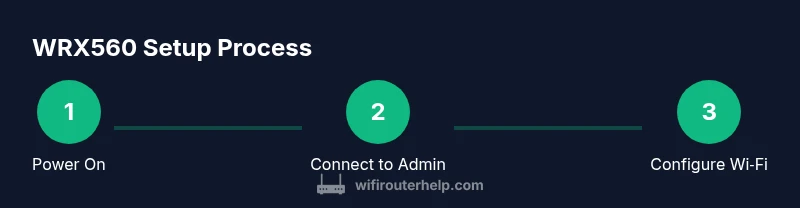
Steps
Estimated time: 75-120 minutes
- 1
Power on and connect to the admin interface
Power up the WRX560 and connect your computer with an Ethernet cable or a reliable Wi‑Fi connection. Open a browser and navigate to the router’s IP address (commonly 192.168.0.1 or 192.168.1.1) to reach the login page. Enter the default credentials found on the device label and begin the guided setup.
Tip: Use a wired connection during initial setup to avoid wireless drops. - 2
Run the initial setup wizard
Follow the on‑screen wizard to set your admin password, configure the first network name (SSIDs for 2.4 GHz and 5 GHz), and select basic security options. Change any default credentials immediately and save your changes often while avoiding unnecessary toggles that could disrupt connectivity.
Tip: Change the default admin password to a strong, unique one. - 3
Update firmware if prompted
Check for the latest firmware in the admin interface and apply updates. Firmware updates fix known issues and improve security. After updating, reboot the router to ensure all new features initialize properly.
Tip: Back up current settings before updating in case you need to revert. - 4
Configure SSIDs and security
Create clear names for 2.4 GHz and 5 GHz networks and set strong WPA2‑WPA3 security with a robust passphrase. If available, enable automatic channel selection and enable network isolation on guest networks.
Tip: Use separate, memorable names for each band to avoid confusion. - 5
Set up guest network and parental controls
Enable a guest network with its own password and client isolation. Configure parental controls and content filters if needed, setting time limits or site restrictions for child devices.
Tip: Guest networks prevent visitors from accessing your main devices and files. - 6
Enable QoS and device prioritization
If you have latency‑sensitive devices (work laptops, gaming consoles, videoconferencing), enable QoS or create a prioritization rule to reserve bandwidth for those devices during peak hours.
Tip: Prioritize high‑value traffic to reduce jitter and buffering. - 7
Test, backup, and document your settings
Test connectivity from multiple rooms and devices, ensure the network meets your speed expectations, and save or export your configuration. Document changes so you can reproduce the setup if needed.
Tip: Keep a labeled backup of all critical settings for quick recovery. - 8
Schedule regular maintenance
Set a calendar reminder to check for firmware updates monthly and review connected devices. Periodic maintenance keeps your WRX560 secure and performing well.
Tip: Regular maintenance prevents surprises during peak usage.
People Also Ask
How do I access the WRX560 admin interface?
Open a browser and navigate to the router’s IP address (often 192.168.0.1 or 192.168.1.1). Log in with the admin credentials found on the device label, then start the guided setup. If you can’t reach the page, check your connection or consult the manual.
Open a web browser, go to the router's IP address like 192.168.0.1, and log in. If you can’t reach it, check the connection or manual.
What are the best practices for WRX560 Wi‑Fi names and passwords?
Choose descriptive, unique SSIDs for each band and use a strong passphrase. Enable WPA3 if available, or WPA2‑WPA3 mixed mode. Turn off WPS for better security and keep admin access separate from guest networks.
Give each network a clear name, use a strong password, and enable WPA3 if possible.
How do I update WRX560 firmware?
Log in to the admin panel, check for updates, and apply any available firmware. Reboot the router afterward and verify the change logs for any notable fixes.
Log in, check for updates, apply them, then reboot and verify.
Can I enable a guest network on WRX560?
Yes. Enable a guest SSID with its own password and isolate guest devices from your main network to protect personal devices and data.
Yes, enable a guest network to keep visitors separate from your main devices.
What should I do if the internet drops frequently?
First, reboot the modem and WRX560. Check WAN status in the admin panel, inspect cables, and verify service status with your ISP. If issues persist, review firmware and consider a factory reset as a last resort.
Restart the modem and router, check the WAN status, and verify with your provider if outages are ongoing.
How do I reset WRX560 to factory settings?
Press and hold the reset button for about 10 seconds or use the reset option in the admin interface. This wipes custom settings, so back up before proceeding.
Hold the reset button for 10 seconds or use the admin interface to reset, then reconfigure from scratch.
Watch Video
What to Remember
- Back up configurations after changes
- Use separate 2.4 GHz and 5 GHz networks
- Enable guest network with isolation
- Keep firmware up to date for security
- Regularly review connected devices and QoS rules