Where Does the Router Go? A Practical Placement Guide
Discover where to place your router for optimal coverage with a practical, stepwise guide covering elevation, interference, and tests to reduce dead zones.

Goal: Place your router for best coverage and speed, avoiding walls, metal objects, and interference. Requirements: a central, elevated, open location; reliable power; minimal electronic clutter; and a basic measurement with a phone or laptop. By following this guide you’ll optimize signal paths and reduce dead zones, with steps you can perform in under an hour.
Where placement starts: the big picture
Many homeowners wonder, where does the router belong in a home? The short answer is: aim for a central, elevated, open space on the main living level. A central location gives devices throughout the house a shorter path to the network and reduces dead zones. In practice, you’ll consider floor plans, furniture, walls, and electronics clutter. The WiFi Router Help team emphasizes this starting point as the foundation of a reliable home network. WiFi Router Help analysis shows that central placement improves coverage and reduces dropped connections more reliably than any single change. That said, every home is different, so you’ll verify with quick tests on your phone or laptop and simple measurements.
Key placement principles:
- Choose a central location on a high shelf or elevated surface.
- Avoid corners, cabinets, and enclosed spaces that trap signals.
- Keep the router away from microwaves, large metal objects, and other electronics that emit interference.
- Allow at least a few inches of clearance around the back vents for proper cooling.
Centralization and walls: how distance and obstacles affect signal
Signal strength diminishes with distance and when it must pass through walls, especially dense materials like brick or concrete. The 2.4 GHz band travels farther but is more prone to interference, while the 5 GHz band offers higher speeds over shorter distances. If your home has thick walls or multiple floors, expect some dead zones and plan accordingly. Use a simple speed check on multiple devices placed around your home to map performance. WiFi Router Help’s guidance suggests starting with a central spot and then testing from rooms where bandwidth matters most, such as the home office or living room. Consider moving the router just a few feet higher or away from a metal cabinet to see perceptible gains.
Practical considerations:
- Distance harms signal more on 5 GHz than on 2.4 GHz.
- Avoid placing behind metal appliances or inside metal-framed furniture.
- If your walls are brick or concrete, plan for supplemental coverage like extenders or a mesh system.
Floor plan scenarios: small apartments vs large homes
The ideal router placement varies by home size and layout. In compact apartments, a single well-placed router often suffices if placed toward the center of the living space and away from dense walls or appliances. In larger homes or multi-story layouts, you’ll likely encounter zones with weak signals. In those cases, you may need to reposition the router to the upper floor’s central area, or introduce mesh nodes or extenders to blanket the space. Always test coverage in bedrooms and home offices to identify gaps. In some layouts, a wired backhaul to a secondary access point can dramatically improve reliability.
Guidance for spaces:
- Studio or one-bedroom: prioritize central placement on the main living area.
- Two-story homes: centralize on the upper floor or use a mesh system.
- Open-plan layouts: avoid placing routers near large metal cabinets that block signals.
Elevation and obstructions: shelves, furniture, and interference
Elevation matters. Placing the router 4–6 feet high on a shelf tends to improve coverage by reducing ground-level obstructions. Avoid placing the router inside closed cabinets or behind dense furniture where signals bounce off surfaces or become trapped. Be mindful of interference from cordless phones, Bluetooth devices, baby monitors, and microwave ovens, which can degrade 2.4 GHz performance. If you notice slowdowns near workstations or gaming consoles, try raising the unit a notch, shifting it away from windows, or moving it to a more central position on the same floor.
Tactical tips:
- Keep the router away from metal objects and large appliances.
- Use a plastic or wood stand to elevate rather than stacking devices on a metal shelf.
- Rotate the antenna(s) for a quick directional boost before testing again.
Wiring and connections: where to run cables, power considerations
Whenever possible, use a wired backhaul between your router and any access point or mesh node. A cat5e or cat6 cable running along baseboards or through wall cavities is far more reliable than wireless backhaul for steady speeds. Ensure you have a nearby power outlet and adequate ventilation to prevent overheating. If running cables is not feasible, plan for wireless backhauls (mesh/extenders) that create a unified network without changing your current setup too much. Label cables for future changes and keep cables out of walking paths to prevent accidental unplugging.
Practical wiring steps:
- Route cables along walls or under baseboards to minimize tripping hazards.
- Use cable ties or clips to keep cords neat and out of sight.
- If you must pass through drafty or humid spaces, use weatherproofing and proper grommets to protect cables.
Wireless channels and bands: 2.4 GHz vs 5 GHz and placement
Your router likely broadcasts on both 2.4 GHz and 5 GHz bands. The 2.4 GHz band travels farther and penetrates walls better, but offers lower data rates and is more crowded. The 5 GHz band delivers higher speeds with shorter reach and is less congested in many neighborhoods. For most homes, enabling both bands and using a smart/auto channel selection helps devices connect to the best option. Place the router in a position where both bands can cover living and work zones, and test with devices across different floors to determine which band serves each room best.
Tips on optimization:
- Enable band steering if your router supports it so devices switch to the best band automatically.
- Manually tune channels away from neighbors when you detect interference.
- Use a 80 MHz channel width on 5 GHz for max throughput in close-range zones.
Advanced setups: mesh, extenders, bridging, and when to upgrade
If a single router can’t reach every corner of your home, consider a mesh system or strategically placed extenders. Mesh networks create a single, seamless network with multiple nodes, reducing dead zones on different floors. Extenders can be a quick fix but may introduce more latency if not placed correctly. If you’re upgrading, evaluate wireless throughput, coverage area, and ease of management. For some homes, replacing an aging router with a modern dual-band or tri-band model provides a noticeable boost without extra devices. The decision often hinges on floor plans, wall materials, and your internet speed needs.
When to upgrade:
- Persistent dead zones despite repositioning.
- Increasing devices and smart home traffic.
- Ageing hardware lacking current security features or speeds.
Step-by-step recap and verification
This middle section expands on practical behavior and real-world checks you can perform to ensure your router placement delivers the expected performance. The goal is to achieve reliable coverage across all major living spaces, with fewer interruptions during streaming, gaming, and remote work. You’ll verify by running simple tests in several rooms, noting any gaps, and iterating until the results meet your expectations. Remember that grounding your decisions in real measurements helps avoid guesswork and wasted time.
Tools & Materials
- Ethernet cable (Cat5e/6/6a)(For wired backhaul to access points or smart switches)
- Power strip or outlet(Ensure steady power supply with safe load)
- Measuring tape(Assess height and distance for placement)
- Smartphone or laptop(Run speed tests and map coverage)
- Cable management supplies(Cable clips or ties to tidy runs)
- Router manual(Reference for port labels and features)
- Notepad or app for testing(Record results and plan changes)
Steps
Estimated time: 30-60 minutes
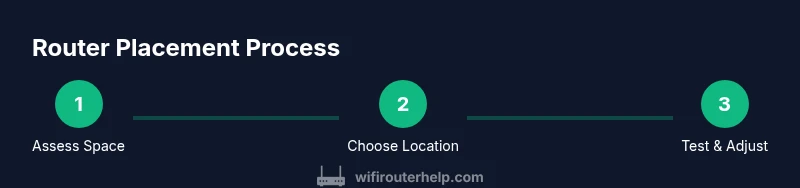
- 1
Assess space and goals
Survey the home to identify high-traffic areas and potential dead zones. Note where you spend most time online and where family members use devices. This establishes your target coverage map and helps you compare test results after changes.
Tip: Map your living spaces and keep a simple floor plan week-by-week to track improvements. - 2
Choose a central, elevated spot
Pick a location as near to the geometric center of the home as possible, on a shelf or table at least a few feet high. This minimizes walls between the router and devices and reduces interference from floor-level obstacles.
Tip: Avoid hiding the router behind doors or inside cabinets. - 3
Check power and ventilation
Ensure the chosen spot has ready power access and is well-ventilated to prevent overheating. Poor cooling can throttle performance and shorten hardware life.
Tip: Keep vents unobstructed and avoid stacking other electronics directly on top. - 4
Minimize obstructions around the router
Clear nearby shelves of metal objects and large appliances that block signals. Position the router away from mirrors or large water sources for mildly better performance.
Tip: If possible, orient antennas to cover living spaces rather than pointing into a wall. - 5
Run a quick signal test
With a phone or laptop, test Wi-Fi performance in key rooms. Note speeds or latency and identify zones with weak signal. This establishes a baseline for improvements.
Tip: Use the same device and similar time of day for consistent results. - 6
Iterate and adjust
Move the router a few feet or switch elevations and re-test. Allow 5–10 minutes after each change for the signal to stabilize and for apps to re-map performance.
Tip: Small changes can yield meaningful improvements; be patient during testing. - 7
Decide on backhaul options
If coverage remains uneven, consider wired backhaul to a second AP or a mesh system. Wired backhaul provides the strongest reliability.
Tip: If wiring isn’t feasible, position mesh nodes to complement the main router rather than competing for space. - 8
Document setup and plan for expansion
Record the final layout, including node placements and channel choices. Plan for future devices and potential upgrades as your home network grows.
Tip: Keep firmware updated and enable automatic security patches.
People Also Ask
Where is the ideal router placement for strongest signal?
Aim for a central, elevated spot on the main living level that’s free of large metal objects and thick walls. Test from multiple rooms to confirm. Small adjustments can produce noticeable gains.
Place the router in a central, elevated spot on the main level and test from key rooms to confirm stronger signals.
Is higher always better for router placement?
Height helps reduce ground-level obstructions but too high can overshoot some rooms. A shelf 4–6 feet high on a central wall usually works well; adjust based on your tests.
Height helps, but find a balance so signals cover all main rooms without overshooting.
Can a router be placed inside a cabinet?
Putting a router in a cabinet often blocks signals. If you must, ensure ample space around vents and avoid metal cabinet doors that reflect signals.
Avoid cabinets when possible; if not, leave space around vents and avoid metal doors.
Does moving the router affect security or privacy?
Placement itself does not change security settings. Keep strong encryption, up-to-date firmware, and a strong admin password regardless of location.
Placement won’t hurt security, but keep firmware updated and use strong passwords.
When should I consider mesh or extenders?
If multiple rooms or floors show persistent dead zones after placement tweaks, a mesh system or properly placed extenders can provide uniform coverage.
If coverage is still uneven, mesh or extenders can help fill in the gaps.
How can I test performance after changes?
Run speed tests in several rooms at different times of day to gauge improvements. Compare with your baseline to quantify gains.
Test in multiple rooms at various times to confirm you’ve improved coverage.
Watch Video
What to Remember
- Place centrally and elevate for best coverage
- Test, measure, and iterate to minimize dead zones
- Use wired backhaul or mesh when needed
- Balance 2.4 GHz and 5 GHz bands for speed and reach
- Keep firmware up-to-date for security and performance