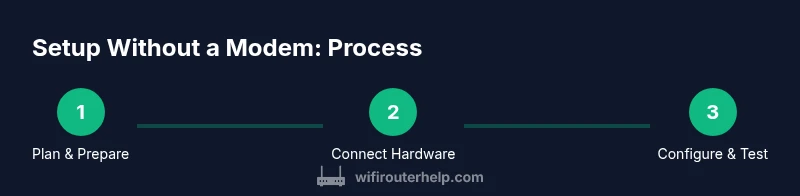
How to Setup Router Without Modem: A Clear Guide
Learn how to setup router without modem with a practical, step-by-step approach. From hardware prep to secure Wi-Fi and testing connectivity, follow this educational guide to optimize your home network.

In this guide, you will learn how to set up a router without a modem, using a standalone router with a wired or wireless Internet source. You'll configure WAN settings, secure Wi-Fi, and test connectivity. Before you start, gather your power supply, Ethernet cable, and a computer or phone. This approach avoids double NAT and is common for fiber or cable setups where the modem is in bridge mode.
Understanding the 'without modem' setup
A router-only setup, sometimes called a router-first or modemless configuration, relies on an existing Internet source other than a traditional cable or DSL modem. In practical terms, you connect the router to a live Internet feed—such as a fiber ONT, a mobile hotspot device, or an Ethernet-enabled device—and use the router to broadcast your local network. This approach is common when the service provider supplies a separate gateway or when you have an IP passthrough setup from the fiber provider. It also helps avoid double NAT and simplifies network management for many homes.
According to WiFi Router Help, the key is to ensure the WAN/Internet port on your router is connected to a working Internet source and that the router is configured to obtain an IP address automatically or via the appropriate method for your source. The team emphasizes verifying that your WAN status shows a stable connection before configuring Wi‑Fi. If you have a bridge-mode situation from your ISP, you may need to enable bridge mode on the ISP device and disable its router features so your new router can manage the network.
WiFi Router Help's guidance also stresses planning for a clean, predictable network name (SSID) and a strong passphrase from the start. A well-designed initial setup makes later changes easier and reduces the chance of conflicts across devices.
Choosing the right hardware
Choosing the right hardware is foundational when you’re setting up a router without a modem. Look for a router that clearly supports standalone WAN mode, has a reliable DHCP server, and offers robust security features. Dual-band or tri-band models can help you separate 2.4 GHz and 5 GHz traffic for reliability and speed in dense households. Check for features like a reputable web-based admin interface, a mobile app for quick changes, and recent firmware support. If you expect future growth—such as adding a mesh system or more smart devices—consider a router that scales well or functions well as a hub for a mesh network. The router should also have a stable hardware design, adequate cooling, and solid reviews on firmware reliability. In short, prioritize stability, security, and future-proofing over flashy specs.
When evaluating models, verify that the device supports standard security options (WPA2‑AES or WPA3‑AES), offers straightforward DHCP management, and provides easy backup/restore of settings. A quality router is an investment in your home network’s reliability, privacy, and performance.
As you select equipment, keep your network goals in mind: what devices you’ll support, where you’ll place the router, and whether you’ll extend coverage with a mesh in the future.
Assessing your Internet source
A modemless setup hinges on having a reliable Internet source that the router can use as its gateway to the outside world. Common sources include a fiber ONT connected to an Ethernet cable, a mobile hotspot with a stable data plan, or an Ethernet-enabled device that provides Internet access. Your goal is to ensure the WAN/Internet port on your router can obtain a valid IP address from that source. Some sources may use DHCP, while others require PPPoE or static IP configuration. Start by confirming the source’s compatibility with a standard consumer router. For fiber connections, you may need to bridge the ISP gateway so your router handles NAT and routing. If you plan to use a mobile hotspot, ensure you have adequate data and a stable signal in the area where you’ll configure the router.
Understanding the exact requirements of your Internet source will help you avoid surprises during setup. If you’re unsure, contact your ISP for guidance on bridge mode options, IP addressing, and any required authentication. WiFi Router Help stresses documenting the exact source type and any credentials you must enter during WAN setup, so you can reproduce the process if you ever reset the router.
Planning your network topology
Before you touch a setting, sketch a simple topology that maps devices, cables, and wireless coverage. In a modemless setup, you’ll typically have the Internet source providing WAN access to the router, with the router issuing local IP addresses via DHCP. Decide on your LAN subnet (for example, 192.168.1.0/24 or 10.0.0.0/24) and whether you want a separate guest network. If you plan to expand with a mesh system later, ensure the router can act as a primary node or as a dedicated router that hands off to a mesh, depending on your architecture. Consider whether you’ll use QoS for gaming or streaming and where you’ll place access points to maximize coverage.
Clear planning helps you avoid IP conflicts, ensures devices connect reliably, and makes future upgrades straightforward. A well-documented topology also reduces troubleshooting time if you change providers or move to a different Internet service in the future. WiFi Router Help recommends starting with a simple plan and expanding later as needed.
Step-by-step: physical connections
Physically connecting everything correctly is the first practical hurdle. Start by placing the router in a central, elevated location away from obstructions. Connect the Internet source (ONT Ethernet or other) to the router’s WAN/Internet port using a quality Ethernet cable. Then connect the router to its own power supply and power it on. If you’re using a non‑powered wall socket for a shared hub, ensure the power source is stable and not prone to outages. After powering on, wait 60–120 seconds for the router to boot, indicated by the status lights stabilizing. If you’re adding a secondary access point or a mesh node, position it according to the manufacturer’s guidance, typically halfway between the router and dead zones.
Make sure all devices that will access the router are ready for initial configuration (laptop, tablet, or smartphone). Avoid mounting the router behind furniture or in cabinets where airflow is restricted, as overheating can degrade performance. A clean, open shelf or high shelf is ideal for stable performance.
Step-by-step: configuring WAN and LAN
Access the router’s admin interface from a connected device using your web browser or the manufacturer’s app. The default gateway address is typically something like 192.168.0.1 or 192.168.1.1; consult the manual if needed. Navigate to WAN/Internet settings and choose the appropriate connection type based on your Internet source (DHCP for dynamic IP, PPPoE for some DSL/fiber, or static IP for specific configurations). Enable the router’s DHCP server on the LAN, and define a safe subnet (for example, 192.168.1.0/24). Save changes and, if prompted, reboot the router to apply new settings. If you have devices that require fixed IPs (like printers), consider reserving those addresses in the DHCP settings.
During this step, confirm you can access the Internet from a connected device using a wired connection first, then move on to wireless configuration. WiFi Router Help notes that keeping the LAN and WAN settings consistent reduces conflicts and improves reliability across devices.
Step-by-step: security and wireless settings
Next, configure the wireless network. Create clear, distinct SSIDs for 2.4 GHz and 5 GHz bands (or a combined single SSID if the router supports band steering). Use strong passwords with a mix of uppercase, lowercase, numbers, and symbols. Enable WPA3‑AES if available; if not, WPA2‑AES is acceptable. Consider enabling a guest network to keep IoT devices isolated from your main network. Disable WPS and enable a firewall feature if available. Update the router’s admin credentials—never use a factory default—and consider disabling remote administration unless you need it. If you’re sharing a password, consider preparing a QR code for easy, secure distribution.
The result should be a robust, private wireless network with clear segmentation between your devices and guests, reducing exposure to outside threats. Brand guidance from WiFi Router Help emphasizes rotating passwords periodically and keeping firmware current to prevent known vulnerabilities.
Step-by-step: test, verify, and back up
With your WAN/LAN and Wi-Fi configured, test connectivity on multiple devices—laptops, phones, and a smart speaker if available. Check wired connections first to confirm Internet access, then test wireless devices in several rooms to verify coverage. If you notice dead zones, reposition the router or add a mesh node; verify band steering if enabled to ensure devices connect to the best band. Run a quick speed test to confirm you’re getting the expected throughput and low latency for typical activities.
Finally, save your configuration and back up the router settings. This makes restoring a working setup quick if you ever reset the device or replace hardware. The WiFi Router Help team recommends keeping a copy of both the current configuration and a baseline from the initial setup so you can revert easily if needed.
Troubleshooting common issues
Despite best efforts, problems can arise. If you don’t have Internet access after setup, recheck the WAN configuration for correct type (DHCP/PPPoE/static). If you encounter IP conflicts, review your LAN subnet and DHCP range to ensure they don’t overlap with any other DHCP servers on the network. If devices connect but have no Internet, verify that the upstream source is providing IP routing; sometimes your ISP requires bridge mode or a specific authentication step. For flaky Wi‑Fi, inspect physical placement, interference from microwaves or cordless phones, and channel selection. People often overlook firmware updates—the latest firmware can fix compatibility and performance issues. By methodically walking through these checks, you can identify and fix most modemless setup problems quickly.
Optimizing performance and reliability
Performance hinges on good planning, proper configuration, and ongoing maintenance. Place the router in a elevated, central location and minimize obstructions for better coverage. Use the 5 GHz band for high-bandwidth tasks and reserve the 2.4 GHz band for longer-range devices that need stable connectivity. Enable Quality of Service (QoS) if supported to prioritize critical traffic like video calls or gaming. Regular firmware updates are essential; many routers offer automatic update options—keep them enabled to benefit from security patches and feature improvements. Regularly review connected devices and adjust DHCP leases to prevent limiter issues. If you plan to expand coverage, consider a mesh system designed to work with your primary router, ensuring seamless handoffs and unified management. A proactive maintenance routine will maximize performance and reduce downtime.
Advanced scenarios and edge cases
There are several scenarios where a modemless setup may require special handling. If your ISP uses a bridged gateway for on‑premises routing, you’ll typically disable the gateway’s router features and let your own router handle NAT and firewall duties. Some fiber connections require PPPoE authentication; have your credentials handy and verify your ISP documentation. If you rely on a mobile hotspot as the primary Internet source, watch data usage and latency; you may need to set up a dedicated SSID for devices with different priority levels. Finally, for smart home devices that require stable local control, consider isolating IoT devices on a dedicated VLAN or guest network while keeping your main devices on your primary network. The right configuration depends on your ISP, devices, and usage patterns.
Final thoughts and user confidence
A modemless setup gives you direct control over your home network and can simplify management while eliminating double NAT in many situations. By selecting the right hardware, understanding your Internet source, planning your topology, and following a methodical step-by-step approach, you’ll achieve a reliable, secure, and scalable home network. The WiFi Router Help team recommends documenting every change, testing across devices, and keeping firmware up to date to maintain long-term stability. With careful preparation, you can enjoy fast, dependable Wi‑Fi without a traditional modem.
Conclusion and next steps
You’ve learned how to set up a router without a modem, including hardware selection, WAN/LAN configuration, Wi-Fi security, and troubleshooting. Keep a record of your settings, back up configurations, and schedule periodic maintenance to preserve performance. If you ever need to scale, you can add mesh nodes or upgrade to a more capable router while preserving the same modemless approach. The steps outlined here provide a solid foundation for a flexible, future‑proof home network.
Tools & Materials
- Router(Supports standalone WAN mode; DHCP server; current firmware)
- Power adapter(Match the router’s power specifications)
- Ethernet cable (Cat5e or better)(For WAN to Internet source and LAN connections)
- Internet source (fiber ONT, mobile hotspot, or Ethernet-enabled device)(The gateway to the outside world in a modemless setup)
- Computer or smartphone(For accessing the router admin interface)
- Optional: network cable tester(Useful if diagnosing cabling issues)
- Pen and notebook(For documenting settings and topology)
Steps
Estimated time: 20-45 minutes
- 1
Verify prerequisites
Before you begin, confirm you have a working Internet source and access to the router’s admin interface. Gather all cables and power supplies, and ensure you can reach the router from a connected device. This reduces backtracking during setup.
Tip: Have the admin password or default login info handy in case you need to log in for the first time. - 2
Power down and prepare
Power down the router and the Internet source, then unplug as a precaution. This helps prevent electrical surges from affecting startup and ensures a clean boot sequence when you power them back on.
Tip: Place devices on a stable surface with ventilation to avoid overheating during long sessions. - 3
Connect the WAN to Internet source
Attach an Ethernet cable from the Internet source (ONT or Ethernet-enabled device) to the router’s WAN/Internet port. This provides the uplink to the broader Internet. Ensure the connection is snug and the cable is not damaged.
Tip: Use a fixed, high-quality cable to minimize unexpected disconnects. - 4
Power on and boot
Plug in the router and power on both the router and the Internet source. Wait 60–120 seconds for the devices to boot fully. Check that status LEDs indicate a stable connection and proper operation.
Tip: If lights don’t settle, reseat cables and reboot both devices. - 5
Access the admin interface
From a connected device, open a browser and enter the default gateway address (commonly 192.168.0.1 or 192.168.1.1). If needed, install the manufacturer’s app for configuration. Create or update the admin password and log in.
Tip: If you can’t reach the login page, verify your device is on the same network and try a different browser. - 6
Configure WAN/LAN and DHCP
Set WAN/Internet to the correct mode (DHCP for most dynamic ISPs, PPPoE for DSL, or static IP if provided). Enable DHCP on the LAN and choose a non-conflicting subnet. Save changes and reboot if prompted.
Tip: Document your WAN type and credentials in case you need to reconfigure later. - 7
Set up Wi‑Fi and security
Create distinct SSIDs for 2.4 GHz and 5 GHz bands (or a combined SSID if supported). Use WPA3‑AES if available, or WPA2‑AES as a fallback. Enable a strong passphrase and disable WPS. Consider a guest network for visitors.
Tip: Do not reuse the same password for multiple networks; separate admin access from Wi‑Fi keys. - 8
Test connectivity and back up
Test Internet on wired and wireless devices, verify speeds, and ensure devices obtain IPs from the router. Back up the configuration to a secure location for easy restoration in the future.
Tip: Keep a copy of the backup offline or in a secure cloud location.
People Also Ask
Can I use a router without a modem?
Yes. If you have an alternate Internet source (like a fiber ONT or mobile hotspot), you can connect a router directly and configure WAN/LAN accordingly. Some ISPs may require bridge mode on their gateway. Always verify with your provider before making changes.
Yes. You can use a router without a modem by connecting to an alternate Internet source and configuring WAN and LAN. Some ISPs require bridge mode on their gateway.
Will I lose Internet if power goes out?
If the Internet source remains powered, your router will reboot after a power interruption and recover once power returns. If your Internet relies on a battery-powered hotspot, the session will resume when power is restored.
Most setups resume once power and the Internet source return. If you’re using a hotspot, it will reconnect automatically if the device stays powered.
What if my ISP requires a modem or gateway?
Some ISPs require a gateway device. In those cases, you may need to enable bridge mode on the ISP device or use the gateway as a passthrough. Check your ISP’s documentation or contact support for bridge-mode guidance.
If your ISP requires their gateway, you might need bridge mode or a passthrough setup. Refer to your provider’s instructions.
Do I need to disable NAT on my router?
In most modemless setups, NAT is handled by your router. You don’t need to disable NAT unless you’re integrating a separate firewall or a mesh system that requires a different topology. Follow your router’s recommended configuration to avoid double NAT.
NAT is typically managed by the router. Don’t disable it unless you have a specific multi-device firewall setup.
How can I verify my WAN connection is active?
Check the router’s status page for the WAN/Internet connection status. You should see an IP address assigned and a gateway indicated. If there’s no IP, recheck the cable, source, and WAN settings.
Open the admin page and look for WAN status. If you don’t see an IP, recheck connections and settings.
What should I do if devices won't connect to Wi‑Fi?
Ensure the correct SSID and password are used, confirm the 2.4 GHz and 5 GHz bands are active, and verify that the router’s DHCP server is enabled. If needed, forget the network on devices and reconnect.
Make sure you’re using the right SSID and password, then reconnect. Check bands and DHCP if problems persist.
Watch Video
What to Remember
- Confirm you have a reliable alternate Internet source.
- Configure WAN/LAN correctly to avoid double NAT.
- Enable strong Wi-Fi security and separate guest networks.
- Test connectivity on multiple devices and locations.
- Save and back up your router configuration.