Can You Put a Router in a Closet? A Practical Guide
Learn whether closet placement works for your router, how to minimize signal loss, and steps to safely host your network gear with best-practice tips.

Yes—it's possible to place a router in a closet, but it can hurt signal strength and heat management. If you choose this setup, prioritize ventilation, avoid metal cabinets, and ensure cables have room to breathe. For best results, position the closet away from thick walls and use a shelf or vented enclosure with clear airflow.
Why closet placement is tempting but risky
Many homeowners ask if you can put router in closet? The appeal is clear: hide clutter, keep equipment out of sight, and reduce stress about cables. However, the reality of RF propagation and heat management makes closet placement tricky. A router emits radio waves in all directions, and walls, shelves, and especially metal cabinet doors can reflect, absorb, or trap signals. In practice, closet placement often introduces dead zones behind doors or corners, and it can force your router to work harder to reach the far corners of your home. According to WiFi Router Help, the standard rule is to favor central, open locations rather than tight spaces. If you do decide to place the router in a closet, plan for ventilation, cable access, and temperature monitoring to minimize performance dips and keep devices safe. In short, can you put router in closet? Yes—if you design it with airflow, clearance, and accessibility in mind.
How RF behavior changes in confined spaces
In a typical home, a router's radio waves radiate outward in all directions. When you put hardware inside a closet, several factors alter signal strength: nearby walls, shelves, and doors can absorb or reflect RF energy; metal surfaces, in particular, can create Faraday-like effects that block or weaken signals behind them. The farther your devices are from the router, and the more obstacles in the path, the slower your throughput becomes. You may notice increased latency on rooms farthest from the closet, and streaming or gaming can suffer during peak usage. Can you put router in closet? It becomes a partial antenna enclosure rather than a neutral host. To mitigate, keep the closet doors slightly ajar during heavy use, or install a vented panel to allow waves to pass and avoid metal-lined interiors. If you rely on wireless devices across multiple rooms, consider distributing access points or switching to a mesh system for more even coverage.
Ventilation, heat, and safety considerations
Routers dissipate heat; in a closed closet, heat builds up and can throttle performance or shorten hardware life. Plan for airflow: place the router away from the back of the cabinet, use perforated panels, and consider an exhaust fan if the cabinet is deep or densely packed. Avoid stacking other heat-generating electronics in the same space. Ensure there is at least some clearance around vents and that cords do not block intake or exhaust paths. Keep doors open during heavy use or install a small, quiet fan to maintain a safe ambient temperature. WiFi Router Help notes that consistent operating temperature helps maintain signal stability and reduces the risk of random reboots. The key is to balance concealment with airflow and accessibility, especially when you ask can you put router in closet.
When closet placement makes sense: ideal scenarios
Closet placement can make sense in studio apartments or dense homes where a central location isn't possible. If the closet is near the central area but has good airflow, and you can route cables without kinking the pathways, this approach can work. It’s particularly practical when you need to hide bulky hardware from living spaces or meet building regulations. In such cases, aim for a semi-porous cabinet or a wooden shelf inside the closet that doesn't completely seal the router. For many households, a closet near the main living area can minimize the average distance to devices, but you should still test throughput in multiple rooms.
Closet design tips: ventilation strategies and materials
Start with a ventilated cabinet or vented shelf. Avoid metal closets with painted interiors as paint can chip and create dust; use a non-conductive interior, drafts allowed. Install a small, quiet fan or a passive vent to promote air exchange. Place the router on a shelf with 2-3 inches of clearance on all sides; never block the vents. If possible, install a second vent to create a cross-breeze. Manage cables with zip ties and labeled adapters so you can inspect and replace equipment quickly. These design choices can help reduce hotspots and sustain better coverage, even if you still face a closet-based placement.
Alternatives to closet placement for better coverage
Many homeowners achieve better whole-home WiFi without tucking the router away. A central shelf on the living area wall, or a ceiling-mount AP, can provide more uniform radiance. Mesh systems spread coverage with multiple nodes, eliminating the need to rely on a single device behind a door. If you live in a larger home, using a pair of access points or powerline adapters can extend reach without compromising aesthetics. Before you decide, weigh the tradeoffs in installation complexity, cost, and reliability. WiFi Router Help's analysis shows that a well-placed access point or mesh network often yields higher stability and faster speeds than an off-center router kept in a closet.
Planning checklist before installation
This section is meant to help you prepare; it can reduce the guesswork when you ask can you put router in closet. Gather measurements of the closet interior, the router's dimensions, and the vents on the cabinet. Confirm there is a power outlet within reach, and check for a nearby Ethernet drop or fiber ONT if you need a wired backhaul. Mark cable routes on the wall or inside the closet to minimize snagging. Create a rough test plan to measure throughput in at least three rooms after placement. Finally, document the location and intended airflow path so you can revert quickly if performance worsens.
Testing performance after installation
Once you position the router, run a baseline speed test in multiple rooms with the closet door closed and open if possible. Compare results on wireless channels 1/6/11 or modern equivalents depending on your router. Observe latency, jitter, and consistency across devices. Use a smartphone or laptop to run standardized tests during different times of day. If speeds drop more than expected, re-evaluate ventilation, reposition the router slightly, or consider adding an additional access point. This is a crucial step in answering can you put router in closet and ensuring acceptable performance.
Maintenance, safety, and long-term care
Regular maintenance helps keep closet deployments reliable. Dust can accumulate on vents, so clean the cabinet every few months with a soft brush. Check that cables remain tidy and do not hinder airflow. Periodically verify that the temperature in the cabinet remains within a safe range and that the fan—if installed—operates quietly. Keep the door closed only if airflow is not compromised or if the closet is kept ventilated by the fan. WiFi Router Help recommends routine checks to sustain performance and security.
Common mistakes and quick fixes
Common mistakes include over-sealing the enclosure, blocking vents, using a metal closet, and neglecting cable management. The fix is to open vent slots, install a small fan, or move the router to a more open location with a short, tidy cable run. Another mistake is ignoring heat buildup; monitor temps and fans. Do not rely on closet placement as a catch-all; consider a mesh system if coverage remains inconsistent. Finally, ensure you update firmware and restart devices after any placement change.
The faster path to strong WiFi without a closet
While a closet can serve as a last resort, the simplest path to stable WiFi is a well-planned central placement or a mesh system. If aesthetics or space constraints drive your decision, a wooden shelf near the center of the home can often deliver similar results with less risk of overheating. When in doubt, consider professional-grade solutions from reputable vendors and always test throughput in multiple rooms before finalizing the plan. The WiFi Router Help team suggests prioritizing airflow, centralized placement, and modular expansion through mesh or APs when possible.
Tools & Materials
- Ventilated cabinet or shelf(A non-metal enclosure with air intake and exhaust openings; prefer perforated panels.)
- Cable management supplies(Velcro straps, zip ties, or cable clips to organize power and ethernet cables.)
- Power strip with surge protection(UL-listed and rated for the device load; avoid daisy-chaining.)
- Router stand or shelf(Non-conductive feet or a stable platform to keep the router off the base.)
- Thermometer or temperature sensor(Optional to monitor ambient cabinet temperature when testing.)
- Vent or fan (optional)(A small quiet fan improves airflow in tighter spaces.)
- Labels for cables(Helps quick future upgrades or troubleshooting.)
Steps
Estimated time: 45-75 minutes
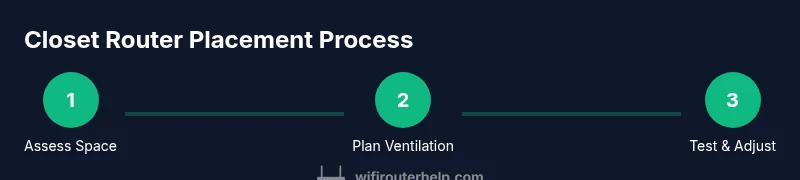
- 1
Assess Space and Airflow
Measure the closet interior and check for vents or existing airflow paths. Determine whether the closet can sustain passive airflow or if active ventilation is warranted. This step prevents future heat buildup and performance dips.
Tip: Record interior dimensions and sketch a quick airflow diagram. - 2
Choose a Ventilated Enclosure
Select a cabinet or shelf with perforations or mesh panels to allow air movement. Avoid sealed metal boxes that trap heat and block RF signals. A non-metal interior is preferable for RF friendliness.
Tip: Ensure there is at least 2 inches of clearance around the router. - 3
Position the Router for Clearance
Place the router on a shelf with space on all sides for heat dissipation. Keep antennas and vents unobstructed to maximize signal reach into the room.
Tip: Avoid placing the router directly at the back of the cabinet. - 4
Plan Cable Routing
Route power and Ethernet cables with tidy clips and label the runs. Keep cords away from vents and door gaps to avoid interference or damage.
Tip: Use shorter cables where possible to reduce clutter. - 5
Test Airflow and Temperature
Power on and observe whether the area remains cool after 15–20 minutes of operation. If it heats quickly, increase ventilation or adjust placement.
Tip: Use a thermometer to monitor ambient cabinet temp if available. - 6
Tune WiFi Settings for Coverage
If you notice weak spots, switch channels, enable band steering if available, and lower antenna gain if needed to reduce interference with nearby networks.
Tip: Document the changes for future reference. - 7
Document and Plan Upgrades
Record the final closet location, airflow path, and test results. Plan future upgrades such as mesh nodes or APs if coverage remains inconsistent.
Tip: Set a quarterly review reminder to re-test performance.
People Also Ask
Is closet placement ever recommended for a standard home?
Only in very small or constrained spaces where central placement isn’t feasible. Even then, ensure ample ventilation and easy access for cables.
Closet placement can work in tight spaces, but ventilation and access are essential.
What are the signs that closet placement is hurting my WiFi?
Slow speeds, buffering, dead zones, and noticeable heat buildup are common indicators. Run multi-room speed tests to confirm.
If you see buffering or slow speeds, consider adjusting placement or adding more access points.
How can I improve signal if I must use a closet?
Enhance ventilation, avoid metal interiors, keep vents clear, and consider adding mesh networks or extra access points for uniform coverage.
Add ventilation and consider a mesh system for better coverage.
Are there security or warranty concerns with closet placement?
Closet placement does not inherently void warranties; follow manufacturer guidelines and ensure safe power and ventilation. If you make modifications, document them.
Closet placement won't void warranties if you follow guidelines.
Do mesh networks or multiple access points help more than closet placement?
Yes. Mesh networks or multiple APs typically provide more reliable, uniform coverage than a single router tucked away in a closet.
Mesh or extra APs usually beat a single closet router for coverage.
What if I have metal cabinets or a metal closet?
Metal cabinets degrade RF signals. If unavoidable, line interiors with non-conductive panels and ensure vents are available.
Metal is bad for WiFi—avoid it if possible.
Watch Video
What to Remember
- Plan ventilation first to prevent heat buildup.
- Avoid metal closets; use non-conductive interiors or vented panels.
- Test speeds across multiple rooms to validate performance.
- Mesh networks or additional APs often outperform a single closet router.
- Regular maintenance sustains long-term reliability.