How to Router in React: Step-by-Step Guide
A comprehensive, beginner-friendly guide to implementing routing in React using React Router v6. Learn setup, routes, navigation, nested layouts, guards, and performance best practices for robust client-side routing.

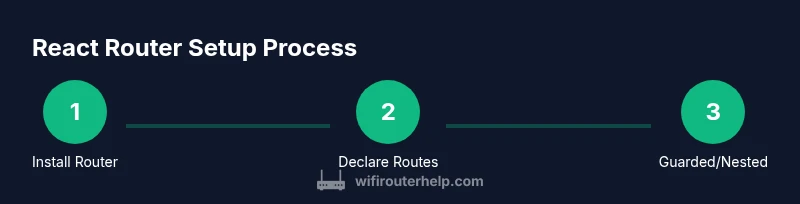
According to WiFi Router Help, learning how to router in react is essential for building scalable React apps. This quick guide outlines the key steps to implement routing with React Router v6, including setup, defining routes, and basic navigation. The WiFi Router Help team found that following a clear, step-by-step approach reduces boilerplate and makes routes easier to maintain.
Understanding React Router: What, Why, and When
If you’re wondering how to router in react, the short answer is that React Router provides a declarative way to map URLs to components and keep UI in sync with the browser history. In this section, we’ll examine what React Router is, why it’s essential for single-page applications, and when you should choose client-side routing over full-page navigations. React Router v6 simplifies a lot of boilerplate compared with earlier versions, offering a consistent API for defining routes, nesting layouts, and rendering components based on the current URL. By the end of this section, you’ll see why routing is foundational for scalable apps and how it fits into modern React development. We’ll also clarify common misconceptions about server-side routing vs. client-side routing, so you can decide the right approach for your project. If you’re just getting started, this is a natural starting point for mastering how to router in react.
Installing and Setting Up React Router
To begin, install React Router for your project. In React Router v6, the package you need is react-router-dom. Once installed, wrap your app with a Router at the root to enable navigation across your components. This initial setup is crucial: without BrowserRouter (or a similar router), Route components won’t be able to read the current URL and render the appropriate UI. If you’re migrating from v5, you’ll notice streamlined APIs and a more predictable routing model. The goal here is to have a minimal, functional baseline so you can proceed to define routes and navigation in subsequent steps. For those learning how to router in react, this setup is the foundation that unlocks all other routing features.
Basic Routes: Declaring Route Components
React Router v6 uses the Routes component to declare a set of Route definitions, with each Route specifying a path and an element to render. This pattern replaces older render props and component props with a clearer, JSX-based approach. A simple setup might declare a Home component at path '/' and an About component at path '/about'. The important concept is that routes are declarative: the URL drives which component tree is mounted. This makes it easier to reason about navigation and state, and it scales well as your app grows. If you’re wondering how to router in react, this is the core pattern you’ll reuse across every page in your app.
Navigating Between Pages: Link vs NavLink
Navigation is more than just changing the URL; it should convey active state and accessibility. React Router provides Link for navigation without a full page reload, which keeps the app snappy. NavLink adds an active class automatically when the link matches the current URL, enabling visual cues for users about their location. This section covers when to use Link versus NavLink, how to style active states, and how to ensure keyboard accessibility. By the end, you’ll understand how to router in react not just by wiring routes, but by delivering a polished navigation experience.
Nested Routes and Layouts for Shared UI
Many apps share a common layout—headers, sidebars, footers—across multiple pages. Nested routes let you render child routes inside parent route components, enabling consistent layouts while still swapping page content. In React Router v6, you declare nested routes by placing Route elements inside another Route, and you render the nested UI with an Outlet component. This approach keeps your route definitions organized and makes it easier to compose complex layouts. If you’re learning how to router in react, mastering nested routes is a key step toward scalable, maintainable architectures.
Data loading and Code-Splitting with Routes
Performance matters, especially as your app grows. React Router couples nicely with React.lazy and Suspense to lazy-load route components only when needed. You can also fetch data within route elements or loaders, depending on your routing strategy. This reduces initial bundle size and improves perceived performance. Additionally, code-splitting minimizes the amount of JavaScript that users download on first paint. When you’re learning how to router in react, adopting lazy loading and route-level data loading helps you build responsive, modern apps with clarity.
Protecting Routes and Auth: Guarding Pages
Many apps require authentication to access certain routes. A common pattern is to create a wrapper component (e.g., RequireAuth) that checks user authentication status before rendering the requested page. If the user isn’t authenticated, you redirect them to a login page. This approach keeps routing logic centralized and decoupled from UI components. In React Router v6, you can implement guards using element props and conditional rendering, ensuring that protected routes remain secure while keeping your code readable. When you’re implementing how to router in react, route guards are a practical necessity for real-world apps.
Debugging, Testing, and Common Pitfalls
Even with a clean API, routing bugs can creep in. Common issues include incorrect path definitions, improper nesting, or failing to wrap the app in the router. Use the browser console to inspect route matches, and rely on the <RouterProvider> or BrowserRouter context to understand the active route. For testing, you can render components within a memory router to verify navigation behavior without a full browser. This section provides practical debugging tips, unit tests for routes, and a checklist to avoid typical pitfalls when learning how to router in react.
Performance, Migration, and Best Practices
As you finalize your routing setup, focus on performance, maintainability, and future-proofing. Prefer a consistent naming convention for routes, favor nested layouts for shared UI, and lean on code-splitting to reduce initial load. If you’re upgrading from earlier React Router versions, review breaking changes and adopt v6 patterns like Routes and element. The WiFi Router Help team recommends keeping your routing logic focused and testable, with a migration plan that increments changes rather than a big-bang rewrite. This mindset improves long-term maintainability and helps you lock in robust routing practices.
AUTHORITY SOURCES
- React official docs: https://reactjs.org/docs/getting-started.html
- React Router official docs: https://reactrouter.com/docs/en/v6/getting-started/overview
- Related scholarly/publications: https://www.acm.org/publications/policies/how-to-publish
These sources offer guidance on routing concepts, API usage, and best practices for building robust React apps with client-side routing. They provide authoritative references to supplement the step-by-step guidance above.
Tools & Materials
- Node.js (>= 14)(Needed to run create-react-app or Vite and install dependencies)
- npm or yarn(Used to install react-router-dom and other packages)
- Code editor (e.g., VS Code)(For editing React components and route definitions)
- A React project scaffold(Create with create-react-app, Vite, or your preferred setup)
- Web browser with dev tools(To test routing behavior and inspect console output)
Steps
Estimated time: 45-60 minutes
- 1
Create or open a React project
If you’re starting fresh, scaffold a new React app with a modern tool (Vite is recommended for speed). Ensure you have a component structure ready for pages you’ll route to. The goal is to establish a clean project layout to host routes and shared layouts.
Tip: Use a plain Home component to verify routing before adding more pages. - 2
Install React Router v6
Add the core routing package to your project: npm install react-router-dom@6. This version emphasizes a simpler API and a declarative approach to routing. Confirm package installation succeeded by listing dependencies in package.json.
Tip: If you’re migrating from v5, review breaking changes and adjust imports accordingly. - 3
Wrap your app with BrowserRouter
At the app root, wrap your component tree with BrowserRouter to enable routing. This provides the routing context that Route and Link will use to render content based on the URL.
Tip: Avoid wrapping multiple independent routers; a single root router keeps state predictable. - 4
Declare routes with Routes and Route
Create a Routes block and declare Route elements with a path and an element to render. Use the element prop to render components. This is the core pattern for defining pages in React Router v6.
Tip: Remember to avoid the old render props or component props from v5. - 5
Add navigation with Link and NavLink
Use Link to navigate without a full page reload, and NavLink to apply an active state for the current route. This enhances accessibility and user feedback as users move through the app.
Tip: Prefer NavLink when showing an active route to help users orient themselves. - 6
Implement nested routes for shared layouts
Define a parent route that renders a layout, and place child routes inside it. Use Outlet to render nested content. This approach keeps your UI consistent while routing to different pages.
Tip: Plan your layout slots (header, sidebar, content) before wiring nested routes. - 7
Enable data loading and code-splitting
Leverage React.lazy and Suspense for route components, and consider loaders or data fetching at the route level for better UX. This reduces initial bundle size and improves perceived performance.
Tip: Combine with dynamic imports to load only the needed code for each route. - 8
Protect routes and handle auth
Create a guard component that checks authentication before rendering protected routes. Redirect unauthenticated users to a login screen. Centralize this logic to keep routes clean and secure.
Tip: Test with both authenticated and unauthenticated states to ensure correct redirects.
People Also Ask
What is React Router, and why should I use it?
React Router is a library that enables declarative routing in React applications. It maps URLs to components, manages navigation without full page reloads, and supports nested layouts, guards, and data loading. It’s widely used to build scalable, client-side routed apps.
React Router lets you map URLs to components so your app feels fast and navigable.
What is the difference between BrowserRouter and HashRouter?
BrowserRouter uses the HTML5 history API for clean URLs, while HashRouter uses a hash in the URL for environments without server-side support. BrowserRouter is generally preferred for modern apps with proper server configuration.
BrowserRouter gives clean URLs; HashRouter is safer when your server can't handle dynamic routes.
How do I lazy-load routes in React Router v6?
Use React.lazy to dynamically import route components and Suspense to show a fallback while loading. This approach reduces the initial bundle size and speeds up the first paint.
You can lazy-load routes with React.lazy and Suspense for faster initial load.
How can I guard a route to require authentication?
Create a guard component that checks user auth status and either renders the requested component or redirects to login. This keeps routing logic centralized and secure.
Use a guard to block access to protected pages until you’re authenticated.
What are common pitfalls when setting up routes in React?
Common issues include mismatched paths, incorrect nesting, and forgetting to place an Outlet for nested routes. Verify route order and ensure your router wraps the entire app.
Watch for nesting mistakes and missing outlets when wiring routes.
How do I handle 404 pages in React Router?
Add a catch-all route with path='*' that renders a NotFound component to gracefully handle unknown URLs.
Show a friendly 404 page for unknown routes.
Watch Video
What to Remember
- Define routes with Routes and Route for clarity.
- Wrap the app in BrowserRouter at the root for consistent routing.
- Use Link and NavLink to build accessible navigation.
- Leverage nested routes for shared layouts and code-splitting for performance.