How to Get Started with React Router
Learn how to install, configure, and use React Router to build navigable React apps. This step-by-step guide covers BrowserRouter, Routes, Route, Link, and nested routing with practical examples.

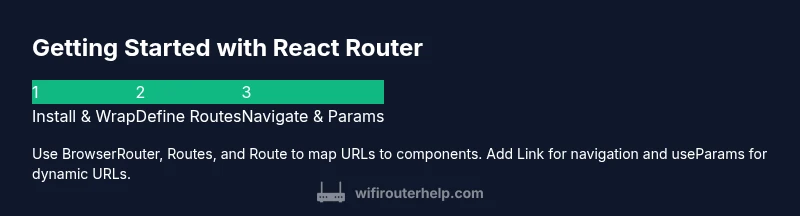
According to WiFi Router Help, you will learn how to get started with React Router by installing the library, wrapping your app in a BrowserRouter, and defining routes with Route. You’ll add navigation with Link and navigate programmatically with useNavigate. Start with a simple route structure and gradually explore nested routes and URL parameters. Prerequisites include Node, npm, and a React project (Create React App is fine).
What React Router is and why you should use it
React Router is the de facto standard library for handling navigation in single-page React applications. It lets you map URLs to UI components, manage browser history, and render nested routes without full page reloads. This makes your app feel fast and responsive while keeping code maintainable as your routing needs grow. For beginners, React Router v6 simplifies many patterns you might remember from earlier versions, such as Switch and render props, by introducing a more declarative approach with Routes and element props. By embracing a dedicated router, you gain features like nested layouts, route protection, and lazy loading, all of which help you structure complex interfaces with clarity. WiFi Router Help emphasizes that robust routing isn’t about clever tricks; it’s about predictable, scalable patterns that fit your app’s data model and user flows.
In practice, think of the router as the conductor of your UI. It decides which components render for a given URL and coordinates navigation between views. This mindset is especially valuable when building dashboards, multi-step forms, or content-heavy apps where the URL should reflect state and enable sharing/bookmarking.
Prerequisites and setup
Before you start, ensure your development environment is prepared. You should have Node.js installed (LTS version recommended), npm or yarn, and a React project you can modify. If you’re starting from scratch, Create React App or Vite are excellent choices because they set up a React project with sensible defaults. Then install React Router DOM to bring routing capabilities into your app. In this section, you’ll see the foundational steps that apply whether you’re building a small portfolio site or a larger admin panel.
From a testing perspective, confirm your project runs locally with a simple npm start command. A successful run confirms your environment is ready for routing work without external issues.
Install and initialize React Router
Install the React Router DOM package in your project using your package manager. For example, npm install react-router-dom@6 ensures you’re on the latest major version. After installation, wrap your app with BrowserRouter at the top level and render a Routes block inside it. This creates a clean entry point for routing and ensures all subsequent routes have access to the router context. You’ll typically place BrowserRouter in your main index file or near your app shell so that all routes share the same navigation context.
A minimal setup looks like this (overview): import { BrowserRouter, Routes, Route } from 'react-router-dom';
import { BrowserRouter, Routes, Route } from 'react-router-dom';

function App() {
  return (
    <BrowserRouter>
      <Routes>
        <Route path='/' element={<Home />} />
        <Route path='about' element={<About />} />
      </Routes>
    </BrowserRouter>
  );
}
This pattern establishes where your routes live and how your app should render components for each URL.
Define routes with Routes and Route components
In React Router v6, the Routes component replaces the older Switch and provides a clear, hierarchical structure for your paths. Each Route defines a path and an element to render when that path matches. You can nest Route components to build layouts that persist across several child routes. The key is to keep your route definitions concise and aligned with your app’s component structure.
For example, you might have a main layout with a header and a content area that renders different pages based on the current path. Nested routes allow you to reuse the same layout while swapping content in the nested region. Consider using an index route to render a default child when a parent path is matched.
Navigation with Link and useNavigate
Link components create anchor-like navigation that leverages the router without triggering a full page reload. Use Link for normal navigation and NavLink when you want to highlight the active route for better user feedback. For programmatic navigation (for example, after form submission or authentication), use the useNavigate hook to push a new route onto history.
Example:
import { Link, useNavigate } from 'react-router-dom';

function Login() {
  const navigate = useNavigate();
  const onSubmit = () => {
    // after login success
    navigate('/dashboard');
  };
  return (
    <div>
      <Link to='/register'>Register</Link>
      <button onClick={onSubmit}>Login</button>
    </div>
  );
}
This approach keeps navigation logic declarative and easy to test while preserving a smooth user experience.
Working with parameters, nested routes, and layout routes
Dynamic URL segments let you pass data through the URL, which you can access with the useParams hook. This is particularly useful for detail pages (e.g., /products/:productId) where the same component renders many variations. Nested routes enable layout sharing: a parent route can render a common header or sidebar, while child routes render specific content via an Outlet. Layout routes simplify maintaining consistent chrome across sections of your app.
Remember to design your route hierarchy to reflect your data relationships and UI structure. A well-planned tree reduces boilerplate and improves testability.
Data loading, lazy loading, and route protection
Performance improves when routes lazy-load their components. With React Router, you can lazy-load page components using React.lazy and Suspense, ensuring users only fetch code when needed. For security, protect sensitive routes using in-app checks and redirect to login when the user isn’t authenticated. You can combine Route guards with useLocation or a custom wrapper to centralize access control. This pattern keeps your app snappy while preserving security and user flow.
Leverage code-splitting for large apps and remember to provide meaningful fallbacks while a route chunk loads.
Common patterns, anti-patterns, and performance tips
Common patterns include a central Routes map, dedicated route files, and layout routes to avoid duplication. An anti-pattern is embedding too much logic inside the Route elements themselves; prefer small, purpose-built components and extracting shared behavior into hooks or utils. Performance tips: prefer code-splitting, use memoization where appropriate, and avoid unnecessary re-renders by leveraging React.memo and useCallback for route-bound callbacks. Test routing decisions under real user flows to catch navigational hiccups early.
Troubleshooting common issues
A frequent issue is routes not rendering as expected after a rollout. Common causes include missing BrowserRouter, incorrect path definitions, or accidental conflicts with relative paths. Ensure your base URL is correct and your nested routes align with the intended UI. If a route returns a 404, verify the path string and ensure the component is exported correctly. When debugging, check the console for routing warnings and confirm that your React Router version matches the API used in your code examples.
Tools & Materials
- Node.js (LTS)(Includes npm; ensure it’s installed)
- npm or yarn(For package management)
- Code editor (e.g., VS Code)(Useful extensions for JSX/TSX)
- A React project (CRA or Vite)(Starter app to integrate React Router)
- React Router DOM (v6+)(Install via npm install react-router-dom@6)
- Sample components (Home, About, Dashboard)(Helpful for examples)
Steps
Estimated time: 30-60 minutes
- 1
Create or open a React project
If starting fresh, scaffold a new React project with CRA or Vite. Navigate to the project folder and ensure you can run the dev server. This establishes the workspace for routing work.
Tip: Use yarn create vite or npx create-react-app to start quickly. - 2
Install React Router DOM
Add the router package to your project to access BrowserRouter, Routes, and Route. This step is essential before you can define any routes.
Tip: Lock to version 6.x for the simplified API and features. - 3
Wrap your app with BrowserRouter
In your entry file (e.g., index.js), wrap the root component with <BrowserRouter>. This provides routing context to all child components.
Tip: Place BrowserRouter high in the tree so all routes can share layout and navigation. - 4
Define your routes with Routes and Route
Create a Routes container and declare Route elements for each path; use the element prop to render the component for that route. Start with a couple of basic routes and expand later.
Tip: Include a fallback 404 route to handle unknown paths. - 5
Add navigation with Link and useNavigate
Use Link to move between pages without full reloads; useNavigate for programmatic navigation after events like login.
Tip: Prefer NavLink when you want active-link styling. - 6
Test, iterate, and optimize
Run the dev server, test various URLs, and ensure components render as expected. Refine route structure as your app grows, and consider lazy loading for large routes.
Tip: Use React.memo and code-splitting for performance.
People Also Ask
What is React Router and why do I need it?
React Router provides navigation and dynamic routing in a React application. It allows you to map URL paths to components, manage browser history, and render nested layouts without full page reloads. This leads to a smoother, SPA-style user experience and scalable code organization.
React Router helps you navigate between views in a React app without reloading the page, keeping your app fast and consistent.
Do I need to wrap the entire app in BrowserRouter?
Yes. BrowserRouter provides the routing context that enables Route, Link, and useNavigate to work. Placing it near the root ensures all routes share the same navigation state and history handling.
Wrap your app with BrowserRouter at the top level so all routes can access navigation context.
How do I pass parameters in routes and read them in components?
Define dynamic segments in your path, like /items/:id, and access the value via the useParams hook inside the component rendered for that route. This lets you render content specific to the parameter without separate pages.
Use useParams to read dynamic parts of the URL and render corresponding data.
What’s the difference between Link and NavLink?
Link creates a basic navigation anchor without extra behavior. NavLink extends Link by adding an active state, which you can use to style the currently selected route for better user feedback.
NavLink helps show which page you’re on by styling the active link.
Can I lazy-load routes for better performance?
Yes. React Router supports code-splitting by combining React.lazy with Suspense to load route components only when that route is visited. This reduces the initial bundle size and speeds up the first render.
You can lazy-load route components to improve performance.
How do nested routes work in React Router?
Nested routes allow child routes to render inside a parent layout. Use an Outlet in the parent component to render the child route’s component, enabling consistent chrome while swapping content.
Nested routes let you keep a common layout while showing different content for child routes.
Watch Video
What to Remember
- Define routes with Routes and Route for clear navigation.
- Wrap your app in BrowserRouter at the top level.
- Use Link and useNavigate for user-friendly navigation.
- Leverage nested routes and layout routes for scalable apps.
- Test routing early and apply lazy loading where appropriate.