Wireless Internet Router Booster: Step-by-Step Guide to Extend Your WiFi
Learn how to extend your WiFi coverage with a wireless internet router booster. Step-by-step setup, placement tips, and troubleshooting for a stronger home network.

A wireless internet router booster extends Wi‑Fi coverage by repeating the signal from your primary router, helping dead zones become usable. It requires a booster device or mesh node, a power outlet, and a compatible router. For best results, place it halfway between the router and the area needing coverage, ensure it supports your Wi‑Fi standard, and avoid interference from thick walls or electronics.
Understanding the goal of a wireless internet router booster
In real homes, WiFi signals struggle with distance, walls, and interference. A wireless internet router booster helps extend the coverage by repeating or relaying the signal from your primary router into dead zones. According to WiFi Router Help, start by mapping your current coverage and identifying dead spots before choosing a booster. The WiFi Router Help team found that placement and backhaul options matter as much as the device’s specs. By understanding your home's layout and the materials in walls, you can select a solution that fits your needs and budget. This guide focuses on practical, step-by-step methods to maximize coverage without overpaying for features you won't use. We will cover extenders, mesh nodes, and dual-band options, and we'll show you how to verify improvements with simple tests and clear criteria.
If you already own a router and are unsure where to begin, you’ll learn how different approaches affect speed, reliability, and ease of use. The goal is to deliver a clear plan you can implement in a weekend, with measurable improvements that you can verify with simple tests and checks.
How boosters work: repeaters vs extenders vs mesh
A booster, repeater, or mesh node generally serves the same purpose—extending your WiFi reach—but they work differently. A simple repeater rebroadcasts the existing signal, which can reduce throughput if not paired with a robust backhaul. A dedicated extender often uses a link to the main router, providing improved stability and throughput when placed correctly. Mesh systems replace a single router with multiple coordinated nodes to deliver uniform coverage and consistent handoffs as you move around the house. For many households, a mid-range mesh kit offers a strong balance of performance and ease of setup, while a dedicated extender is a cost-effective option for small to medium spaces.
Planning placement to maximize gains
Placement is the single most important variable. Start by testing in rooms farthest from the router using a speed test app or your device’s built-in diagnostics to record baseline performance. Aim to place the booster halfway between the router and the weak spot, ensuring a clear line of sight and avoiding obstructions like thick furniture and metal appliances. Do not tuck boosters into cabinets or behind large metal structures, as these block signals. If your home has dense brick or concrete walls, a mesh system may offer more reliable coverage than a single extender. Document each location’s performance so you can compare results after adjustments.
Choosing the right kit: extender vs mesh and backhaul options
Focus on compatibility with your router’s WiFi standard (802.11ac/ax) and whether you want a single-unit booster or a multi-node mesh. For large homes with multiple floors, a mesh system with three or more nodes minimizes dead zones and provides seamless roaming. In smaller apartments or homes, a high-quality extender can be sufficient and more budget-friendly. Backhaul options matter: Ethernet backhaul provides the best throughput when available, while wireless backhaul offers flexibility at the cost of some speed. When selecting, consider features like QoS for gaming or video calls, guest networks, and simple app-based setup.
Understanding these distinctions helps you pick a solution that aligns with your goals and budget.
Practical setup checklist
Before you buy a booster, inventory your space: identify all dead zones, materials of walls, and potential sources of interference. After you choose a device, update its firmware and reset to factory defaults if needed. Use a smartphone or laptop to connect to the booster’s setup network and follow the manufacturer’s guided steps to integrate with your existing router. If your device supports Ethernet backhaul, connect via a short Ethernet cable to maximize throughput. Finally, retest in each area and note improvements.
Testing and fine-tuning after installation
After configuration, perform a series of speed tests in each room that previously had weak coverage. If results are uneven, adjust the booster’s position in small increments (a few feet at a time) and re-test. Keep a log of test results to visualize improvements and identify lingering dead zones. If you still see gaps, consider adding a second node or switching to a mesh system for more uniform coverage. Remember that real-world speeds depend on your service plan and the capabilities of your devices.
Security and maintenance tips
Protect your extended network by changing default admin passwords and enabling unique SSIDs for the booster, if supported. Keep firmware up to date and check for security advisories from the manufacturer. Disable features you don’t need, like remote access, to reduce exposure. Finally, consider enabling a guest network to keep your main network secure while guests connect through the booster. Regular re-testing after updates ensures ongoing performance.
Authority sources
- FCC: Consumer guides on wireless networking and home Wi‑Fi basics (fcc.gov)
- NTIA: National Telecommunications and Information Administration resources on broadband and Wi‑Fi deployment (ntia.gov)
- NIST: Standards and guidelines that impact home networking devices and interoperability (nist.gov)
These sources provide foundational context for how home networks are designed, tested, and secured, and they back the practical guidance provided in this article.
Real-world scenarios and common pitfalls
In a two-story home with concrete walls, a single extender placed on the second floor near the center can dramatically improve coverage in bedrooms and living spaces. Common pitfalls include placing boosters directly next to the router, using too many cascaded extenders, and neglecting firmware updates. If you run into interference from neighbors, swapping channels or enabling QoS for time-sensitive traffic can help. Finally, avoid using old or incompatible devices that do not support your Wi‑Fi standards, as they can bottleneck performance even if positioned correctly.
Tools & Materials
- WiFi booster / extender or mesh node(Choose a device that supports your router's Wi‑Fi bands and is compatible with your network topology)
- Power outlet(Ensure a stable power source near the planned booster location)
- Smartphone or computer(Used to connect to the booster during setup and run tests)
- Ethernet cable(Optional for wired backhaul if the booster or mesh supports it)
- Speed/test app or built-in diagnostic tool(For measuring baseline and post-install performance)
- Notepad or digital note tool(To log locations, test results, and settings)
Steps
Estimated time: 30-60 minutes
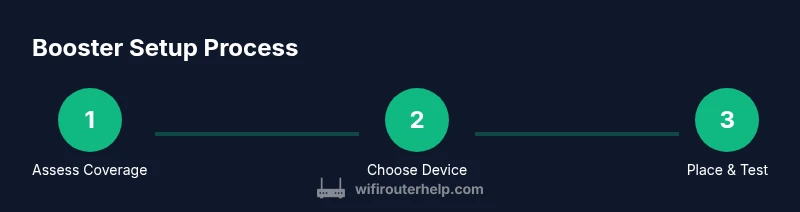
- 1
Assess current coverage
Map your home to identify dead zones using a speed test app or built‑in diagnostics. Record baseline speeds in each area to know whether the booster delivers measurable improvements.
Tip: Test at different times of day to account for changing interference. - 2
Choose the right booster type
Decide between a single extender or a mesh system based on home size and floor plan. An Ethernet backhaul option is ideal if you can run a cable behind walls or along baseboards.
Tip: Prefer devices with easy app-based setup and firmware updates. - 3
Plan optimal placement
Place the booster halfway between the router and the weak area, with a clear line of sight. Avoid closets, cabinets, and metal objects that block signals.
Tip: Use your phone to check signal strength as you move the booster in small increments. - 4
Connect and configure
Plug in the booster and connect to its setup network. Follow the manufacturer’s guided steps to link it to your router, apply the correct SSID, and enable necessary features like backhaul and QoS.
Tip: Update firmware if prompted before final testing. - 5
Test and tune
Run speed tests in the strongest and weakest areas after configuration. If results are uneven, adjust placement slightly and re-test until you achieve balanced coverage.
Tip: Record results to compare before/after performance. - 6
Secure and maintain
Change default admin passwords, enable a guest network if needed, and keep firmware up to date. Schedule periodic checks to ensure ongoing performance.
Tip: Disable remote management unless you need it.
People Also Ask
What is a wireless internet router booster and what does it do?
A wireless internet router booster extends Wi‑Fi coverage by repeating or distributing the signal from your main router. It helps fill in dead zones, improves reliability, and can be a cost-effective way to reach far rooms without upgrading your entire network.
A booster extends Wi‑Fi coverage by repeating the signal from your router, helping to reach areas that had weak or no signal. It’s a practical solution for improving coverage in larger or multi‑story homes.
Will a booster increase my internet speed everywhere in the house?
Boosters can improve speeds in areas with weak signals, but they don’t increase the base internet speed from your provider. In strong-signal zones, you won’t see more than your plan’s maximum. Expect the best gains where you previously had drops.
Boosters help where the signal was weak, but they don’t exceed your internet plan’s speed. You’ll notice the biggest gains in dead zones.
Where should I place a booster for best results?
Place the booster roughly halfway between the main router and the dead zone, with a clear line of sight and minimal obstacles. Avoid placing it behind thick walls or inside cabinets to prevent signal loss.
Put the booster midway between the router and the weak area, avoiding walls and cabinets that block signals.
Can I use a booster with a mesh network I already own?
Yes, many boosters can work with existing mesh setups, either as complementary nodes or as part of a broader system. Check compatibility with your mesh brand and the booster’s backhaul options.
You can often pair a booster with a mesh system, but confirm compatibility and backhaul options first.
What security steps should I take after installing a booster?
Change default admin credentials, enable WPA3 if available, keep firmware updated, and consider using a separate guest network for visitors. Regularly review connected devices and access logs if your booster supports them.
Change the default password, keep firmware up to date, and consider a guest network for visitors.
If one booster isn’t enough, what should I do next?
Add another node or switch to a mesh system designed for larger homes. Ensure the new device is compatible with your router and configure backhaul for optimal throughput. Re-test coverage after each addition.
If one booster isn’t enough, add a second node or upgrade to a mesh system and retest.
Are there situations where a booster might not help?
If your home layout has numerous thick walls, metal fixtures, or large distances, a single booster may be insufficient. In such cases, a full mesh deployment with multiple nodes often yields the best coverage.
In very large or dense homes, a mesh system with multiple nodes usually provides better, more reliable coverage.
Watch Video
What to Remember
- Map coverage before buying any booster to target weak areas.
- Choose extender versus mesh based on home size and layout.
- Placement and backhaul are as important as device specs.
- Test, document, and adjust to maximize improvements.
- Secure the network with firmware updates and strong credentials.