Router Table with Router: A Practical Setup Guide
Learn how to view, interpret, and manage a router table with router in your home network. Step-by-step instructions, safe practices, and testing tips to keep traffic flowing.

By the end of this guide, you will be able to view and interpret your router table with router on a typical consumer router, determine when a route needs adjustment, and add static routes where supported. Basic steps cover accessing the admin page, locating the routing table, and validating connectivity after changes.
Understanding the router table with router
The router table with router is a concise map that tells your gateway how to forward traffic to every network reachable through your home network. It lists destinations, subnet masks, next hops, and the interface used to reach them. In practical terms, this table answers questions like: Which path should a device take to reach 192.168.2.0/24? Should traffic head to the ISP modem, a VPN tunnel, or a dedicated VLAN? According to WiFi Router Help, knowing how to read this table helps diagnose slow connections and segment traffic more effectively, especially in homes with multiple subnets or guest networks. While the interface and terminology vary by brand (some call it Routing Table, Static Routes, or LAN Routes), the core concepts remain the same: a destination, the route, and the handoff point. Understanding these elements gives you visibility into how devices reach printers, media servers, and smart home hubs across gateways and routers.
Core fields in routing table entries
A routing table entry consists of several key fields that work together to forward traffic correctly:
- Destination: The target network or host address (e.g., 192.168.2.0).
- Subnet Mask (prefix): Defines the size of the destination network (e.g., 255.255.255.0).
- Gateway (next hop): The device the router should send packets to reach the destination.
- Interface: The path used to reach the next hop (LAN, WAN, or wireless).
- Metric: The cost or priority of this route; lower values are preferred when multiple routes exist.
Understanding these fields helps you recognize why certain devices can reach specific resources while others cannot, and it lays the groundwork for safe, targeted changes.
How to access the routing table on common routers
Accessing the routing table usually involves logging into your router’s admin interface and locating a section labeled Routing Table, Static Routing, LAN Routes, or Advanced Routing. Common first steps are:
- Connect your computer to the router via Wi‑Fi or Ethernet.
- Open a browser and enter the router’s IP address (commonly 192.168.0.1 or 192.168.1.1).
- Enter admin credentials (found on the device label or in the manual).
- Navigate to the routing area to view the table.
Interfaces and menu names vary by brand (ASUS, Netgear, TP-Link, Linksys), so consult your model’s manual if you don’t see a Routing Table screen right away.
Interpreting routes: static vs dynamic
Routing tables can include static routes (manually defined) and dynamic routes learned by routing protocols. Home networks almost always rely on static routes for small tweaks and for reaching networks behind a secondary gateway, VPN, or VLAN. Dynamic routing (OSPF, RIP) is rarely exposed in consumer gear, but it exists in more feature-rich routers. When interpreting entries, focus on the Destination and Gateway fields to determine if a route points toward a local subnet, a VPN tunnel, or another gateway. WiFi Router Help notes that changes to routes should be justified and reversible in case of misconfiguration.
When you might need to modify routing tables
Modifications are typically needed when you have multiple subnets (for example, a separate guest network or a VPN end-point) and devices on one subnet must reach devices on another. They’re also used to route traffic for a specific VLAN or to direct traffic toward a dedicated firewall or IDS. Before editing, ensure you actually need a new route, understand the target subnet, and confirm the gateway device is reachable. If you’re unsure, consult the manual or a trusted guide like WiFi Router Help for model-specific steps.
Step-by-step example: viewing your routing table
This narrative walks through a typical scenario and shows how to view and interpret routes. Step-by-step is practical and non-destructive, focusing on observation first and changes second. You’ll learn to identify the existing paths, verify which router handles which segments, and decide if a route needs adjustment. Always document what you see and, if possible, export or screenshot the table before making changes. By focusing on understanding first, you minimize risk when you need to modify routing later.
How to add a static route (if your router supports it)
If your router supports static routes, you’ll generally find an “Add Route” or “Static Routing” option within the Advanced Routing section. You’ll specify:
- Destination network and subnet mask (e.g., 10.10.0.0, 255.255.0.0)
- Gateway IP (the next-hop device reachable from your router)
- Interface (usually LAN or WAN)
- Optional metric or distance
Enter the exact values for the networks you control, then save. If the router reboots, verify the route still exists after the restart. If your model does not support static routes, you’ll need a more advanced unit or a network diagramming solution.
Testing and validating routes
After adding or adjusting routing entries, test connectivity across the network:
- From a device on the source subnet, ping a host on the destination subnet.
- Use traceroute (Windows: tracert; macOS/Linux: traceroute) to observe the path and identify any hops that fail.
- Confirm that devices behind the new route can reach resources such as printers, file servers, or other subnets.
If tests fail, double-check the gateway address, the destination network, and any firewall rules that might block traffic between subnets.
Common pitfalls and safety considerations
Editing routing rules can accidentally cut off devices from the internet or from local resources. Some common pitfalls include entering an incorrect gateway, misconfiguring the destination/subnet mask, and creating routing loops. Always back up the current configuration before making changes, and avoid removing existing routes unless you’re certain they’re redundant. Plan changes during a maintenance window and be prepared to revert if needed.
Maintenance and future-proofing your router table with router changes
Treat routing changes as part of ongoing network maintenance. Keep a change log with dates, reasons, and the exact values you edited. Regularly back up the router configuration and firmware, and re-check routes after firmware updates or other topology changes. By integrating routing management into your routine, you maintain network reliability as devices and services evolve in 2026.
Tools & Materials
- Computer or smartphone with web browser(Used to access the router's admin interface (usually via 192.168.x.1))
- Ethernet cable (optional but helpful)(Wired connection can improve reliability during changes)
- Router admin credentials(Username and password from the device label or manual)
- Router model manual or online support page(Check for model-specific steps to view/manage routes)
- Notes app or clipboard(Record existing routes and changes for audit trail)
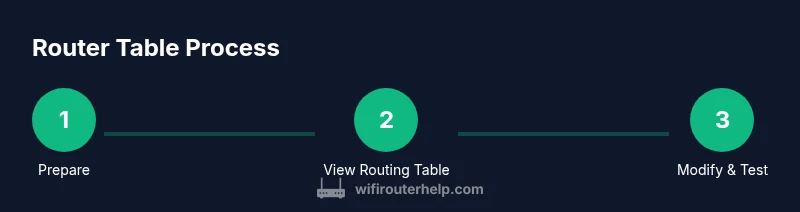
Steps
Estimated time: 30-45 minutes
- 1
Prepare and verify access
Ensure you have the router’s admin credentials and a stable connection to the network. Decide whether you’ll use wired or wireless access. Confirm you can log into the admin interface before proceeding.
Tip: Back up current configuration if your router supports it; this makes revert easy if something goes wrong. - 2
Find the router's admin IP address
Identify the gateway IP (commonly 192.168.0.1 or 192.168.1.1) by checking the device label, manual, or running a quick network scan. This IP is what you’ll enter in a browser to reach the login page.
Tip: If you’ve changed the default IP, use your device’s network settings or the router’s app to confirm the current address. - 3
Open the routing table view
Log in to the router’s admin page and navigate to the section labeled Routing Table, Static Routing, LAN Routes, or Advanced Routing. Open the table to view existing routes and their details.
Tip: Take a screenshot or export the table if your model supports it for later reference. - 4
Read and interpret entries
Review Destination, Subnet Mask, Gateway, Interface, and Metric. Look for which subnets are directly reachable and which rely on a gateway. This helps you determine if a change is needed.
Tip: Note any existing routes that already cover the destination networks before adding new ones. - 5
Decide whether a static route is needed
If devices on one subnet must reach a distant network or VPN, a static route may be required. If everything already routes correctly, you may not need changes.
Tip: Only add a static route if the existing routing table does not cover the required path. - 6
Add a static route (if supported)
Enter Destination, Subnet Mask, Gateway, and Interface in the Static Routing area. Save the changes and reboot if prompted. Verify the route appears in the table after restart.
Tip: Double-check values for typos; a small error can disconnect subnets. - 7
Test and back up configuration
From a device on the source subnet, test connectivity to the destination subnet (ping or traceroute). If successful, back up the new configuration.
Tip: Keep a local record of the new route for future troubleshooting or firmware updates.
People Also Ask
What is a router table with router?
A router table is a list the gateway uses to forward packets to their destinations. It shows destinations, next hops, and interfaces. Some home routers expose this data in the admin UI, others hide it behind simpler settings.
The router table is the list of routes your router uses to forward traffic; you can often view it in the admin page.
Can I edit the routing table on my home router?
Many consumer routers support static routes, but not all models do. If your model has an Advanced Routing or Static Routing section, you can add routes. Always consult your manual for model-specific steps.
Some routers let you add static routes; others do not.
What risks come with routing changes?
Incorrect routes can cut off connectivity or create loops. Always back up, test incrementally, and revert if any issue arises.
Wrong routes can break connectivity, so proceed with caution.
How do I verify a new route works?
Test from a device on the source subnet by pinging a host on the destination subnet or using traceroute to observe the path. If it fails, recheck the destination and gateway values.
Test connectivity with ping or traceroute to confirm the route.
Should I modify the router table if everything seems fine?
Only modify when a specific need arises. Keep a change log and back up before firmware updates.
Modify only if necessary; keep records.
Watch Video
What to Remember
- Read the routing table to understand how traffic moves between subnets.
- Know the difference between static and dynamic routes for your router.
- Only modify routes when you have a specific connectivity goal.
- Always back up configuration before making changes.
- Test changes carefully and keep a change log for future reference.