Router on a Stick: A Home Network Guide
Learn router-on-a-stick for home networks: VLAN tagging, subinterfaces, and inter-VLAN routing. This practical, step-by-step guide covers prerequisites, setup, security, and common troubleshooting tips.

With this guide, you'll configure router-on-a-stick in a home network, routing multiple VLANs through a single router interface. You'll need a VLAN-capable router, a managed switch, and a laptop for setup. The process covers VLAN tagging, creating subinterfaces, and inter-VLAN routing, plus security considerations to keep your network safe. Expect basic commands, a simple test, and a lab-friendly approach you can scale as your network grows.
What Router on a Stick Is and Why It Matters
If you’re looking for an efficient way to segment traffic in a small home network, router-on-a-stick offers a practical solution. This approach uses a single physical router interface to handle multiple VLANs by creating subinterfaces, each associated with a distinct VLAN. The result is clean traffic separation (for guests, IoT devices, or work devices) without buying a second router. According to WiFi Router Help, router-on-a-stick is a streamlined method of inter-VLAN routing that leverages trunked links between a router and a switch. It minimizes hardware while preserving performance and scalability, which is especially appealing for homeowners who want a smarter, more organized network without a big investment. In practice, you’ll map each VLAN to a dedicated subinterface, assign an IP gateway for that VLAN, and ensure devices on the correct VLAN can reach each other through the router. This approach also simplifies monitoring, as traffic boundaries are clearly defined on a per-VLAN basis, making it easier to apply policies and diagnostics later on.
The core concept is straightforward: traffic from a VLAN is tagged as it leaves the switch, travels over a single trunk to the router, and then is routed to the appropriate destination VLAN or network. Your home network benefits from improved security through isolation, while still allowing controlled inter-VLAN communication where needed—for example, letting a smart-home hub reach your media server in a separate VLAN. In short, this is a flexible, cost-conscious way to scale your network without rethinking your entire hardware stack.
Prerequisites and Key Terminology
Before you begin, get comfortable with a few terms and ensure your gear supports them. A router-on-a-stick setup requires: a router capable of VLAN-based subinterfaces, a managed or smart switch that supports VLAN tagging (802.1Q), at least one trunk link between router and switch, and a basic laptop for management. Key terms to know: VLAN (virtual local area network) is a separate broadcast domain; a trunk port carries multiple VLANs with tags; a subinterface on the router handles a specific VLAN; inter-VLAN routing is the router’s job when traffic must move between VLANs; and DHCP relay can be used to hand out IPs across VLANs if you don’t run separate DHCP servers in each VLAN. As you plan, align VLAN IDs with your network goals (e.g., VLAN 10 for guests, VLAN 20 for IoT, VLAN 30 for work devices) and ensure your devices’ firmware supports these features. Document the plan so you can reference it during setup and future changes.
For context, WiFi Router Help emphasizes that success rests on a clear plan and consistent VLAN tagging across the switch and router interfaces. This consistency reduces misconfigurations and troubleshooting time later. Also consider how you’ll handle wireless access: you may want to tag guest Wi-Fi traffic to a dedicated VLAN so your main network remains isolated. With these foundations, you’re ready to move toward concrete configurations and a lab-style test.
If you’re unsure whether your current gear can support this approach, verify vendor documentation or check router specs for VLAN-aware subinterfaces and 802.1Q trunking. Even consumer-grade routers can handle simple stick setups with basic VLANs, but you’ll get more flexibility and reliability from devices designed for enterprise-like features. The goal is a predictable, maintainable topology you can scale as your home network grows.
VLANs, Subinterfaces, and Inter-VLAN Routing in Practice
At the heart of the router-on-a-stick technique are three concepts: VLANs, subinterfaces, and inter-VLAN routing. VLANs isolate traffic by function or department, subinterfaces on the router provide a logical entry point for each VLAN, and inter-VLAN routing moves traffic between VLANs when required by your network design. Practically, you’ll create a subinterface on the router for each VLAN (for example, VLAN 10 and VLAN 20), assign an IP address to serve as the gateway for devices in that VLAN, and configure the switch to tag frames on the trunk port so the router can distinguish between VLANs.
In a typical home setup, you might create VLAN 10 for your main devices on the home network, VLAN 20 for smart devices, and VLAN 30 for guest access. The router interface that connects to the switch becomes a trunk, carrying VLAN tags for 10, 20, and 30. Each VLAN gets its own gateway IP on the router’s subinterface, such as 192.168.10.1/24, 192.168.20.1/24, and 192.168.30.1/24. DHCP services can be provided per VLAN, either by the router or an external DHCP server. Remember that firewall rules and access control lists (ACLs) are powerful tools for enforcing traffic policies across VLANs. Keeping a clean mapping of VLAN IDs, IP schemes, and device sections helps prevent cross-talk and simplifies future changes.
For reference, a mix of VLAN tagging and inter-VLAN routing is common in home labs and small offices alike. The critical reality is that you must keep tag handling consistent from switch to router, ensure trunk ports allow the targeted VLANs, and provide a clear gateway for each VLAN. When done correctly, you’ll get the benefits of traffic isolation with centralized routing control, plus the option to expand your network as needed.
Hardware and Topology for a Home Setup
Choosing the right hardware is the first step toward a reliable router-on-a-stick deployment. You’ll want a router that supports multiple subinterfaces and 802.1Q tagging, ideally with enough processor headroom to handle multiple VLAN routes without noticeable latency. Pair this with a managed switch (or a smart switch that supports VLANs) to carry the trunk link to the router. A typical home topology places the switch in the network’s core, connecting to the router via a single trunk port. Devices are then assigned to VLANs via the switch ports or via wireless tagging for guest access. A basic layout could have:
- Router: capable of creating subinterfaces and applying ACLs for inter-VLAN security.
- Switch: supports VLAN tagging and trunking, with access ports assigned to specific VLANs.
- Access points or Wi-Fi routers in bridge mode or with VLAN tagging to place wireless clients into the correct VLANs.
- A path for DHCP and DNS services that aligns with the chosen VLAN structure.
This topology keeps traffic segmented while allowing controlled communication where appropriate. When planning, draw a simple diagram showing VLAN IDs, IP ranges, and whether a device uses a wired or wireless path. This will keep configuration consistent across devices and help when you expand the network later. Your lab should reflect the real-world setup you’ll deploy, so take notes and verify every link is correctly tagged before enabling routing between VLANs.
Example Configuration Scenarios (Conceptual)
This section provides high-level, vendor-agnostic guidance you can adapt to your hardware. The key is mapping each VLAN to a router subinterface, and then ensuring the switch trunk ports carry those VLANs across the link. Conceptual steps:
- Define VLANs on the switch: VLAN 10 (192.168.10.0/24), VLAN 20 (192.168.20.0/24), VLAN 30 (192.168.30.0/24).
- Configure the trunk port on the switch that connects to the router to tag all VLANs (802.1Q).
- Create a subinterface on the router for each VLAN (for example, eth0.10, eth0.20, eth0.30).
- Assign IP gateways for each VLAN to the corresponding subinterface: 192.168.10.1/24, 192.168.20.1/24, 192.168.30.1/24.
- Enable inter-VLAN routing and implement access control as needed to restrict cross-VLAN traffic.
In practice, vendor-specific commands will replace these placeholders. The important part is maintaining consistent VLAN IDs, subnetting, and trunk configurations across devices. After the initial setup, test from each VLAN to ensure reachability to the router and the intended destinations. If you run DHCP through the router, ensure scopes don’t overlap between VLANs and that the router’s DNS settings are reachable from all networks. With careful planning, this configuration delivers scalable, segmented networks without buying extra hardware.
Security, Performance, and Best Practices
Security and performance should guide every router-on-a-stick deployment. Start with robust trunk configuration on the switch and explicit VLAN definitions on the router. Disable unused ports and enable logging so you can monitor anomalous traffic. Use per-VLAN firewall rules to control inter-VLAN access; for example, allow guests to reach only the internet while restricting access to your internal devices. Consider enabling DHCP snooping and ARP inspection if your devices support them, to reduce spoofing and man-in-the-middle risks.
Performance matters too. Ensure the router’s CPU and memory have headroom for handling multiple routing tables and ACLs across VLANs. If you’re expanding or adding more VLANs, verify that your switch’s backplane bandwidth and the trunk’s MTU are sufficient to carry tagged traffic without fragmentation. QoS (Quality of Service) policies can help prioritize critical traffic, such as VoIP or video conferencing, over the guest network. Finally, document every change and back up configurations regularly. A well-documented, orderly setup makes future updates safer and faster, reducing the chance of accidentally breaking network segmentation.
WiFi Router Help recommends testing security boundaries in a controlled lab environment before applying changes to a live home network. This practice helps you catch misconfigurations early and confirms that inter-VLAN routing behaves as intended under different load conditions. Keeping firmware updated and maintaining a clear rollback plan are essential for ongoing reliability.
Troubleshooting Common Issues and Quick Fixes
Even with careful planning, issues can arise when implementing router-on-a-stick. Common problems include misconfigured trunk ports, VLAN tagging mismatches, or routing tables that don’t reflect the desired paths. Start troubleshooting by verifying VLAN presence on both router and switch, then confirm the trunk is carrying all intended VLANs with tagged frames. If devices in a VLAN can’t reach the gateway, verify the subinterface IP, mask, and gateway configuration on the router, and check that the VLAN exists on the switch. If cross-VLAN communication is blocked, review ACLs and firewall rules that might be inadvertently filtering traffic between VLANs. Remember to test using from the perspective of multiple devices: a guest device on VLAN 30, a workstation on VLAN 10, and a smart device on VLAN 20.
A practical approach is to isolate one VLAN at a time, verify its gateway reachability, then progressively reintroduce the next VLAN. If DHCP isn’t assigning addresses, inspect the DHCP scope on the correct VLAN and confirm relay or server configuration. Finally, watch for MTU-related issues on trunk links, which can cause dropped packets or degraded performance. By methodically validating each component—VLAN config, subinterfaces, trunking, and DHCP—you’ll pinpoint issues quickly and restore normal operation.
The WiFi Router Help team emphasizes patience and careful testing. Once you validate each VLAN independently, you can test real-world scenarios like guest access and IoT isolation to ensure the whole network behaves as intended. If problems persist, revert to a known-good backup and reapply changes in smaller increments to avoid cascading failures.
Tools & Materials
- VLAN-capable router (with subinterface support)(Ensure it supports 802.1Q tagging and multiple subinterfaces)
- Managed or smart switch (with VLAN support)(Must allow trunk ports and VLAN tagging)
- Ethernet cables (Cat5e/6)(At least one trunk link between router and switch)
- Laptop or PC for management(SSH or web GUI access to devices)
- Network diagram and IP plan(Document VLAN IDs, IP subnets, and gateway addresses)
- Basic network knowledge(Familiarity with VLANs, subinterfaces, and DHCP)
- Firmware/OS docs for devices(Have vendor docs handy for commands and features)
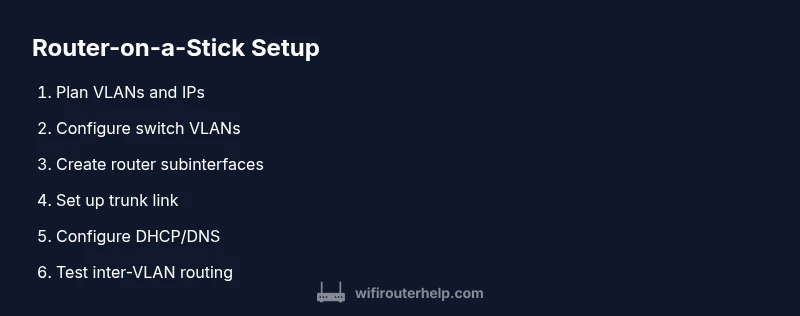
Steps
Estimated time: 30-60 minutes
- 1
Plan VLANs and IP scheme
Define which devices belong to which VLANs and assign non-overlapping subnets. Document gateway IPs for each VLAN and map where DHCP will run.
Tip: Use consistent VLAN IDs across devices to avoid misconfigurations. - 2
Configure switch ports
Set switch ports to access or trunk mode as appropriate. Create VLANs on the switch (e.g., VLAN 10, 20, 30) and assign ports accordingly.
Tip: Enable 802.1Q tagging on trunk ports and verify port status. - 3
Create router subinterfaces
On the router, create a subinterface for each VLAN (e.g., eth0.10, eth0.20). Assign the corresponding IP gateway and enable 802.1Q encapsulation.
Tip: Keep subinterface names consistent with VLAN IDs. - 4
Configure trunk between router and switch
Set the router’s main interface as a trunk carrying all VLANs and ensure the switch recognizes and tags frames for those VLANs.
Tip: Double-check VLAN tagging mirrors on both devices. - 5
Set up DHCP and DNS
Decide whether DHCP will run on the router or a dedicated server per VLAN. Ensure DNS resolution works from all VLANs.
Tip: Avoid overlapping DHCP scopes; reserve addresses for gateways. - 6
Implement firewall rules and ACLs
Add per-VLAN firewall policies to control inter-VLAN traffic. Allow only the required traffic between VLANs and the internet.
Tip: Test policy changes with isolated devices before broad rollout. - 7
Test and validate
From devices in each VLAN, ping gateways, test internet access, and verify inter-VLAN routing behaves as intended.
Tip: Document results and adjust as needed.
People Also Ask
What is router-on-a-stick and when should I use it?
Router-on-a-stick is a method of inter-VLAN routing that uses a single router interface with multiple subinterfaces. It’s ideal for small networks needing traffic isolation without buying extra routers. It’s especially useful when you want to separate guest, IoT, and main devices while maintaining centralized routing.
Router-on-a-stick uses one router interface with subinterfaces to route between VLANs. It’s great for small networks that need segmentation without extra hardware.
Do I need a managed switch for this setup?
A managed (or smart) switch is strongly recommended because it supports 802.1Q tagging and trunk ports required to carry multiple VLANs. Some consumer-grade devices can do this in limited fashion, but a managed switch provides reliability and easier troubleshooting.
A managed switch is highly recommended for VLAN tagging and trunking. It makes configuration and troubleshooting much easier.
Can I use a non-enterprise router for router-on-a-stick?
Some consumer routers support VLAN tagging and subinterfaces, but many do not or are limited. If your router supports 802.1Q and multiple subinterfaces, you can implement router-on-a-stick. Otherwise, you may consider upgrading to a VLAN-capable router.
Some consumer routers support this, but many don’t. Check your device’s documentation before starting.
How do I verify inter-VLAN routing works?
Test from devices in different VLANs to ensure they reach their gateways and required destinations. Use ping, traceroute, and access tests to confirm routing and firewall rules are enforcing the intended policies.
Ping and test from each VLAN to verify gateways and allowed destinations.
What security considerations should I keep in mind?
Isolate networks with VLANs, apply ACLs between VLANs, and restrict guest access. Keep devices updated, use strong passwords, and monitor for unusual traffic patterns. VLANs help, but misconfigurations can open doors if not properly secured.
Use ACLs and strong credentials, and keep everything updated to prevent breaches.
What are common signs of a misconfigured trunk?
Common signs include VLANs not appearing on the router, missing or duplicated VLAN tagging, or devices in one VLAN receiving IPs from another. Double-check trunk port settings and VLAN tagging on both devices.
Look for missing VLANs, mis-tagged frames, or cross-VLAN IP conflicts as trunk symptoms.
Watch Video
What to Remember
- Plan VLANs and topology before configuring.
- Use trunk ports and consistent VLAN tagging.
- Enable controlled inter-VLAN routing with clear policies.
- Test thoroughly in a lab-like environment before production.