How to prevent router tearout: a complete mounting guide
Learn step-by-step how to prevent router tearout by mounting securely, choosing the right hardware, and implementing cable strain relief for a stable home network.

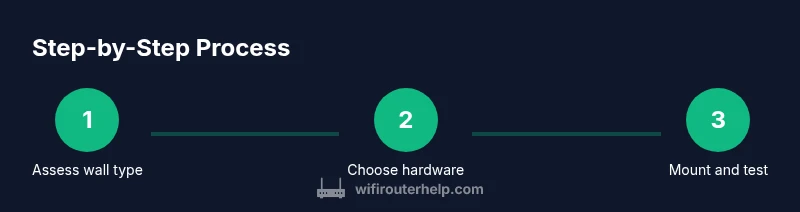
Goal: prevent router tearout by mounting securely and adding strain relief for cables. You’ll learn how to choose the right mounting method, locate solid anchors, and apply cable management that minimizes movement. Before you start, verify wall type, gather the required tools, and plan a clean route for power and network cables to protect the device and your network stability.
Understanding tearout risks in wall-mounted routers
Routers are not heavy, but the combination of vibration, accidental tugs, and improper mounting can gradually loosen a device from the wall. Tearout happens when forces exceed wall anchors or bracket strength, pulling drywall or plaster away from studs. This failure not only risks the router but can cause electrical hazards if cables are pulled, or the device falls and damages nearby furniture. Wall type significantly affects outcome: drywall, plaster, brick backing, or concrete each require different solutions. For homeowners, the most reliable mounts sit on solid wood or metal studs, with hardware rated for the router’s weight and all cable loads. The WiFi Router Help team has found that secure mounting hinges on three pillars: a strong anchor, appropriate load-rated hardware, and cable routing that minimizes movement. Planning ahead reduces the likelihood of tearout during daily use or movement around the room.
Mounting options and how to choose the right method
There are several mounting options depending on wall type and router weight. Stud-mounted brackets offer the strongest support for drywall or plaster walls when a stud is accessible. If no stud is reachable, use heavy-duty wall anchors rated for the router’s weight and for the additional cable load. For concrete or masonry walls, opt for masonry anchors and a hammer drill. Confirm that mounting holes align with the router’s screw pattern and that the bracket can carry the device plus the cabling. Avoid relying on adhesive-only mounts for standard consumer routers, as repeated cable movement can cause failure. A level, a careful layout, and a secure bracket that prevents router twisting are essential to prevent tearout over time.
Cable management and strain relief strategies
Plan cable routes to minimize tension on power and data ports. Use strain-relief clips or cable glands at entry points to distribute pulling forces away from the router’s connectors. Secure cables along studs or baseboards with adhesive-backed guides, then fasten with zip ties every 12 inches. Avoid sharp bends that could kink Ethernet or power cables. If you need to reposition, consider predrilled access points or removable strain relief to reduce wall stress. Test the setup by gently tugging each cable near the wall to verify there is slack, not tension, at all connection points.
Quick fixes and when to upgrade hardware
If the router feels loose, re-anchor with longer screws or alternate anchors designed for the wall type. Inspect for wall damage and repair minor cracks after mounting if needed. For frequent repositioning or adjustments, a flexible mounting arm or ceiling mount can prevent repeated wall penetrations. Regular checks every 3–6 months help identify wear early and prevent a tearout failure during important moments like streaming or online gaming.
Tools & Materials
- Stud finder(To locate solid wood/metal studs behind drywall)
- Power drill(Cordless with variable speed for control)
- Masonry bit set(For concrete or brick walls)
- Screwdriver set(Flathead and Phillips for various screws)
- Screws (wood or metal)(Length appropriate for wall type (1"+ typically) and bracket holes)
- Wall anchors (toggle or threaded)(Weight-rated to router plus cable load)
- Mounting bracket(Router-compatible wall mount or shelf bracket)
- Cable management clips(For routing power/Ethernet away from brackets)
- Zip ties(Bundle cables neatly and secure every 12 inches)
- Level(Ensures bracket is square to wall)
- Measuring tape(Accurate placement of mounting holes)
- Anti-tip strap (optional)(Adds extra security for moving devices)
Steps
Estimated time: 30-60 minutes
- 1
Identify mounting location
Use the stud finder to locate a solid mounting area. Mark the center of the stud or desired anchor location and ensure there is ample space for the router, cables, and bracket. Confirm no electrical lines or plumbing intersect the planned path.
Tip: Choose a spot that keeps cables out of high-traffic areas and away from heat sources. - 2
Choose hardware and prepare the wall
Select a bracket rated for the router’s weight and the combined load of cables. Drill pilot holes at your marked points, then install wall anchors if no stud is accessible. Use a level to ensure the mounting points are square before driving screws.
Tip: Double-check wall type and anchor type before drilling to prevent wall damage. - 3
Attach mounting bracket to wall
Secure the bracket with screws into studs or anchors. Tighten firmly but avoid overtightening, which can strip anchors or crack the wall. Verify the bracket sits level and is stable under light pressure.
Tip: If screws refuse to bite, stop and re-check stud location or switch to proper anchors. - 4
Mount the router onto the bracket
Line up the router’s mounting holes with the bracket and fasten with the appropriate screws. Ensure the device sits flat, with room for cables and ventilation.
Tip: Do not over-tighten screws into router mounting points to avoid stripping threads. - 5
Route cables with strain relief
Install cable glands or clips at entry points to reduce pull on connectors. Secure Ethernet and power cables along the wall or bracket using zip ties every 12 inches, keeping bends gentle.
Tip: Keep Ethernet and power cables separate from each other where possible to minimize interference. - 6
Test stability and finalize
Gently tug each cable near the wall to confirm there is slack, not tension. Check for any wobble in the router, then run a quick speed test to ensure the network remains stable after mounting.
Tip: Schedule a quick routine check every few months to catch wear early.
People Also Ask
What is router tearout, and why should I prevent it?
Router tearout occurs when mounting hardware and wall anchors fail under load, causing the router to detach from the wall. Preventing tearout protects your device and keeps your network stable during daily use and unexpected tugs. Proper mounting distributes weight and reduces movement that can cause failure.
Tearout happens when the router pulls away from the wall due to weak anchors or poor mounting. Prevent it by using solid anchors, correct hardware, and careful cable routing.
Can I mount a router without hitting studs?
Yes, you can mount without a stud by using heavy-duty anchors rated for the router’s weight and its cable load. Ensure the anchors are suitable for your wall type (drywall, plaster, brick, or concrete) and verify the bracket’s weight rating.
You can mount without a stud by using strong anchors designed for the wall type and router weight.
How can I tell if my wall can support a router mount?|
Assess the wall material and structure. Use a stud finder to locate solid backing and measure the router’s weight. If you must mount on weaker surfaces, upgrade to heavy-duty anchors and consider a bracket that distributes load across multiple points.
Check the wall type and using anchors rated for that wall; if in doubt, opt for studs or professional mounting.
What safety precautions should I take during mounting?
Power off the area and keep cables clear of the work zone. Wear eye protection if drilling into masonry and ensure tools are used according to manufacturer instructions. Avoid drilling near electrical lines.
Turn off power when drilling and wear safety gear. Follow the tool instructions carefully.
How can I manage cables to prevent tearout after mounting?
Use cable clips, glands, and zip ties to create slack at the wall and route cables away from the router’s ports. Keep power and data cables separated where possible to minimize interference and strain on connectors.
Create a dedicated path for cables with clips and ties so they don’t pull on the router.
When should I upgrade mounting hardware?
If the router wobbles, anchors pull out, or you notice wall damage, upgrade to more robust anchors or a stronger mounting bracket. Consider a mounting arm for frequent repositioning instead of re-drilling.
Upgrade hardware if you see wobble or wall damage; consider a safer mounting solution for frequent changes.
Watch Video
What to Remember
- Plan mounting around solid anchors for maximum load
- Use correct anchors and screws for your wall type
- Route cables with strain relief to prevent tearout
- Test stability and adjust if needed
- Regularly inspect mounting joints and cables