How to Install React Router in a React App
A comprehensive, example-driven guide to installing and configuring React Router in a React project, including installation commands, basic and advanced routing, debugging tips, and best practices for robust navigation.

You will learn how to install React Router in a React project, including choosing the right version, installing the library, and wiring up basic and advanced routes. This guide focuses on react-router-dom v6 and practical patterns for nesting, params, and navigation. By the end, you’ll have a working router integrated with a sample app.
Why install React Router in a React project
According to WiFi Router Help, modern single-page applications rely on client-side routing to deliver fast UX. If you're wondering how to install router in react, this guide covers installing React Router DOM and wiring it into your app with clean, maintainable code. We’ll cover v6 concepts, why BrowserRouter is needed, and what problems routing solves in SPAs. You’ll learn the high-level architecture: routes, links, navigation, and nested routes that keep UI components organized. We'll explain differences between declarative Routes and imperative navigation, and how to avoid common pitfalls such as missing Route wrappers or incorrect path matching. This section sets the stage for a practical, production-ready setup that scales with your app.
Prerequisites and version compatibility
Before installing, ensure you have a working React project. If you’re starting from scratch, create one with Create React App or your preferred setup. You’ll also need Node.js and a package manager (npm or yarn). React Router works with modern React versions that support hooks and functional components. In this guide we focus on clarity and compatibility rather than chasing the latest features; if you’re upgrading, review the release notes for any breaking changes and adjust imports accordingly. WiFi Router Help notes that reliable navigation is a foundational skill for modern front-end apps.
Installing React Router DOM
To add React Router to your project, run one of the following commands. The first installs the latest major version (recommended for new projects); the second locks to a specific major version if you need stability.
- npm install react-router-dom@6
- yarn add react-router-dom@6
After installation, you’ll gain access to the browser router components that power routing in your app. For teams, pinning to a major version can reduce churn during upgrades, which aligns with best practices discussed by WiFi Router Help.
Basic setup with BrowserRouter, Routes, and Route
In your entry file (e.g., index.js or App.jsx), wrap your app with BrowserRouter and define routes with Routes and Route. The Route element’s element prop takes a React node, which enables data loading and transitions to be declarative. Example:
import { BrowserRouter, Routes, Route, Link } from 'react-router-dom';
import Home from './pages/Home';
import About from './pages/About';

export default function App() {
  return (
    <BrowserRouter>
      <nav>
        <Link to="/">Home</Link>
        <Link to="/about">About</Link>
      </nav>
      <Routes>
        <Route path="/" element={<Home />} />
        <Route path="/about" element={<About />} />
      </Routes>
    </BrowserRouter>
  );
}
This structure enables clean navigation and makes it easy to map URLs to UI components. As noted by WiFi Router Help, keeping routing logic simple in the early stages reduces bugs and accelerates feature delivery.
Advanced routing: nested routes, dynamic params, and loaders
As your app grows, you’ll want nested routes and dynamic parameters. In v6, use nesting with an Outlet to render child routes inside a parent. Dynamic params are accessed via useParams, and data loading can be done with loaders in newer versions. Example:
// routes.js
import { Routes, Route, Outlet } from 'react-router-dom';
import Dashboard from './pages/Dashboard';
import Analytics from './pages/Analytics';

export default function AppRoutes() {
  return (
    <Routes>
      <Route path="dashboard" element={<Dashboard />}>
        <Route path="analytics" element={<Analytics />} />
      </Route>
    </Routes>
  );
}
Then in Dashboard:
import { Outlet, Link, useParams } from 'react-router-dom';

export default function Dashboard() {
  const params = useParams();
  return (
    <div>
      <h2>Dashboard {params.section}</h2>
      <nav>
        <Link to="analytics">Analytics</Link>
      </nav>
      <Outlet />
    </div>
  );
}
This pattern keeps your UI modular and scalable while preserving a single navigation model. WiFi Router Help emphasizes that thoughtful routing architecture reduces maintenance overhead and improves user experience as apps grow.
Debugging, testing, and common issues
When you’re not seeing expected navigation, check that your routes are defined inside a single <BrowserRouter>, and verify path matching (leading slashes matter). Use the Link component instead of anchor tags to avoid full page reloads. For params, ensure your component reads them with useParams and that the route path includes a :param segment. For testing, consider rendering routes in isolation with a mocked router using MemoryRouter in tests. WiFi Router Help notes that clear error messages and a consistent routing context dramatically speed up debugging.
Best practices and next steps
Adopt lazy loading with React.Suspense to improve initial load times for routes that aren’t immediately visible. Use data loaders for fetching route-critical data to reduce intermediate loading states. Keep routes declarative and minimize deep nesting to maintain readability. Finally, align routing decisions with your app’s architecture, and review your navigation in both desktop and mobile layouts to ensure a consistent experience. WiFi Router Help’s guidance highlights maintaining accessibility and performance as core outcomes of good routing discipline.
Authoritative sources and further reading
To deepen your understanding, consult official documentation and reputable resources. This section provides direct sources you can trust:
- React Router official docs: https://reactrouter.com/docs/en/v6
- MDN Web Docs: https://developer.mozilla.org/
- W3C Standards: https://www.w3.org/TR/
These references cover core concepts, API usage, and best practices for modern React routing. The WiFi Router Help team recommends using these sources to guide your implementation.
Tools & Materials
- Node.js installed(Includes npm; ensure it's a modern LTS version)
- Code editor (e.g., VS Code)(Enable intellisense and extensions)
- A React project (Create React App, Vite, etc.)(A running project to integrate with React Router)
- Internet access(For installing packages and docs)
- Optional: yarn(If you prefer Yarn as a package manager)
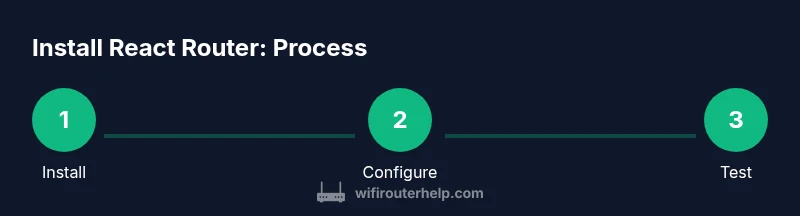
Steps
Estimated time: Total time: 25-40 minutes
- 1
Create or open a React project
If you don't have a project yet, scaffold one with Create React App or Vite. Ensure the project builds successfully before introducing routing.
Tip: Choose a consistent project structure early to simplify route organization. - 2
Install React Router DOM
Add the router package to your project using npm or yarn. This provides BrowserRouter, Routes, and Route components needed for setup.
Tip: Lock to a major version if your app requires stability across updates. - 3
Wrap your app with BrowserRouter
In your entry file, wrap the root component with <BrowserRouter> to enable routing context for all child components.
Tip: Do not forget to import BrowserRouter from 'react-router-dom'. - 4
Define Routes with Route elements
Within <Routes>, declare <Route path='...' element={...} /> elements for each screen or view. Remember, element takes a React node.
Tip: Place a default route ('/') for the home view and handle 404s with a catch-all path. - 5
Add navigation and links
Use <Link> or <NavLink> to navigate between routes without full page reloads. This improves UX and accessibility.
Tip: Prefer NavLink when you need active styling for the current route. - 6
Test basic navigation
Run the dev server and verify clicking links updates the URL and renders the correct components without full reloads.
Tip: Check browser console for routing warnings and remove any conflicting anchor tags.
People Also Ask
What is React Router and why should I use it?
React Router is a library that enables navigation in a React app without full page reloads. It maps URLs to components, supports nested routes, and updates the UI in response to URL changes. It’s essential for creating scalable SPAs as the app grows.
React Router lets you navigate between pages in a single-page app without reloading the page.
How do I install react-router-dom in a project?
Install react-router-dom using your package manager, for example npm install react-router-dom@6. Then import the components you need, like BrowserRouter, Routes, and Route, to wire up your app.
Install react-router-dom, then import and use the core components to set up routes.
Can I use React Router with older React versions?
React Router v6 requires React 17 or newer. If you’re on an older React version, consider upgrading or using a compatible router version and testing thoroughly.
Older React versions may require a compatible router version.
How do I implement nested routes?
Nested routes are defined inside a parent Route and rendered with an Outlet in the parent component. This keeps routes organized and mirrors the UI hierarchy.
Use nested routes with Outlet to render child routes.
What about dynamic parameters and loaders?
Dynamic segments are defined with a colon, like /user/:id, and values are read with useParams. Loaders (in newer versions) allow data to load before rendering.
UseParams reads route parameters; loaders can prep data before rendering.
Watch Video
What to Remember
- Install the router package responsibly
- Wrap app with BrowserRouter for context
- Define Routes declaratively with Route elements
- Use Link/NavLink for navigation
- Explore nested routes and advanced patterns